Air-Dry Clay Projects That Look Like Ceramic (Really)
Air-dry clay can pass for kiln-fired ceramic, but only if you treat the finishing as seriously as the shaping. There is no kiln, wheel, or studio fee involved. The ceramic look comes almost entirely from surface preparation, paint choice, and topcoat. This guide covers three target finishes: a matte porcelain look, a high-gloss glazed look, and a speckled stoneware effect, along with the tools, realistic costs, and the drying fixes that separate a clean piece from a cracked one.
What Gives Air-Dry Clay a Ceramic Look
Real ceramic vitrifies in a kiln at roughly 1,000 to 1,280 C, which fuses the clay body and bonds the ceramic glaze into a glassy shell. Air-dry clay never reaches those temperatures, so you rebuild that appearance with four surface techniques:
- Sanding and burnishing: Working up through the grits removes paper fibers and mold seams so light reflects off an even surface instead of scattering off fuzz.
- Priming: A thin coat of gesso fills the tiny pores in the dried clay and stops paint from soaking in unevenly.
- Paint system: Matte acrylics read as porcelain; layered acrylics read as stoneware; a slick color coat under gloss reads as glaze.
- Topcoat: Water-based polyurethane, acrylic gloss varnish, or resin supplies the sheen that a fired glaze would give.
One hard limit: air-dry clay pieces are decorative. They are not food-safe, oven-safe, microwave-safe, or dishwasher-safe, and sealing does not change that. Water-resistant is not waterproof, so for anything that holds flowers, build the clay as a sleeve around a removable glass insert rather than relying on the seal.
Tools, Supplies, and What It Costs
Start with white clay: it sands and paints cleaner than terracotta-toned bodies and gives the most convincing porcelain. Beyond the clay you need a craft knife or clay blade, a small rolling pin with 3 mm thickness guides (two stacked coffee stir sticks work), a sandpaper range of 220, 400, and 800 grit, gesso primer, matte and satin acrylics, a foam brush kept only for varnish, and a metal spoon or polished stone for burnishing. Optional upgrades are 1000 to 2000 grit paper for a mirror gloss and two-part epoxy resin for showpiece coats.
| Item | Typical cost (USD) | Notes |
|---|---|---|
| Air-dry clay, 1 to 2 lb | $7 to $15 | White sands and paints cleanest |
| Gesso primer | $6 to $12 | One bottle covers many pieces |
| Acrylic paint, per color | $1 to $5 | Matte white plus a neutral or two |
| Sandpaper pack (220/400/800) | $5 to $10 | Add 1000+ for gloss finishes |
| Gloss acrylic varnish | $7 to $14 | The budget route to a glazed look |
| Two-part or UV resin | $12 to $25 | Optional; highest-gloss finish |
| Glass bud-vase insert | $3 to $8 | Makes a clay sleeve water-ready |
A first project of a trinket dish and one small vase sleeve runs well under $40 in materials, and most of that stock carries over to the next dozen pieces. Reach for gloss varnish before resin: it is cheaper, cleans up with water, and forgives beginner mistakes.
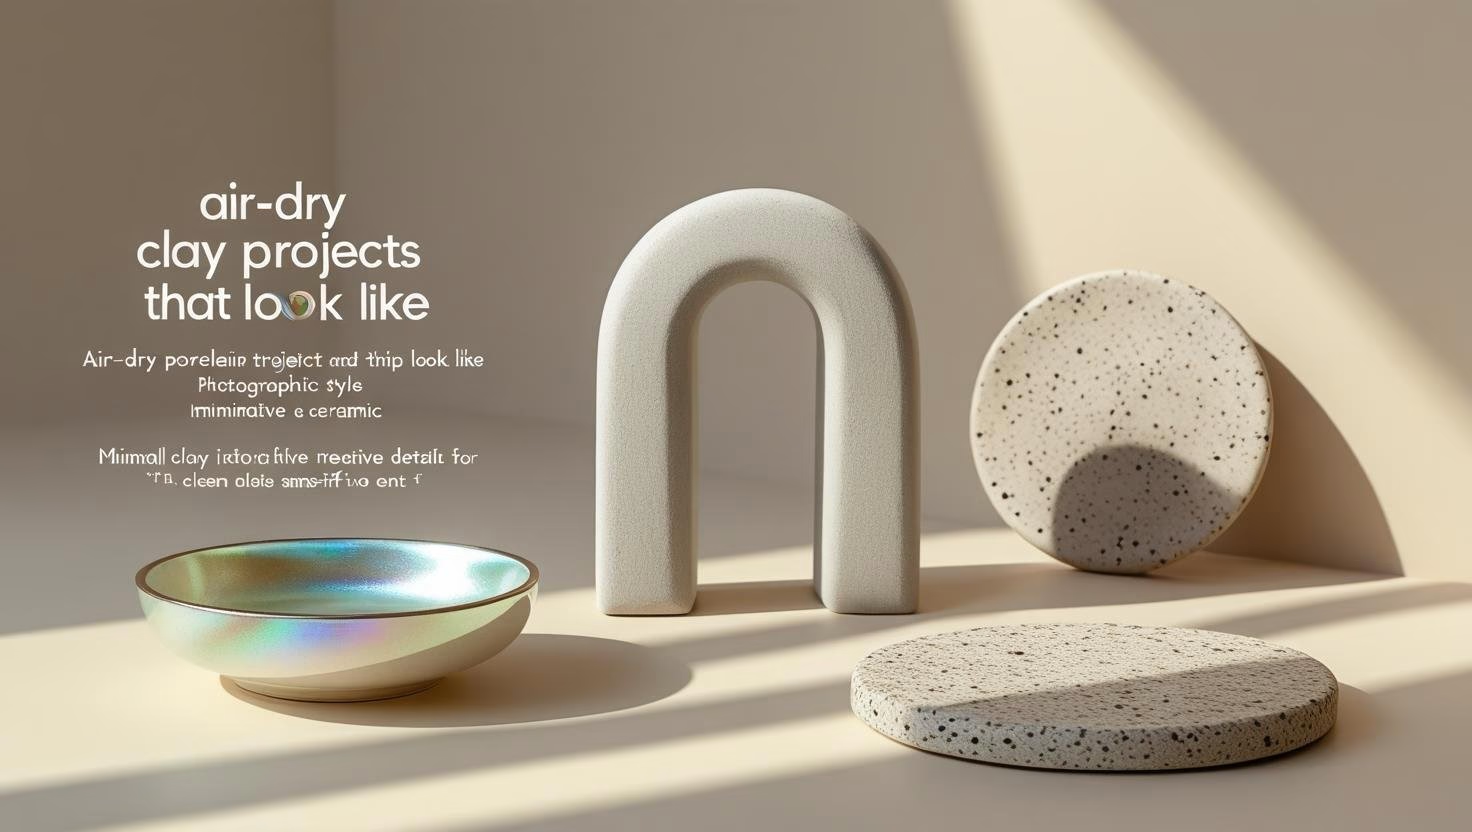
Three Finishes That Read as Ceramic
Porcelain Matte
Best for ring dishes, small trays, and sculptural arch decor. Roll the clay to an even 3 mm, cut your shape, and slump it over an upturned bowl until it firms to leather-hard. Dry slowly for 24 to 48 hours, flipping once at the halfway point to fight warping. Sand 220 to knock down the seams, 400 to refine, and 800 for a velvety face, then prime thin with gesso and micro-sand again with 800. Paint matte white warmed with a single drop of gray so it photographs as porcelain rather than chalk, then seal with two or three thin matte or satin coats.
High-Gloss Glazed
Best for trinket dishes and bud-vase sleeves. Prep through priming as above, lay down a smooth acrylic base in a studio color such as cream, cobalt, or deep sage, and let it dry fully. Build the gloss with two to four thin varnish coats, tipping off the last pass with a foam brush to kill streaks. Layering a satin coat under the final gloss gives an under-sheen that mimics the depth of a fired glaze. For a true glass surface, pour a thin two-part resin coat, pass warm air over it to chase bubbles, and cure under a flipped clear bin to keep dust off.
Speckled Stoneware
Best for coasters, display bowls, and wall tiles. Paint a matte oatmeal base, then load a stiff brush with watered-down brown or black acrylic and tap the handle over a finger to flick fine specks across the surface. For an embedded look, stir a pinch of pastel dust straight into the gesso before priming. Leave one rim edge in a darker warm gray to imitate a dipped glaze, then seal with satin or a soft gloss for a kiln-like sheen.
Fixing Cracks, Warping, and Fuzzy Surfaces
Most failures trace back to drying too fast or skipping the fine grits. Dry pieces flat on a breathable surface, away from direct heat and fans, and flip after the first 12 to 24 hours. For edge cracks, work in a paste of clay plus a few drops of warm water, let it dry, and re-sand. Straighten a warped tray while it is still leather-hard by pressing it gently flat under two boards weighted with light books. A surface that stays fuzzy after painting was under-sanded: burnish with a spoon before priming to compress the fibers, and take the final sanding up to 800 or 1000 grit. Aim for 3 mm on small dishes and up to 5 mm on larger trays, which resist warping far better than thin slabs.
A Repeatable Finishing Routine
Once the technique clicks, the same seven-step sequence carries every piece: shape and dry with one flip, sand 220 then 400 then 800, burnish the key faces, prime thin and micro-sand, paint in thin layers, then seal to match the effect (matte or satin for porcelain and stoneware, gloss or resin for glaze). Cure fully before staging, and add cork or felt feet to protect shelves. If you gift a piece, tuck in a short care note: decor use only, keep dry, wipe with a damp cloth. That one line keeps a handmade dish looking studio-quality for years.
Related Posts

Macrame Cord Choice for Beginners: Single-Twist vs 3-Ply
3-ply cord is forgiving, single-twist gives the boho fringe, braided locks in clean knots. The...

Punch Needle Loops Pulling Out: The Tension Fix Guide
Punch needle loops pull out for one of four reasons: supply tension, a loose foundation...

Sealing Watercolor Wood Slices for Indoor Display Pieces
Watercolor on raw wood fades fast without prep: the priming options, painting adjustments, spray...
Beginner Hand Embroidery Hoops: Sizing for Long Projects
Choose the right embroidery hoop: why 6-to-8-inch beechwood beats large or bamboo, tension over...