
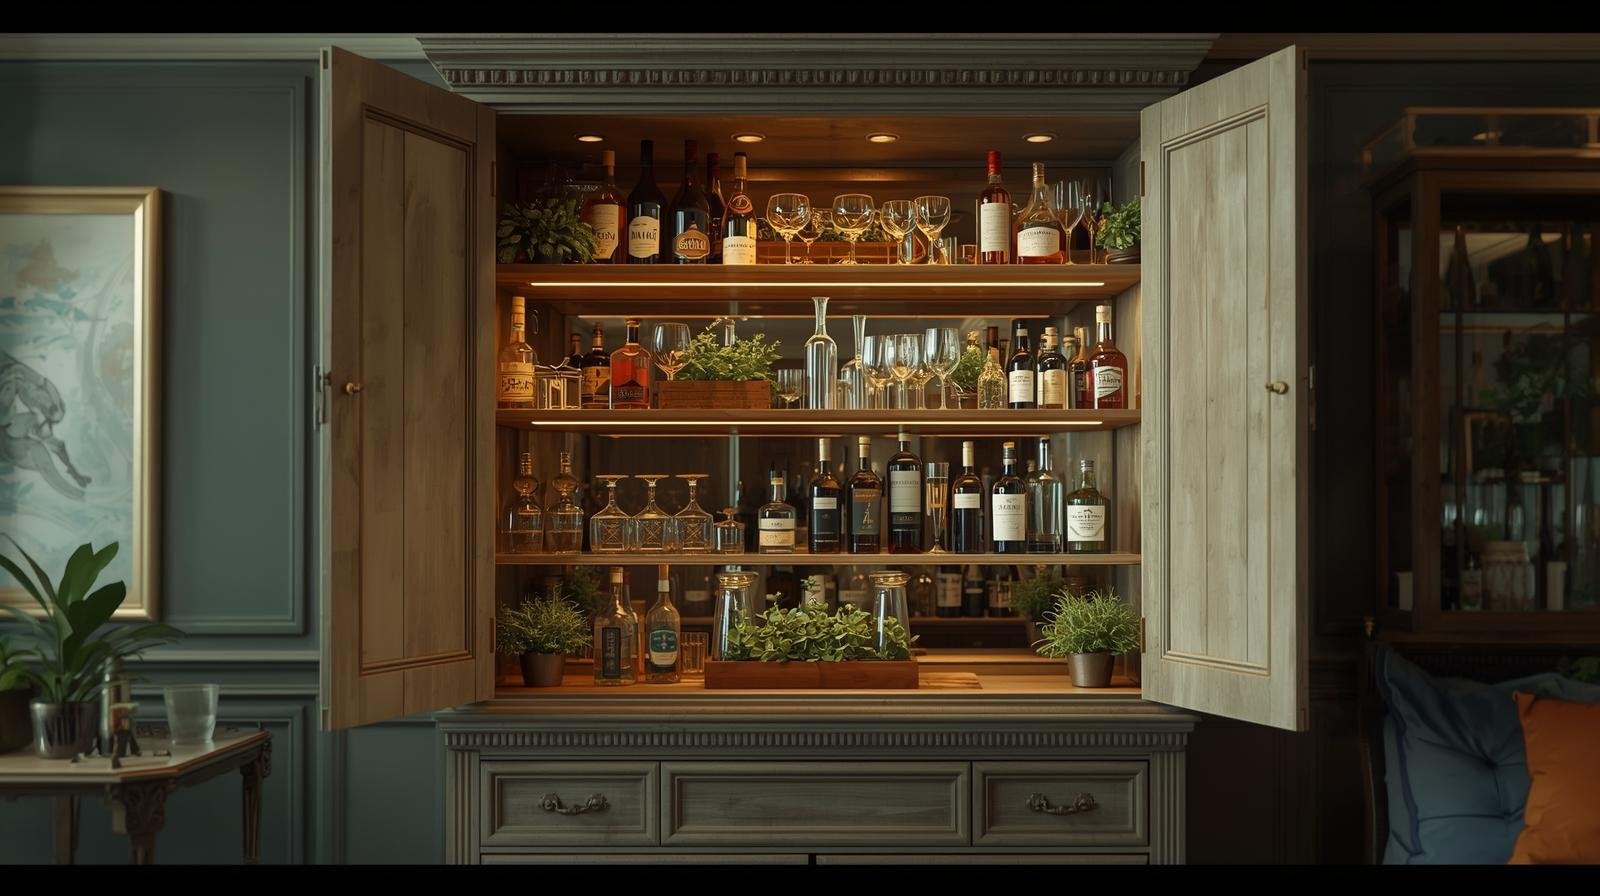

Although there are many beautiful bar carts on the market, you can easily repurpose an old piece of furniture to create a chic, functional bar. All you need are a few supplies and you are on your way to mixing drinks, serving guests, and storing all your barware in style. If you do not already own an armoire you can easily find one at your local thrift store and quickly transform it to match the style of your home.
Things You’ll Need
- Stripper
- Drop cloth and/or pail
- Gloves (chemical resistant)
- Old rags
- Scraper
- Wire brush (optional)
- Sander
- Sandpaper (1 coarse, 1 fine)
- Screwdriver
Step 1: Prepare Surface for Stripping
Wipe down the armoire with a damp rag to remove any dirt and dust and remove any hardware so that you have a smooth clean surface to work with.
Tip
- Place your piece of furniture on a drop cloth before beginning this project to catch all debris as you remove the paint. A metal pail can also be used to dispose of scrapings as you work.
Step 2: Apply the Stripper
Using a rag, smear stripper over the surface. A paintbrush or your gloved hand can also be used to distribute the stripper. Make sure to disperse the stripper until the surface is evenly covered. Follow package directions for specific wait times. For this project, the stripper was left undisturbed for one hour.
Step 3: Remove the Stripper
Using the scraper, remove a small test patch. If the stripper peels away easily, then continue scraping the entire surface. If you have difficulty removing the stripper, let it sit for another hour. A wire brush may be needed for stubborn areas, such as trim work.
Step 4: Sand the Surface
Once all the paint has been stripped, the armoire will need to be sanded. For this project, a hand sander was used along with varying grits of sandpaper. For this project, 80-coarse grit paper was used initially, and then a 120-medium grit was used to create a smooth fine finish.
Tip
- Remove doors and drawers while sanding for easy access.
Step 5: Wipe Down and Finish the Surface
Once the sanding is done, you will need to wipe the entire surface with a damp cloth to remove any dust. At this point, your surface can be sealed, stained, or left in its natural state. For this project, the surface was left as is for a more rustic appearance. Don’t forget to replace the hardware to tailor the piece to your space
Step 6: Style Your Bar
Now for the fun part! Gather all of your barware and cocktail supplies and create a drink station. The bar can also be used to house glassware, serving platters and accessories.
Step 7: Organizing Your Bar
Corral drink bottles neatly on a tray on the top of the armoire for easy access. You can also keep straws and cocktail napkins handy here. Utilize the drawers for barware and serving pieces. An armoire bar is a fun and functional piece that can be customized to suit any style!
The drawers are a great place to stow extra bar necessities like napkins, cork screws, glasses and coasters.
Think twice before you pass up that thrift store armoire! It may make the perfect spot to mix up cocktails for your next gathering.
