How to Organize a Paint and Sip Night Without Hiring an Instructor
How to Organize a Paint and Sip Night Without Hiring an Instructor
You know that feeling when you scroll past all those super-fun, curated paint and sip events online? The ones that cost an arm and a leg, or require you to commit to a specific date and time that never quite works with your schedule?
Yeah, I’ve been there too. My calendar is a chaotic mess, and sometimes I just want to paint a wonky landscape in my sweatpants without judgment from a professional artist.
Well, what if I told you that you can totally recreate that relaxed, creative vibe right in your own home? No instructor needed, no fancy studio fees, just you and your pals, some paint, and maybe your favorite beverage. 👋
Today, we're going to dive into how I’ve organized these low-key, high-fun DIY paint nights. We’ll cover everything from picking a theme to gathering supplies, making it super easy and budget-friendly. Get ready to unleash your inner artist!
Why This Actually Matters
Let's be real, carving out creative time feels impossible sometimes. Between work, life, and just trying to keep your houseplants alive, hobbies often get pushed to the back burner.
But having a dedicated, fun creative outlet is so important for clearing your head and just de-stressing. It's not about making a masterpiece, it's about the process and having some laughs along the way.
For me, these DIY paint nights started because I wanted to try out new painting techniques without the pressure. I'd buy a cheap canvas, some acrylics from the craft store sale bin, and just play around.
Then I realized, why not invite friends over? It's a fantastic way to connect, try something new together, and avoid spending $50+ per person at a formal event. My last setup cost me about $70 for six people, and we used a lot of supplies I already had on hand.
Choosing Your Creative Adventure
The first thing people usually worry about is what to actually paint. This is where the "no instructor" part can feel a little daunting, but trust me, it’s actually liberating.
The goal isn't perfect replicas. It's about having fun and seeing what everyone creates. You don’t need to be a professional artist to guide your friends to a good time.
Finding Your Inspiration
I always start with a vibe or a simple idea. Think about what kind of art you generally enjoy or what might be fun to try with no stakes involved.
A quick Pinterest search for "easy acrylic painting ideas" or "beginner landscape painting" will give you a ton of options. Pick something with simple shapes and a limited color palette. Think chunky brushstrokes, not intricate details.
- Abstract Art - This is my go-to for beginners. There's no "wrong" way to do it. Just pick a few colors, maybe some metallics, and let everyone experiment with textures and blending. It's incredibly freeing and often produces surprisingly cool results.
- Simple Landscapes - Think impressionistic trees, sunsets, or mountains. You can find step-by-step videos on YouTube for super basic versions. Look for ones that only use 3-5 colors and focus on broad strokes. Everyone can interpret it in their own way.
- Pop Culture Nods - Maybe everyone paints their favorite cartoon character in a simple, stylized way, or a fun symbol from a game or movie. This can be a great conversation starter and feels less intimidating than a "real" painting.
- Still Life with a Twist - Gather some interesting objects you already own – a quirky vase, a unique bottle, some fake flowers. Arrange them on a table and let everyone paint their interpretation. The fun is in seeing how different people see the same setup.
Remember, the goal is low pressure. Pick something that makes everyone feel like they can jump in without needing years of art school under their belt. We're here for good times, not gallery showings.
How to Actually do It
Okay, you've got your theme! Now for the practical stuff. This is where my love for thrifting and repurposing really shines. You don’t need to spend a fortune to set up a great paint night.
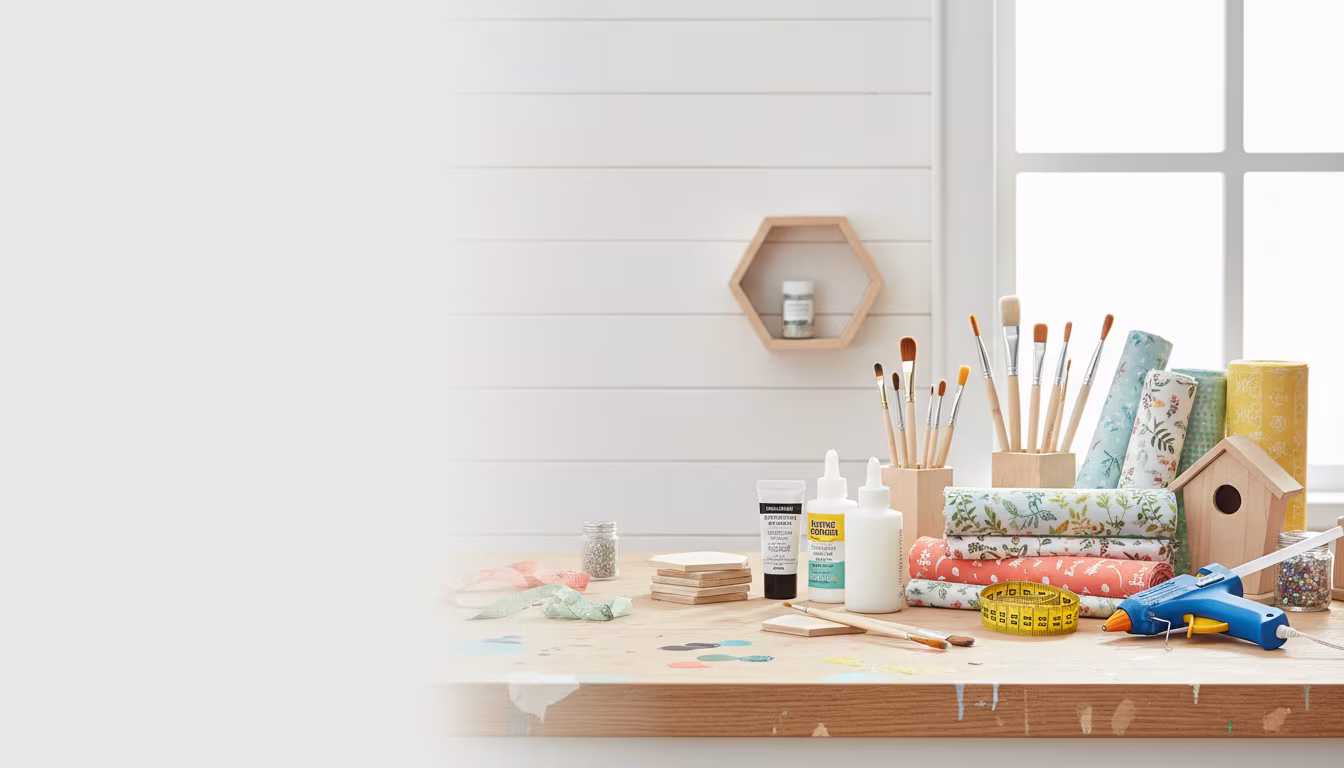
Step 1: Gather Your Supplies
This is probably the most crucial step, but also the most flexible. You can go big or keep it minimal, depending on your budget and what you already have.
For paints, I usually grab a multi-pack of acrylic paints from the craft store when they're on sale. You can get a decent set of 12 small tubes for around $10-$15. If you're going for a specific theme, like a sunset, just buy a few larger tubes of red, yellow, blue, white, and black.
Canvases can get pricey. For a group of six, I typically look for multi-packs of 8x10 or 9x12 canvases, which can be $15-$20 for a 5-pack. Or, a cheaper option: thick cardboard cut to size, or even small wood panels from the hardware store.
Don't forget brushes! A basic variety pack with a few flats, rounds, and a smaller detail brush is usually enough. You can find these for under $10. Plastic cups for water, paper plates for palettes, and old rags or paper towels for cleanup are also essential.
Step 2: Set the Mood and Workspace
This is where the "sip" part comes in! Pick your beverage of choice – sparkling cider, wine, iced tea, whatever makes your crew happy. Have some snacks on hand too; cheese and crackers, fruit, or even just some pretzels work great.
Protect your surfaces! Lay down an old tablecloth, some newspaper, or even a cheap plastic drop cloth. Paint tends to get everywhere, and a little planning saves a lot of scrubbing later. I learned this the hard way when a friend splattered red paint all over my vintage kitchen table. Oops!
Good lighting is key, especially if you're painting at night. Clear away clutter to give everyone enough elbow room. A little background music can also really help set a relaxed, creative vibe. I usually put on a lo-fi playlist or some instrumental jazz.
Step 3: Pick Your "instructor" Material
Since you're not hiring anyone, you become the guide, or at least the curator. This doesn't mean you have to be Bob Ross. Just pick a few inspiration images or a short YouTube tutorial that everyone can follow along with loosely.
I like to project an image or video onto a wall if I can, or just print out a few copies for everyone to look at. Remind everyone that it's a guide, not a stencil. Encourage them to try new things and not worry about perfection.
Sometimes, I'll even do a super quick "how-to" demo of one specific technique, like how to blend two colors or create a textured sky. It's usually messy and imperfect, which instantly makes everyone else feel more comfortable trying it too.
Step 4: the Color Palette Conversation
Before everyone starts slinging paint, talk about colors. You can offer a limited palette to keep things cohesive, or let everyone go wild. My favorite method is to have a base set of primary colors plus white and black, and then add in a few "fun" colors like metallic gold or a vibrant teal.
Encourage mixing colors! It's a huge part of the fun and a great learning experience. Show them how a tiny bit of blue can transform green, or how much white you need to get a pastel shade. I always put out extra paper plates for people to use as mixing palettes.
Don't be afraid to use color theory to your advantage, even if you just scratch the surface. "We're going for warm tones tonight!" or "Let's try some complementary colors for a pop!" can spark a lot of creativity.
Step 5: Let the Painting Begin!
This is where the magic happens. Encourage everyone to just start. The blank canvas can be intimidating, so suggest putting down a background color first, or just making some abstract marks to break the ice.
I always make sure to put some of my own "failures" out there. "My first attempt at this tree looked like a broccoli stalk, but then I tried this..." Sharing your own messy journey makes others feel more at ease with their own beginner efforts.
Walk around, offer encouragement, and maybe point out different ways someone could approach a tricky spot. "What if you tried blending that edge with a damp brush?" or "That texture is really interesting, what if you added more layers?" Keep it positive and supportive.
Step 6: the "sip" Side of Things
Make sure the drinks and snacks are flowing. The "sip" part is just as important as the "paint" part for creating that relaxed, social atmosphere. It helps everyone loosen up and feel less self-conscious about their artistic skills.
Take breaks! Sometimes stepping away for five minutes, grabbing a refill, and chatting can give you a fresh perspective when you come back to your painting. This is especially true if someone feels stuck or frustrated.
I often find that after a good chat and a laugh, people return to their canvases with renewed energy and less pressure. It's not a race, it's an experience.
Step 7: the Grand Reveal & Clean up
Before everyone packs up, encourage a "show and tell." Have everyone stand back and admire each other's creations. It’s amazing to see how different each painting turns out, even when starting with the same inspiration.
Celebrate the unique interpretations and effort. This is where you really emphasize that it’s about the fun and the shared experience, not about producing a gallery-worthy piece. Every painting is a story!
For clean up, have a designated bucket for brushes and plenty of paper towels. Acrylic paint dries fast, so encourage people to rinse brushes quickly. I usually keep a few old newspapers or plastic bags handy for disposing of used paper plates and paint-covered rags.
Making It Stick / Common Mistakes
So, you've decided to host your own paint and sip night. That's awesome! Now, let's talk about what can sometimes trip people up and how you can avoid those little bumps.
One common mistake I’ve seen is trying to make it too serious. Remember, we’re not aiming for art school here. If you or your guests get too focused on perfection, it sucks all the joy right out of the room.
Another pitfall is running out of essential supplies. You don't want to be scrambling for more white paint halfway through the evening, believe me. Always over-estimate a little, especially for primary colors.
And finally, don't forget the "sip" part! I once got so caught up in the painting prep that I forgot to chill the drinks. It was still fun, but definitely less "sip."
"The best art is often born from joyful experimentation, not rigid instruction."
The goal is a low-stress, high-fun evening. Keep it light, keep it simple, and focus on the camaraderie. That's what makes these nights truly memorable.
Frequently Asked Questions
What if No One in My Group has Painted Before?
That's totally fine, and actually pretty common! Most people haven't picked up a paintbrush since grade school. Start with an abstract theme or a super simple landscape that encourages free expression rather than precise detail. Emphasize that there are no mistakes, just happy accidents.
How Much Should I Expect to Spend on Supplies for a Small Group?
For a group of 4-6, you can realistically pull this off for around $50-$80 if you’re smart about shopping. Look for multi-packs of canvases and paints, use paper plates as palettes, and old containers for water. Thrift stores can sometimes have unopened paint sets or cheap brushes too!
Do I Need an Easel for Everyone?
Absolutely not! Easels are nice but totally unnecessary for a casual paint night. Everyone can comfortably paint flat on a table. Just make sure they have enough space and that the surface is well-protected from paint.
How Long does This Usually Take?
Typically, a relaxed paint and sip night lasts about 2 to 3 hours from start to finish. That includes time for setting up, painting, chatting, refilling drinks, and a quick show-and-tell. Factor in a little extra time for cleanup afterwards.
Is This Worth It if I'm Not a Very Artistic Person Myself?
Definitely! You don't need to be an artist to host a fun and creative event. Your role is more of an enthusiastic facilitator. Your own willingness to try, make "mistakes," and just have fun will encourage everyone else to do the same. It's about the social connection and trying something new together. ❤️
The Bottom Line
Organizing your own paint and sip night doesn't have to be complicated or expensive. It’s really about creating a welcoming space where friends can gather, unwind, and dabble in some creativity without any pressure.
Don't sweat the small stuff. Pick a simple theme, gather some basic supplies, protect your surfaces, and let the good times flow. You'll be surprised at how much fun everyone has, and you might even discover a hidden talent or two.
So, what are you waiting for? Grab some paint, call your pals, and get ready to make some messy, beautiful memories. Start small, try it out, and let me know how it goes!
Related Posts

Pegboard vs French Cleat: The Honest Tool Wall Choice
A blunt comparison of pegboard and French cleat for shop tool walls — weight, customisation, cost...

The Complete Guide to Starting a Fiber Arts Guild in Your Town
Dreaming of a local hub for knitters, crocheters, weavers, and more? Starting a fiber arts guild ...
Why Tool Libraries Let You Try Expensive Hobbies Before Committing
Dreaming of diving into woodworking or pottery but worried about the cost of specialized tools? T...
How to Plan a Nature Journaling Walk and Sketch Workshop
Ready to blend your love for nature with your creative spirit? Learn how to plan and host your ve...