Acrylic Pouring Cells: Why They Form and How to Control
The short answer
Cells in acrylic pouring are not a single technique — they are the visible result of two paint layers having different densities and different surface tensions. The lighter layer rises through the heavier one, pulling small circles of the under-layer's colour to the surface. To get cells reliably, you create the density difference deliberately (different pigment loads, different additives) and you add something to the lighter layer that breaks surface tension faster than the heavier layer (silicone oil, hair conditioner, dish soap).
The two things that matter most: paint consistency in the runny-honey range, and one to two drops of 100% silicone oil per colour cup (except the lightest one). Get those two right and cells appear on the first pour. Get them wrong and you chase cells through eight pours that produce mud.
What is happening physically
The pour cup contains layered paint colours, each thinned with pouring medium to a similar consistency. When you tip the cup onto the canvas, the layers begin to slide and spread. If every colour had identical density and tension, they would marble together as one flowing sheet — no cells.
But because pigments differ in weight (titanium white is heavy; phthalo blue is light; iron oxide is heavy) and because additives change tension (silicone reduces surface tension dramatically; Floetrol slightly), some colours want to push to the top while others want to settle. Where a lighter, lower-tension colour breaks through a heavier higher-tension one above it, it forms a round opening — that is a cell.
This means you can think of cells the way you think of bubbles rising in honey: the bubble forms because the gas inside wants to go up through the resistance of the surrounding fluid. In paint cells, the lighter colour is the bubble, the heavier colour is the honey, and silicone is what destabilises the boundary enough to let the bubble through.
The role of silicone
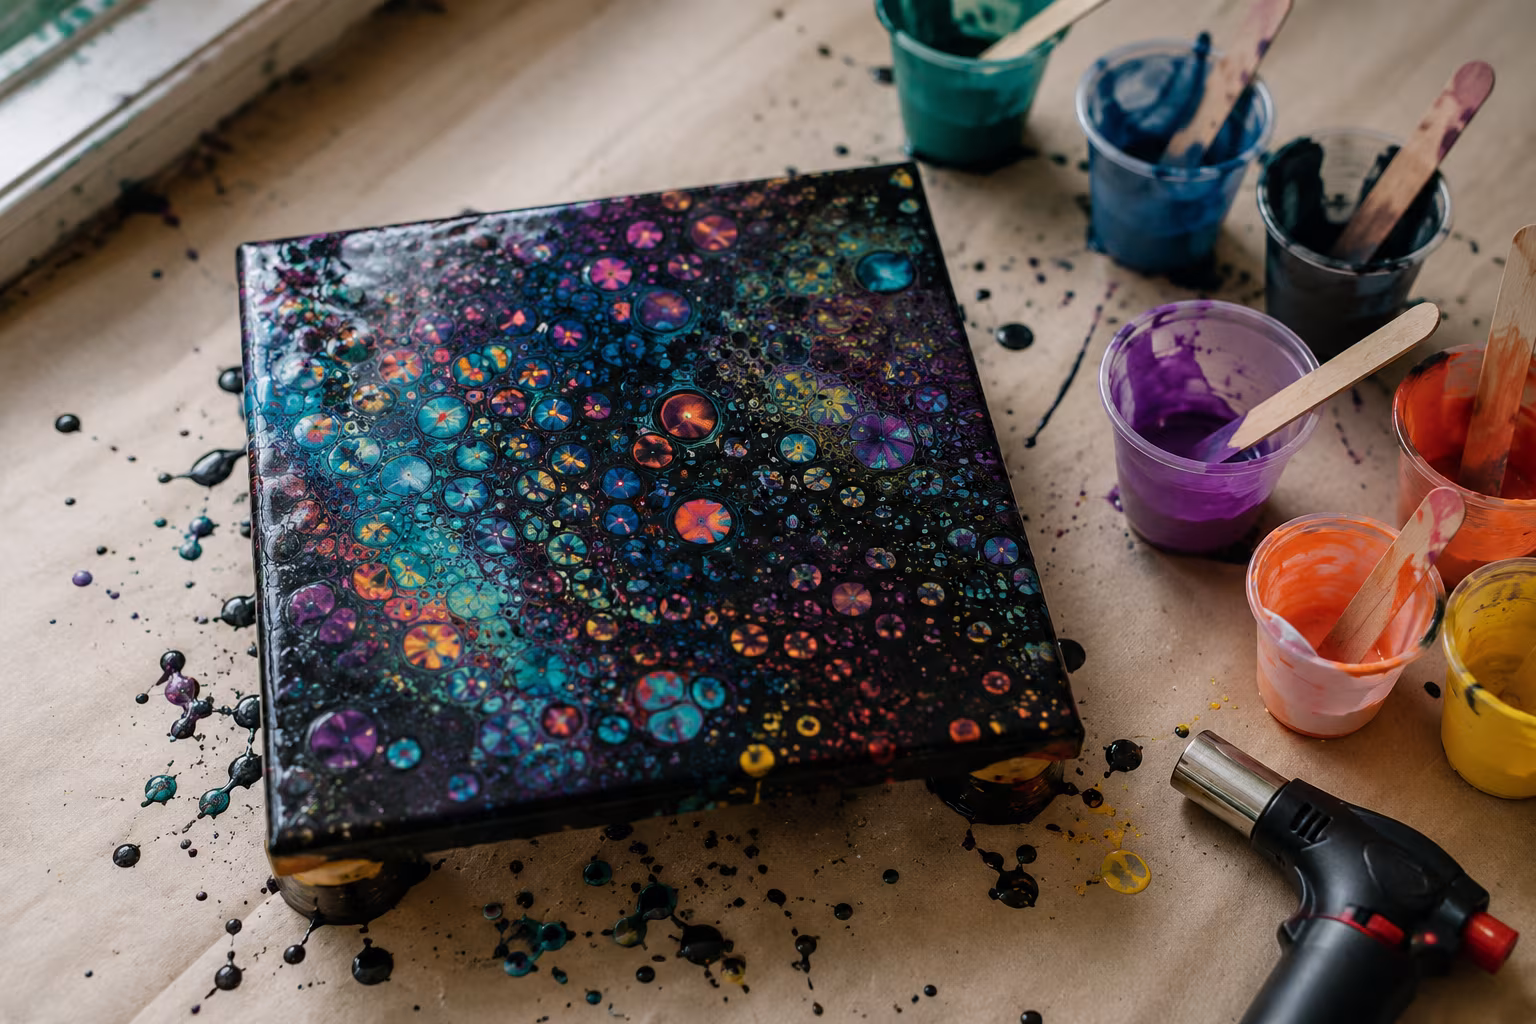
Silicone oil (most commonly 100% pure silicone, sold as treadmill belt lubricant or as dedicated pouring additive) is the most reliable cell-forming agent. A drop or two stirred into one or two of the cup's paint colours dramatically lowers surface tension for those specific colours. When the cup is poured, the silicone-treated colours form cells more aggressively than the untreated ones.
The standard ratio is one or two drops of silicone per two to three ounces of mixed paint. More silicone gives more, smaller cells; less gives fewer, larger ones. Going overboard — five or ten drops per cup — produces a chaotic mess where the cells lose definition and the paint looks oily.
Hair oil with silicone, dimethicone-based serums, and silicone hair conditioner all work similarly. The active molecule is the same; only the carrier differs. Treadmill belt lubricant is popular because it is cheap, widely available, and chemically clean.
Add silicone to selected colours, not all of them. The contrast between treated and untreated layers is what creates the cell pattern. If every colour has silicone, the chaos has no quiet background to play against.
The role of Floetrol and pouring medium
Floetrol is a paint additive originally designed to keep latex paint flowing during brush application. In acrylic pouring, it slightly extends the open time of the paint, reduces brush marks, and — most importantly for cells — adds a small but consistent surface tension difference compared to plain water-thinned paint.
Floetrol alone is not a cell-maker. It is a base medium that improves the paint's behavior. Paint thinned only with water cracks as it dries (water-thinned acrylic loses too much volume), so a proper pouring medium is non-negotiable.
Mix Floetrol with acrylic paint at roughly one-to-one by volume for most pours. Adjust by feel — the target consistency is liquid honey: pours in a slow steady ribbon, drops self-level into a flat puddle within seconds, no chunks. Too thick and the paint will not flow into cells; too thin and the layers blend before cells can form.
Other commercial pouring mediums (Liquitex Pouring Medium, GAC 800, DIY mixes of Elmer's glue and water) work similarly. The cheap pour standby is Floetrol with a small splash of distilled water; the higher-end alternative is Liquitex or GAC 800.
Consistency: the variable everyone underestimates
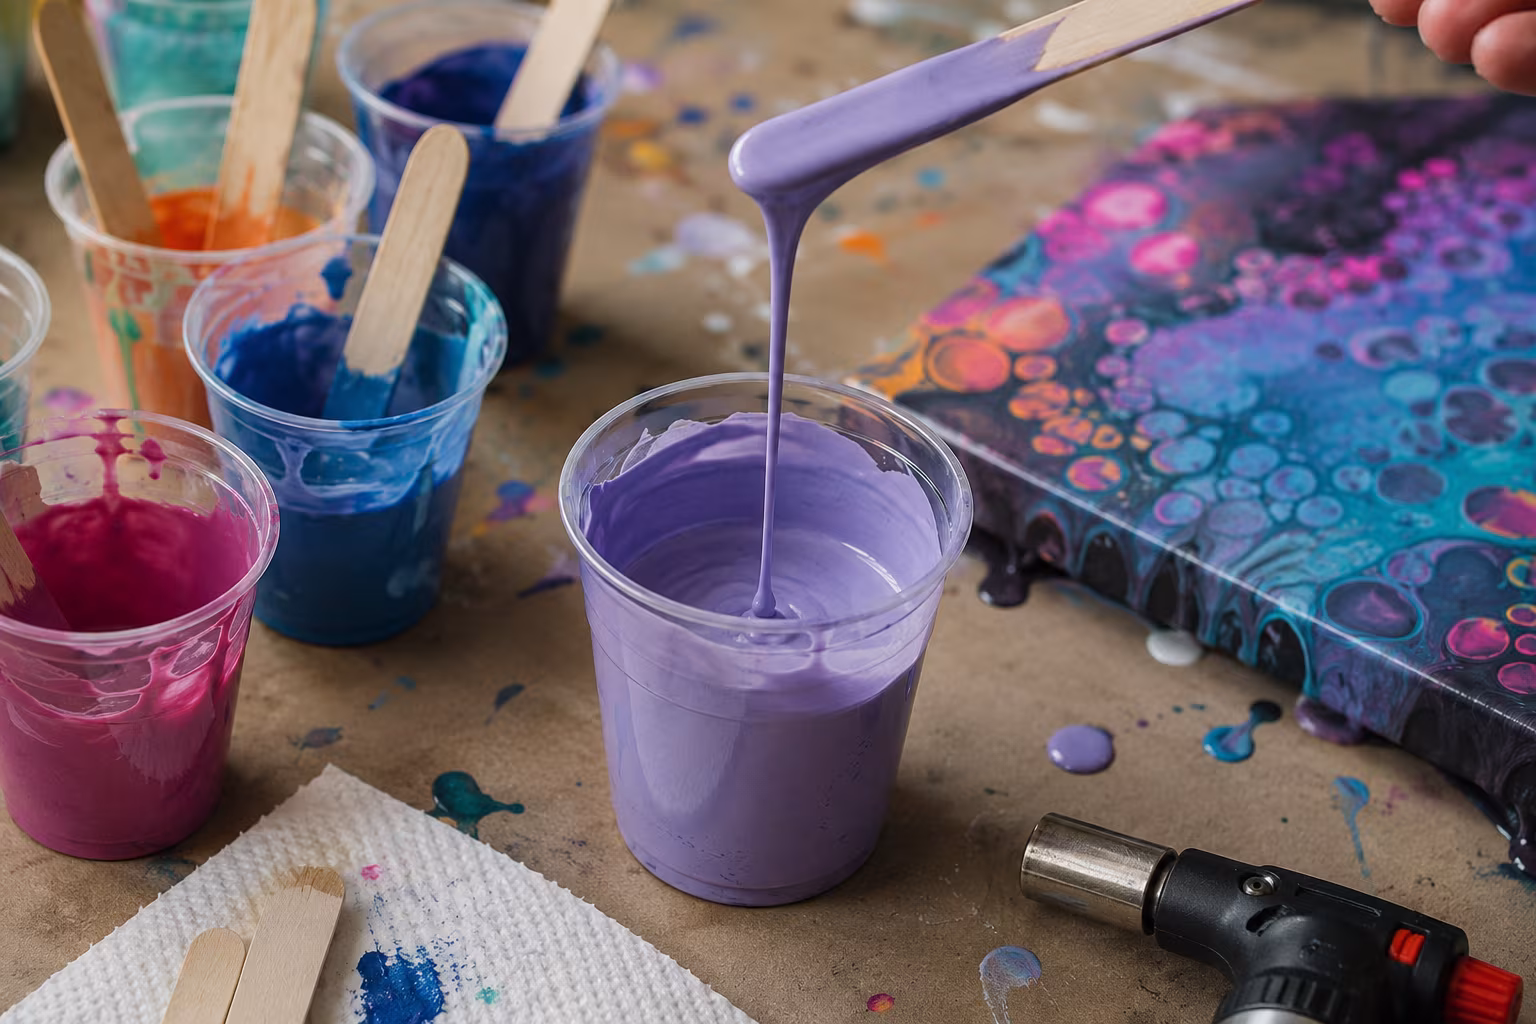
The single biggest reason a pour fails is incorrect consistency. Thick paint moves slowly and refuses to spread; thin paint runs together and loses definition. Liquid honey is the target.
Test the consistency in the mixing cup before pouring. Lift the stir stick and watch the paint drip back: a slow continuous ribbon that lays on the surface and disappears in two to three seconds is right. A drip-drip-drip is too thick; a splash is too thin.
Adjust by adding more pouring medium (for thicker paint that needs to thin) or by waiting a few minutes (for newly mixed paint with air bubbles that need to settle, which makes it feel thicker until they pop).
Different paint brands have different starting viscosities. Heavy body artist acrylics need more medium; soft body or craft acrylics need less. Test each new tube of paint against the ribbon test before committing it to a real pour.
The pour technique that builds reliable cells
Mix each colour separately in its own cup. Add silicone to selected colours (not the lightest, not all of them — usually two out of four colours).
Layer the colours into one large pour cup. The order matters less than people think; the layers rearrange themselves once poured. A common starting order is darkest at the bottom, lightest at the top, with the silicone-treated colours sandwiched in the middle.
Tip the pour cup onto a level prepared canvas. Move slowly. Pour in a pattern (a flip-cup pour, a tree-ring pour, a swipe) that suits the composition you want. Cells appear within seconds of the paint settling.
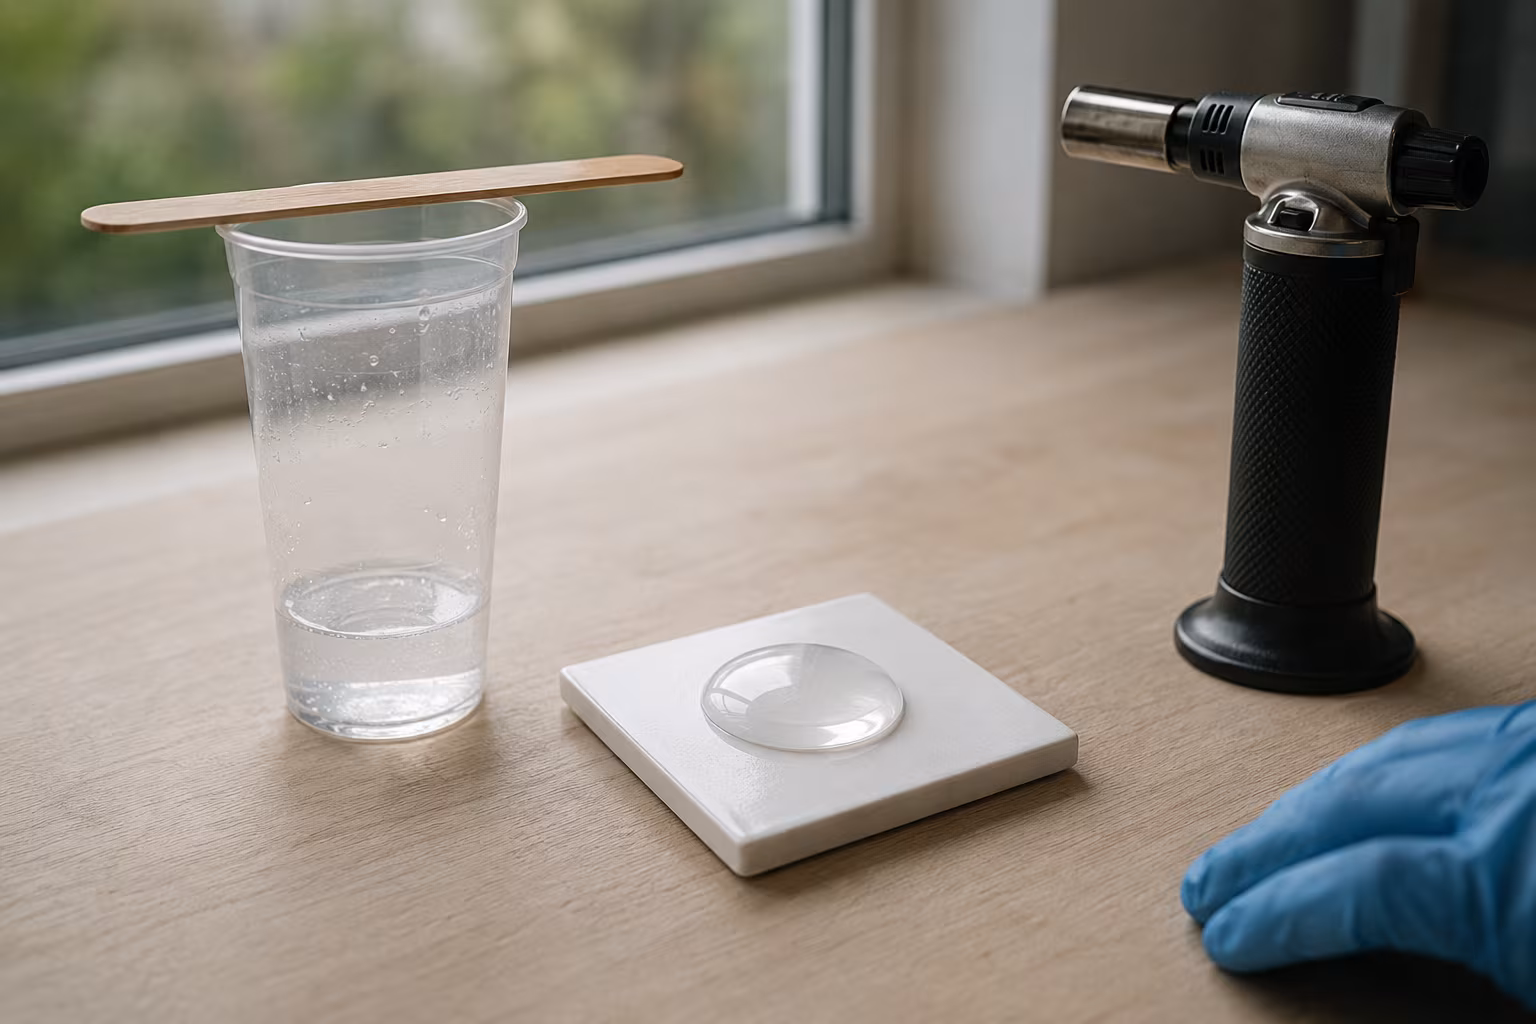
Apply a heat source (a small butane torch, swept quickly) over the wet surface to help cells expand and pop bubbles. Do not linger; one or two passes is enough. Heat too long and the paint scorches or develops a skin.
Leave the painting completely undisturbed for the full cure. Acrylic pouring dries unevenly under the surface for up to 72 hours; touching, tilting, or moving the painting during this window will distort the cells permanently.
Common cell problems and their fixes
No cells at all. The most common cause is consistency — paint too thick or too thin. Second most common is no density difference between colours; adding silicone to one or two colours typically fixes this.
Tiny cells with no definition. The paint is thinned to runny rather than liquid honey, or you added too much silicone, or both. Thicken the paint slightly and reduce silicone to one drop per cup.
Cells that all look the same. Only one colour was treated with silicone, or all colours got the same amount. Vary the silicone treatment across two of the four cups for visual variety.
Cells that collapse after the pour. The paint dried too fast on top while still moving underneath. Pour in a cooler room (under 22°C / 72°F is ideal), or work faster between mixing and pouring.
Oily look on the finished painting. Too much silicone, or silicone not properly absorbed. Wipe the cured surface with a soft cloth and isopropyl alcohol before varnishing.
Removing silicone for the final varnish
Silicone on a cured pour blocks varnish from bonding to the surface. Before varnishing, wash the painting gently with warm water and a mild dish soap, rinse, and let dry completely (24 hours). Some painters do this twice. Then apply varnish.
If you skip this step, the varnish beads on the silicone residue and dries patchy or fish-eyes. The painting looks blotchy from arm's length even though the underlying art is correct.
Once the painting is varnished, the silicone is sealed in and the surface is durable. The wash step takes ten minutes and saves the painting.
Materials worth investing in early
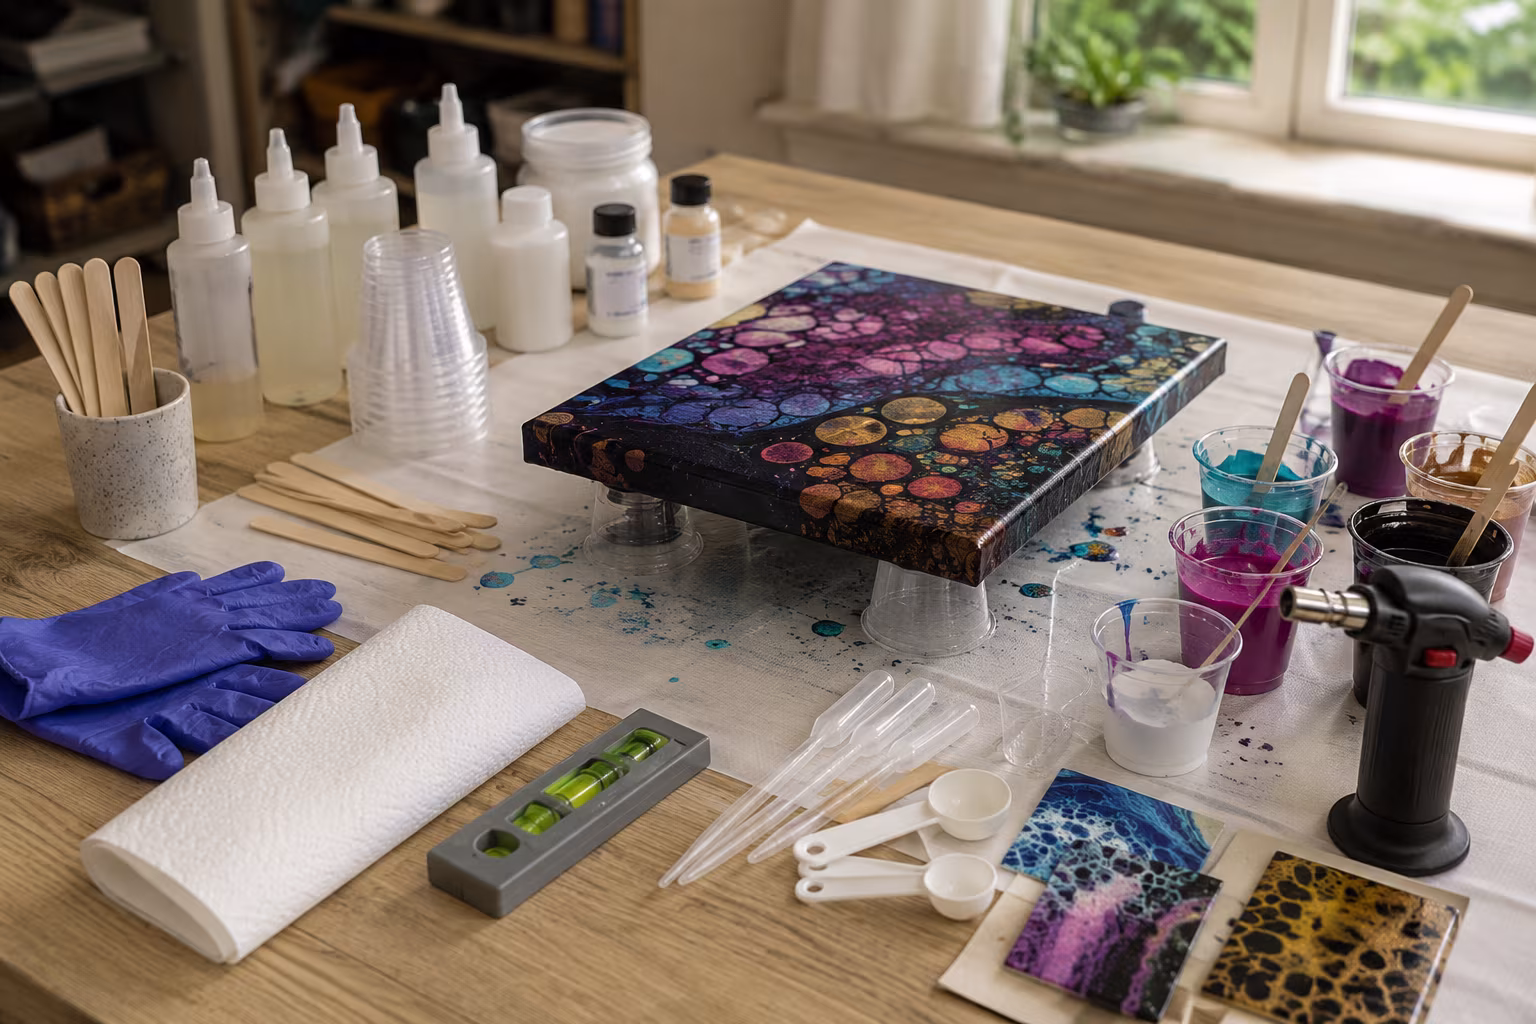
A pouring kit that pays back fast: a pack of clean plastic cups (1-2 oz size for individual colours, 8-16 oz for the pour cup), wooden stir sticks, a small bottle of 100% silicone treadmill lubricant, a quart of Floetrol, a small butane torch, and three or four heavy-body artist acrylics in colours you actually want.
Add a level pouring surface (a small piece of MDF on adjustable feet, or just a torpedo level used to check the canvas), a few pre-stretched canvases (8x10 to start), and disposable gloves.
This kit covers many pours and gives you the variables — silicone amount, paint ratios, consistency — to experiment with without re-buying supplies. The single biggest cost-saver is buying paint in larger tubes rather than craft-store small bottles; pouring uses paint quickly.
Different pour techniques and their cell behavior
The technique you use to apply the paint to the canvas changes how cells form and where they appear.
Dirty pour. All colours layered in one cup, dumped onto the canvas in a single pour. Cells form in the layered cup itself as the colours stack and silicone migrates between layers, then become visible as the pour spreads on the canvas. The most beginner-friendly approach; the most chaotic in results.
Flip cup. Layered cup placed upside-down on the canvas, then lifted. The paint flows outward from the centre in concentric rings. Cells form along the rings as silicone-treated layers break through untreated ones. More controlled than dirty pour; produces a more deliberate-looking composition.
Tree-ring pour. Slow pour from a low height in concentric circles. Each ring of paint pushes the previous ring outward, creating visible tree-ring patterns. Cells form at the boundaries between rings.
Dutch pour. Paint blown across the canvas with a hair-dryer or straw after the initial pour. Air pressure stretches and shapes the paint, exposing layers underneath. Cells form in the disturbed paint as silicone-treated colours rise through the moved layers.
Swipe. A piece of plastic or palette knife drags one colour across another. The dragged colour pulls the underlying colour into cell formations along the drag path.
For consistent cell results, the flip cup and the tree-ring pour give the most predictable outcomes for beginners. Dutch and swipe techniques produce dramatic visuals but require more practice to control.
Why some cells stay perfectly round and others distort
Cell shape depends on the speed and stability of the paint after the pour. Cells that form in still paint (no movement) stay round because the surface tension forces are symmetric. Cells that form in moving paint (the paint is still spreading or the canvas is being tilted) become elongated or teardrop-shaped as the movement stretches the boundaries.
For round cells: pour, settle, and torch without further movement. For elongated cells: tilt the canvas slightly after the pour to encourage flow in the direction you want the cells to stretch.
Distorted, irregular cells often mean the paint consistency was wrong — too thin and the cells lose their shape as they form; too thick and the cells never fully open.
Storing and reusing leftover paint
Leftover acrylic paint mixed with pouring medium and silicone has a usable shelf life of a few weeks if stored airtight. Transfer leftover paint cups to small lidded containers (small jars, freezer containers, paint-sample bottles), label with the colour and date, and store at room temperature.
Reusable leftover paint behaves slightly differently from fresh mix — the silicone settles out and needs to be re-stirred before use. Some pigments separate; a gentle stir restores most.
For long-term storage (months), refrigeration extends the usable window but introduces condensation issues when the paint returns to room temperature. Most pourers find that mixing fresh for each session gives better results than reusing.
Hardened paint in containers is usually waste. Acrylic that has dried fully cannot be re-liquefied. The cost of disposing of cured paint is a small but real cost of the hobby.
Related Posts
How to Block a Knitted Wool Sweater Without Felting
The blocking routine that opens stitches and sets the shape without turning your wool sweater int...
Resin Doming Without Bubbles: A Calm, Reliable Method
A repeatable doming routine that keeps bubbles out and the dome tidy — pour technique, heat metho...
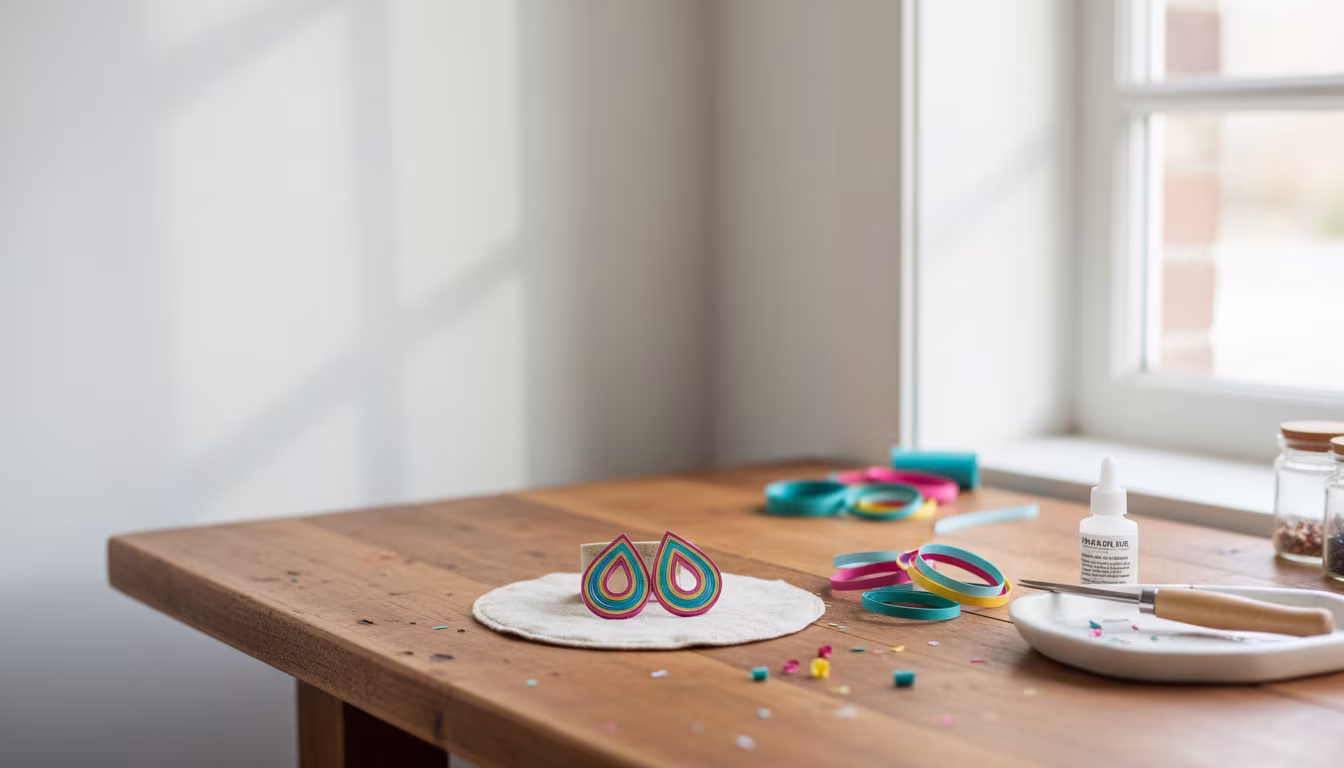
Why Quilling Earrings Are the Most Profitable Craft to Sell Online
Thinking about starting a craft business? You might be surprised to learn that delicate, colorful...
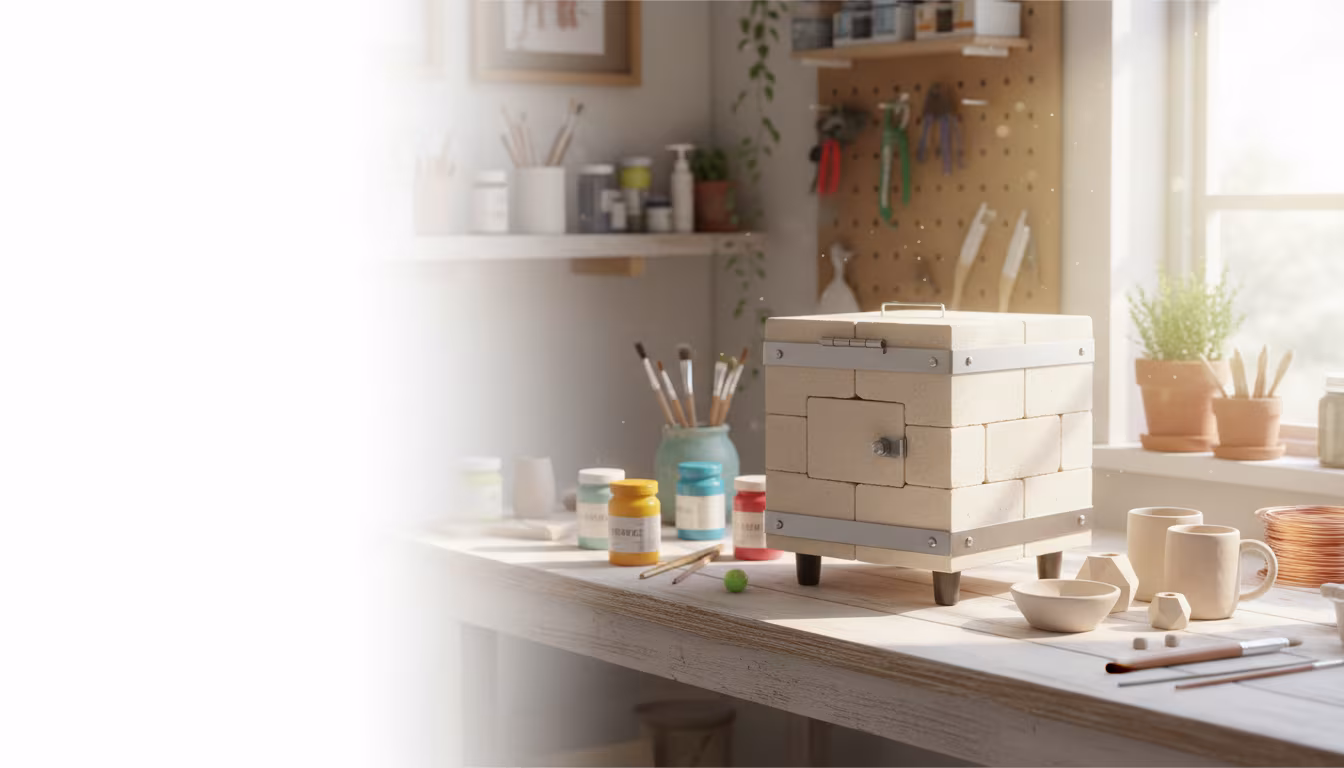
How to Build a Tabletop Kiln for Small Ceramic Projects
Dreaming of firing your own small ceramic creations at home? This beginner-friendly guide shows y...