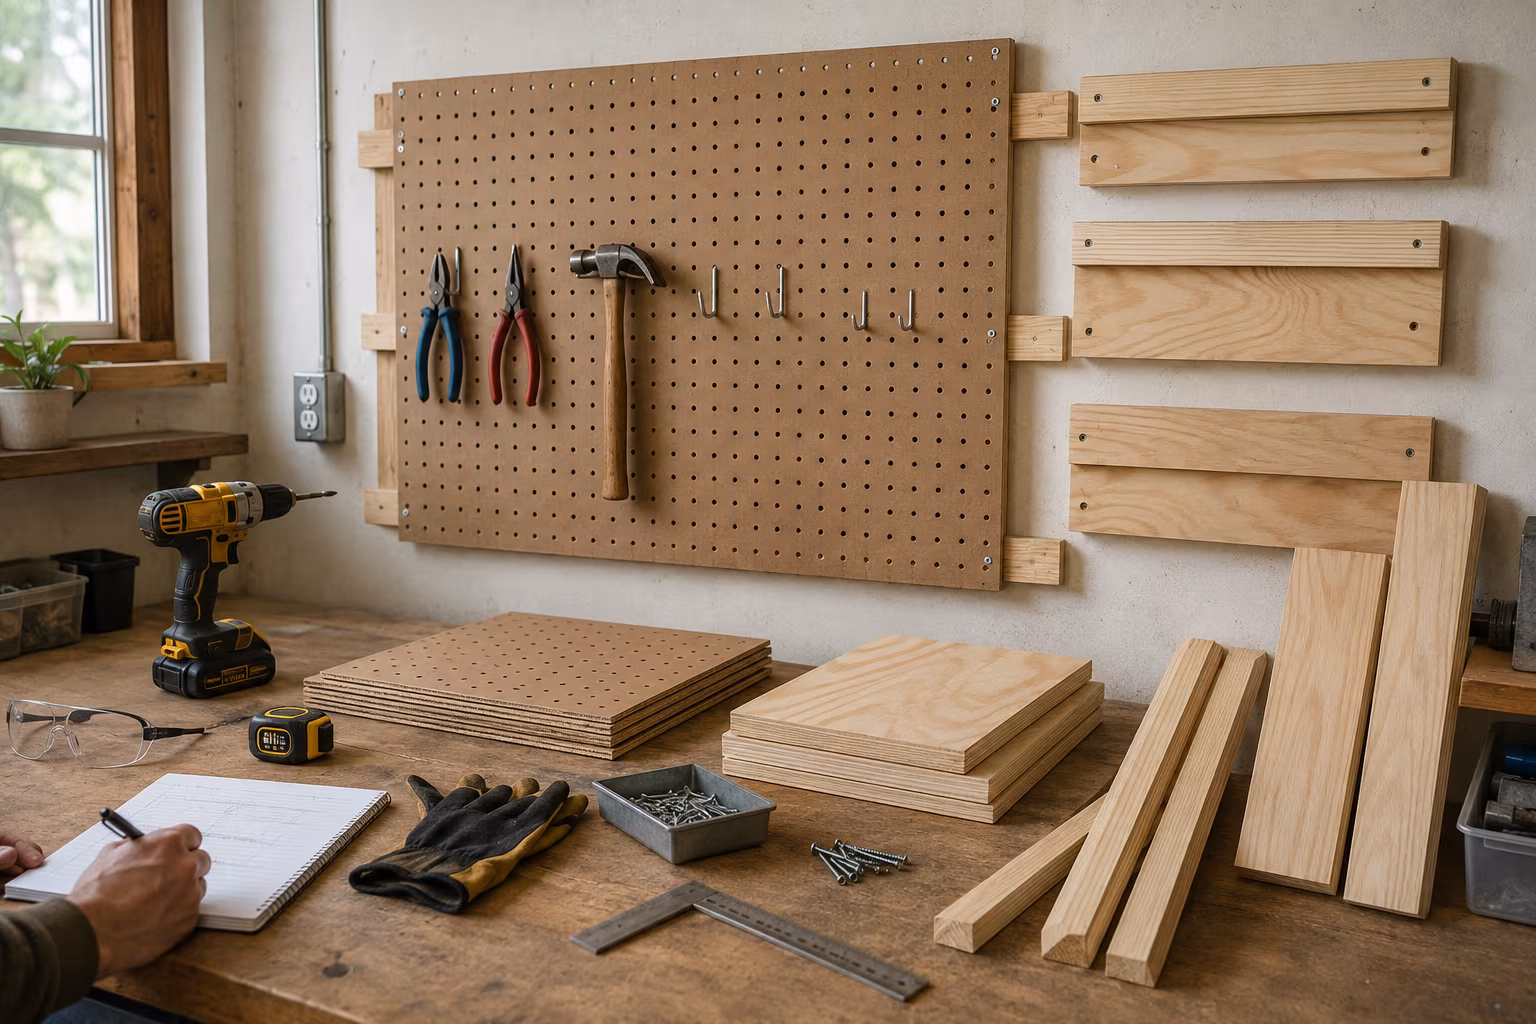
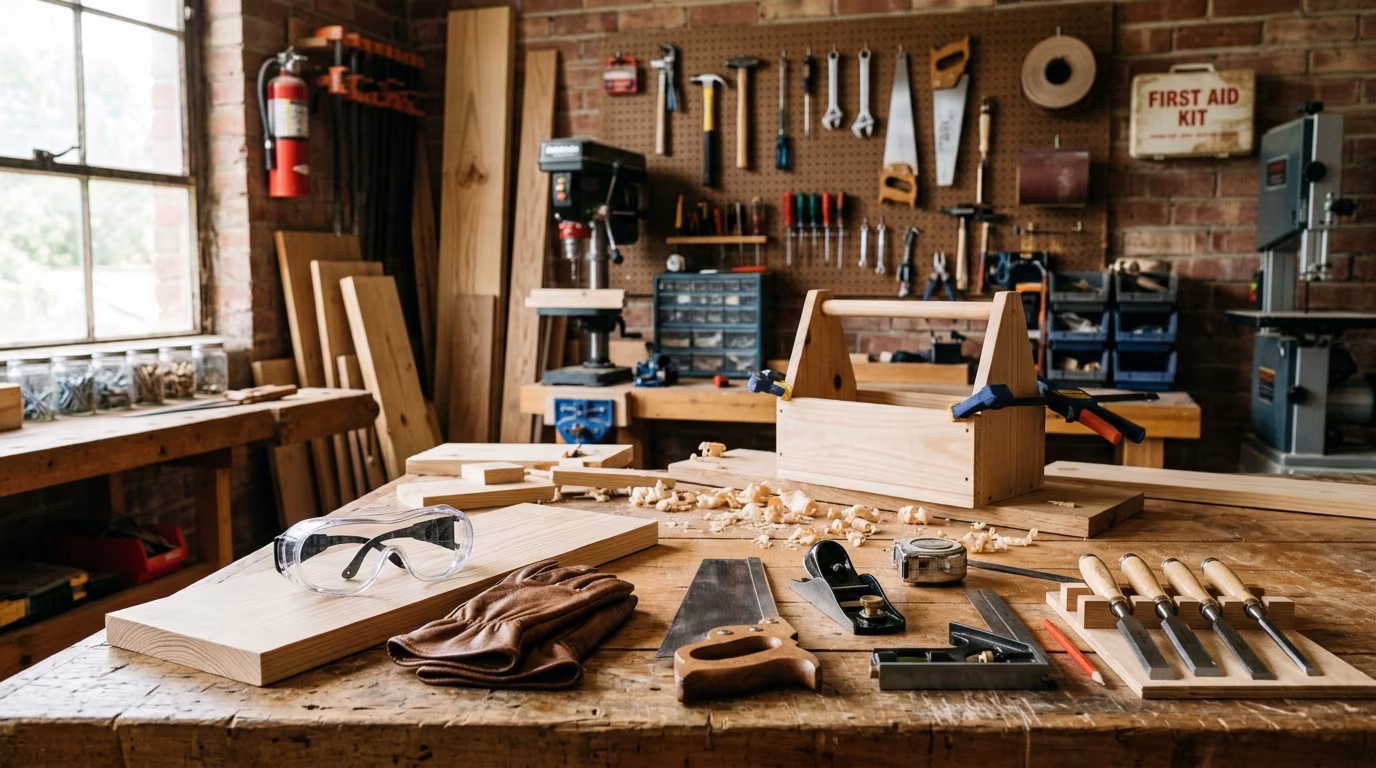
Pegboard vs French Cleat: The Honest Tool Wall Choice

The short answer
Pegboard is fast, cheap, and limited to light tools — typical hardboard pegboard holds about 50 pounds across a whole 4x8 sheet, and individual pegs hold only a few pounds each. It is the right answer for hand tools, organisers, small accessories, and anything you want to rearrange every few months without effort.
French cleat is slower to build, costs more in lumber, and is the right answer for everything heavier than that. A 3/4-inch plywood cleat anchored to studs can hold 100+ pounds per cleat, and a properly built cleat wall with multiple horizontal rails can store cordless tools, jigs, large clamps, and storage cabinets. The trade-off is build time: a pegboard goes up in an afternoon; a French cleat wall with custom holders is a weekend project that grows over months.
For most home shops, the right answer is both — pegboard above the bench for grab-and-go hand tools, French cleat for the heavier wall around it. The two systems do different jobs and trying to make either one do both leads to disappointment.
Weight capacity: where pegboard hits its ceiling
A standard 1/4-inch hardboard pegboard panel rated at the typical home-improvement-store grade holds a few pounds per peg, and a fully loaded sheet maxes out around 50 pounds spread evenly. Heavier individual loads bend the pegboard between supports, eventually deforming the board permanently and pulling pegs out of round.
The heavier upgrade is metal pegboard (typically 22-gauge steel with formed peg holes) or thicker pegboard. Metal pegboard easily holds 100-200 pounds per panel; some industrial-grade systems hold significantly more. The peg holes do not deform under load, and the pegs themselves can be heavier-gauge.
For reference, common shop items and approximate weights to keep in mind when planning a pegboard:
Hand planes, large clamps, heavy circular saws: too heavy for hardboard pegboard, fine on French cleat or metal pegboard.
Screwdrivers, pliers, wrenches, small clamps: well within hardboard pegboard.
Cordless drills and impact drivers (4-7 pounds): borderline on hardboard pegboard; supportable on metal pegboard or French cleat with a proper holder.
Levels, squares, and other long flat items: pegboard works but the long lever arm stresses individual pegs; French cleat with a custom holder is more durable.
French cleat by contrast holds whatever the wall structure behind it can hold. A 3/4-inch plywood or pine cleat screwed into studs every 16 inches with proper screws (#10 wood screws at least 2.5 inches long, into studs not just drywall) supports 100-200 pounds per cleat without strain. Multiple cleats spread that load further.
Customisation and changeability
Pegboard's greatest virtue is fast reconfiguration. Pull a peg out, push it into a different hole, done. The standard peg spacing (one inch on centre for most consumer pegboard) gives an enormous number of placement options on a single panel.
The downside is that pegs come in standard shapes — single hook, double hook, J-hook, shelf, ring. Tools that do not match a standard shape end up with awkward mounting compromises. A handsaw hangs from one or two pegs by its blade hole, but a Japanese saw with no blade hole has nowhere to hang.
French cleat reverses these properties. Each individual holder is custom — a sized pocket for the specific tool, a clamp shape for the specific clamp, a shelf at the specific depth needed. Tools that did not fit any pegboard hook get exactly the right holder on a cleat wall. The downside is the custom holders take time to build, and changing the layout requires unscrewing and remounting holders one at a time.
In practice, cleat walls grow incrementally. Build the cleat wall first; build holders as you find tools that need them. The wall fills up over months. Workshop owners describe this as the most rewarding part of cleat systems — every new holder solves an annoyance.
Cost in materials and time
Hardboard pegboard is among the cheapest wall storage you can buy. A 4x8 sheet of 1/4-inch hardboard pegboard costs much less than the same area in plywood (confirm current pricing at your local hardware store before purchase, as of 2026), plus furring strips to space it off the wall, plus a pack of pegs. Installation is typically under an hour: screw furring strips to studs, screw the pegboard to the strips, hang pegs.
Metal pegboard panels cost several times more per square foot and require more careful mounting, but the install time is similar.
French cleat materials: 3/4-inch plywood cut into 2-3 inch strips with a 30 or 45 degree bevel along one edge. A single 4x8 sheet of 3/4-inch plywood yields enough cleats for a fairly large wall, plus enough scrap for many holders. The cleats themselves install in an hour or two; the custom holders accumulate over weeks of weekend work.
The time difference is real. Pegboard is up and storing tools the day you start. French cleat is up and storing some tools the day you finish the cleats; storing all tools well takes months as holders are built.
For a workshop that needs to be functional immediately and you can revisit later, pegboard wins on speed. For a workshop being built deliberately over a year, French cleat wins on long-term outcome.
Aesthetics: how each one looks
Fully loaded pegboard reads as busy. The eye sees many small objects against a perforated background, and the visual texture is dense regardless of how organised the tools are. Some shop owners like the worked-on look; others find it visually exhausting after a year.
French cleat reads cleaner because the holders themselves are wood-toned and integrate with the wall, and the tools sit in holders rather than dangling from hooks. The cleat lines themselves are nearly invisible behind the holders; the wall reads as a series of organised modules.
A half-empty pegboard looks unfinished. A half-empty French cleat wall looks normal because the cleats themselves are unobtrusive.
For a shop that doubles as a display space (workshop tours, photography for content, customer-facing space), French cleat almost always wins on visual quality. For a pure working shop where appearance matters less than function, pegboard's busy look is irrelevant.
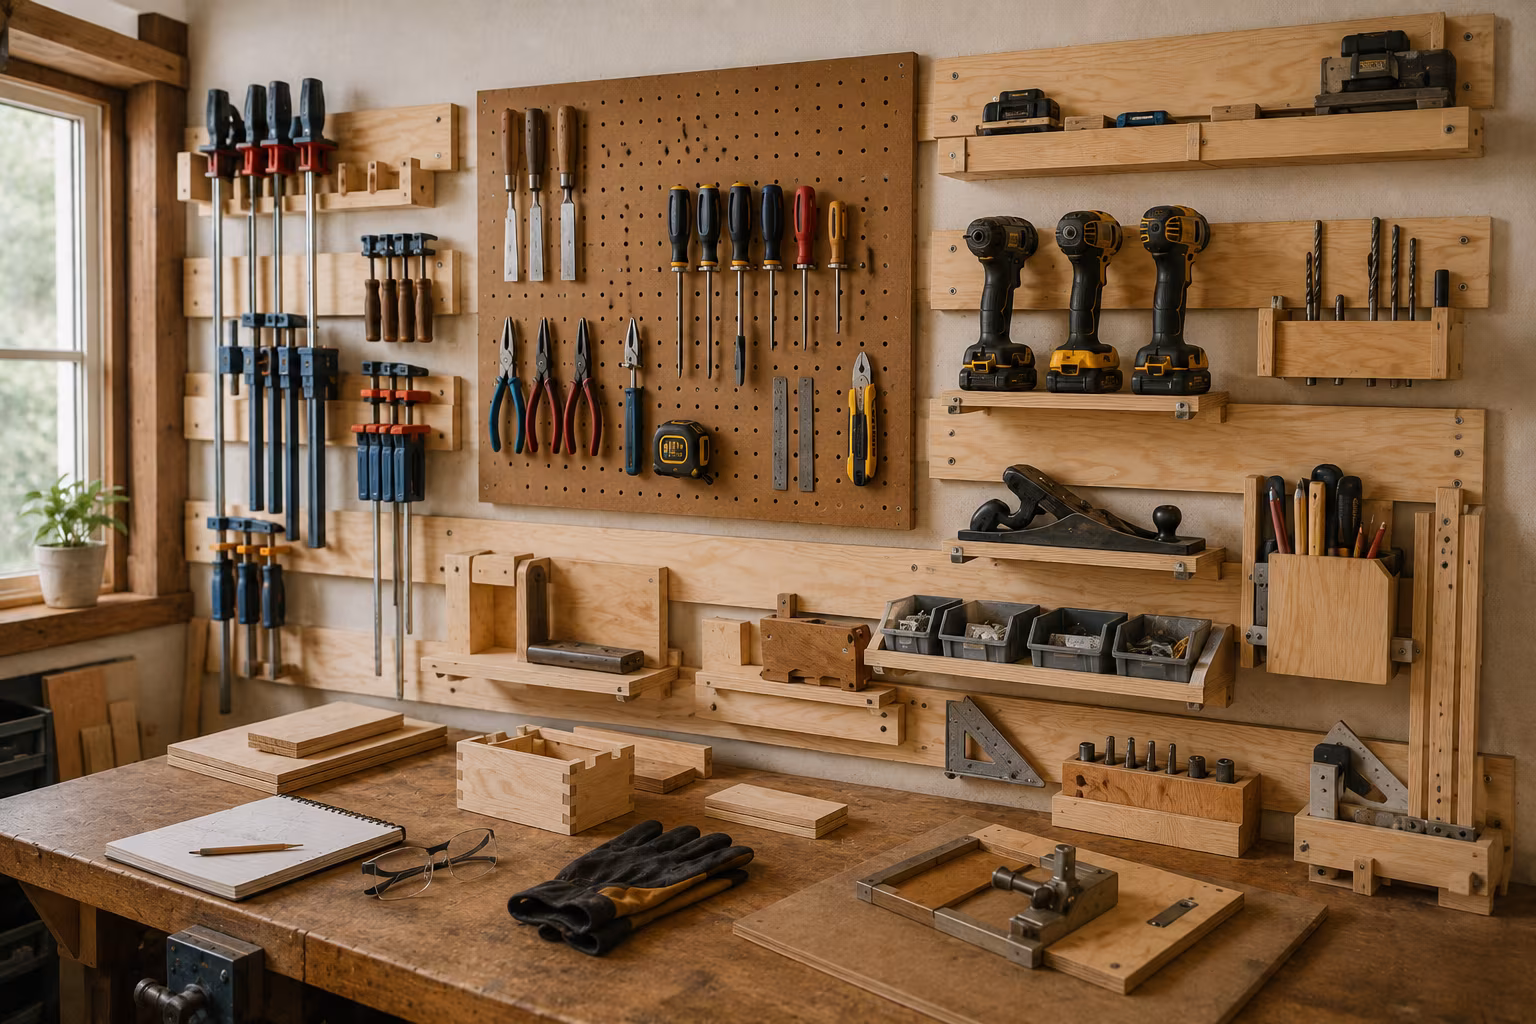
Combining both on the same wall
The hybrid approach: a section of pegboard directly above the workbench for hand tools used constantly (screwdrivers, chisels, marking gauges, hammers), and French cleat on the larger surrounding walls for everything heavier or oddly shaped.
The pegboard section gives instant rearrangement for tools that move around the workflow. The French cleat section gives the rest of the wall its load capacity and visual cleanliness.
In this hybrid, mount the pegboard inside a frame that visually contains it — say, a 3-foot wide by 2-foot tall pegboard panel above the bench, framed by cleat material on the sides. The framing edges hide the pegboard's busy edges and integrate the system into the cleat wall.
Do not try to mount pegboard on cleats. The pegboard panel itself is too flexible to span between cleats reliably, and the result is a bouncy, awkward surface. Pegboard wants its own frame and furring; cleats want their own wall.
When each one is genuinely the wrong choice
Do not use pegboard for: cordless drills and impact drivers (the weight and shape are not what pegs are designed for), large clamps, hand planes, levels longer than about 24 inches, anything you fear dropping on your foot if the pegs pop.
Do not use French cleat for: very lightweight rapidly-rearranged items where the build time outweighs the benefit; in rental spaces where stud-anchored screws are not allowed (cleats lose most of their advantage when only attached to drywall); on walls under 24 inches wide where there is not enough cleat length to be useful.
Do not use pegboard on un-furred walls. Pegboard must be spaced about 1/2 to 3/4 inch off the wall so pegs can clip through. Mounting it flat to the wall removes the clip space and the pegs cannot hold.
Do not use French cleat without anchoring to studs. A cleat fastened only to drywall anchors will hold light loads briefly and fail under any real load, and the failure mode is the entire wall section falling at once.
A practical hybrid setup
For a typical single-bay garage shop, the workable layout is:
A 3-4 foot wide pegboard section directly above the workbench, holding hand tools used multiple times per project — chisels, screwdrivers, files, the most-used pliers, measuring tape, marking knife.
French cleat covering the rest of the bench wall and at least one full adjacent wall, holding cordless tools in custom holders, larger clamps grouped together, jigs and templates on shelf holders, and storage boxes for fasteners and small parts.
Budget about a weekend for initial cleat wall install plus the pegboard, then plan to add new holders as you find tools that need them. Most shops report the cleat wall is still being added to two years after the initial install — that is the system working as designed.
For a basement shop with shorter walls, pegboard above the bench plus a single large cleat panel on one section of wall covers most needs. For a true large workshop with multiple workstations, cleat dominates and pegboard remains in small task-specific zones.
The combination beats either alone in almost every shop. The mistake is choosing one system on principle and forcing it to do work the other does better.
Build order and small details that pay back
For French cleat, mill all the cleats from a single sheet of plywood with the same blade setting in one session. Consistent cleat dimensions mean every holder you build later will fit every cleat on the wall. Mixed-batch cleats with slightly different angles or thicknesses create holders that fit some cleats but not others, which is the most annoying mistake to discover six months in.
The wall-mounted cleats should run horizontally, not vertically. A vertical cleat takes loads poorly because the holder's weight wants to slide down. Horizontal cleats locked between studs hold gravity in their favour.
Space horizontal cleats four to six inches apart vertically. Closer than four inches and large holders cannot fit between cleats; farther than six inches and small tools have no place to mount cleanly. Four-and-a-half inches is a common spacing that works for most tool sizes.
Mark cleat positions on the wall before mounting so they are level across the whole wall. A cleat that runs at a one-degree slope across a long wall is visually disturbing once tools hang on it.
Holder design that prevents tools from falling
The basic French cleat holder is a backing piece with the matching cleat angle cut on top, plus a pocket, hook, or shelf for the tool. The backing piece must hang from the cleat with enough fabric below the cleat to keep the holder from tilting forward — a backing piece that is too short pivots forward and the tool falls off.
A rule of thumb: the backing piece should extend at least three to four inches below the lower edge of the cleat. Heavier tools want longer backing pieces. The backing also benefits from a small bumper at the bottom (a strip of self-adhesive rubber, a small wood block) that contacts the wall behind the cleat and prevents the holder from rocking under load.
For tools that are heavy and tall (jigsaws, planers, large drills), the holder should grip the tool not just hang it from a handle. A pocket sized to the tool's body, secured with a small clip or pin, keeps the tool from rocking or working loose with vibration.
Label each holder discreetly. A small label on the back of the holder helps when reorganising, because it is easy to forget which holder fits which tool once they are off the wall during a remodel.
Lighting and the pegboard-cleat wall
A tool wall in shadow is half-useful. Mount task lighting above the tool wall — a strip LED light at the top of the wall or a pair of small adjustable lights illuminates both pegboard hooks and cleat pockets and prevents the wasted minutes of squinting at a corner to identify the right driver.
Avoid placing lights directly in front of the wall (between viewer and tools), which casts the viewer's shadow onto the wall. Lights above and slightly forward give the best illumination.
LED strip lights last for years on average use and run cool enough that they are safe near wooden cleats. Halogen and incandescent fixtures generate heat that has stopped being a reasonable choice for any shop lighting; the LED upgrade pays back in both energy and safety.
Related Posts

The Complete Guide to Starting a Fiber Arts Guild in Your Town
Dreaming of a local hub for knitters, crocheters, weavers, and more? Starting a fiber arts guild ...
Why Tool Libraries Let You Try Expensive Hobbies Before Committing
Dreaming of diving into woodworking or pottery but worried about the cost of specialized tools? T...
How to Plan a Nature Journaling Walk and Sketch Workshop
Ready to blend your love for nature with your creative spirit? Learn how to plan and host your ve...
How to Host a Beginner Woodworking Safety and Skills Workshop
Ready to share your love for woodworking? Learn how to put together a beginner-friendly workshop ...