How to Build a Tabletop Kiln for Small Ceramic Projects
How to Build a Tabletop Kiln for Small Ceramic Projects
Okay, confession time. I’ve always been a bit intimidated by ceramics. The idea of needing a massive, expensive kiln to fire even a tiny little pinch pot felt like a huge barrier. Like, where do you even put one of those things in a city apartment, right?
But what if I told you that you can fire your own small ceramic pieces right at home, without needing a dedicated studio or taking out a second mortgage? Today, we're going to dive into building a super simple tabletop kiln that’s perfect for beginners and small-scale projects. We'll cover the why, the how, and all the little nitty-gritty details I learned along the way.
Why This Actually Matters
Let's be honest, the biggest hurdle for many of us wanting to try ceramics is the firing process. Going to a community studio or sending your work out can be time-consuming and costly, especially if you're just experimenting or making small gifts. Having your own small kiln means instant gratification and complete creative control over your projects.
Last year, I was working on these tiny little sculpted animals, no bigger than my thumb. I wanted to glaze them and have them ready for a craft fair the following weekend. Sending them out meant a week's turnaround, and that just wasn't going to cut it. Building a small kiln felt like my only option to get them done on my own timeline.
The Magic of a Small Kiln
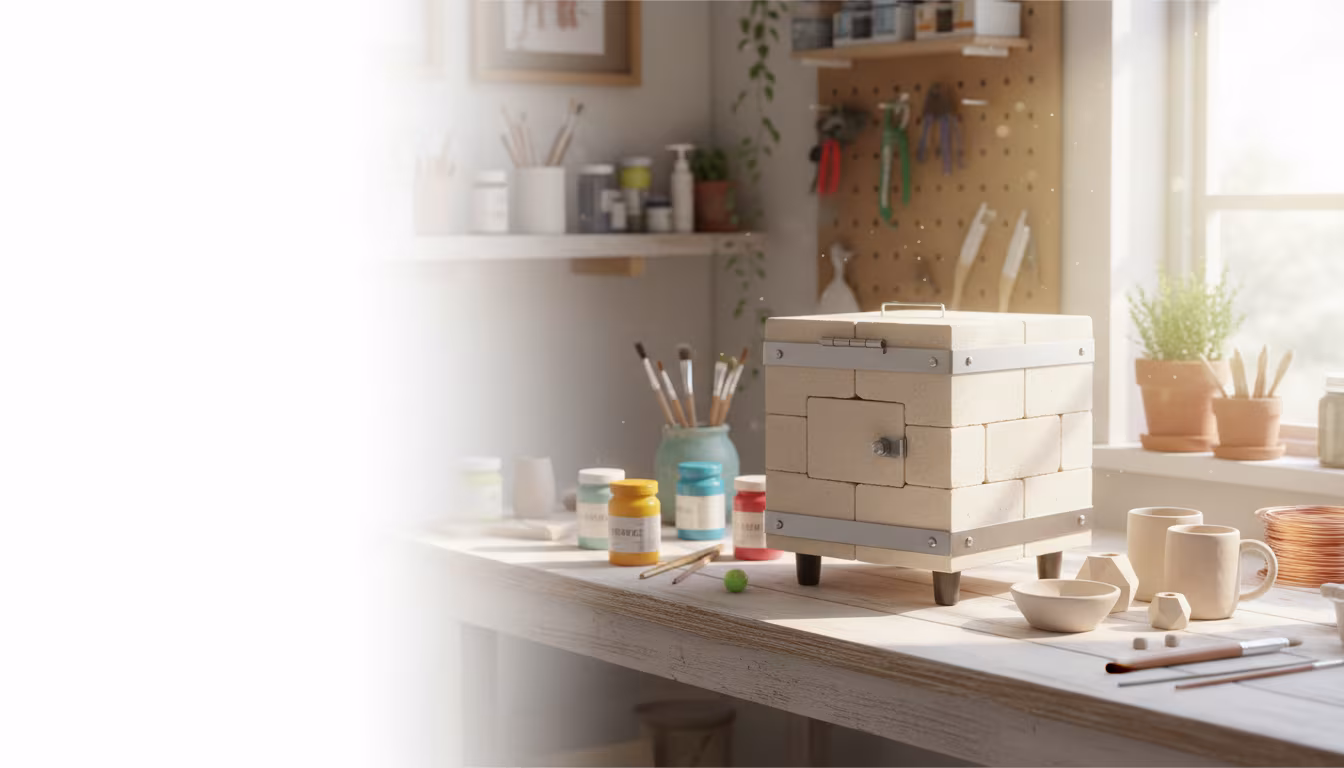
So, what exactly are we building here? We're essentially creating a miniature, insulated chamber that can reach the high temperatures needed to harden and fuse clay – that’s firing! Think of it as a super-powered, high-heat oven specifically designed for pottery. It's not going to fire large sculptures or delicate porcelain, but for small, earthenware pieces, it's a game-changer.
What This Kiln Can Do (and Can't)
This type of DIY kiln is fantastic for smaller projects, like earrings, small figurines, decorative tiles, or even those cute little ring dishes you see everywhere. It's perfect for bisque firing (the first firing that makes the clay hard but porous) and low-fire glazing. You won't be reaching the super high temperatures needed for stoneware or porcelain, but for many beginner projects, this is more than enough.
- Bisque Firing: This is the essential first step that turns your fragile greenware into sturdy ceramic pieces ready for glazing.
- Low-Fire Glazing: You can apply glazes that mature at lower temperatures, giving you a beautiful, durable finish.
- Small Batch Firing: It's ideal for small items, allowing you to fire a few pieces at a time without needing a huge industrial kiln.
- Not for High-Fire Ceramics: This setup typically won't reach the temperatures required for stoneware or porcelain, so keep your clay choice in mind.
Gathering Your Supplies
This is where the thrift store hunting and online browsing really kicks in. I’ve found that combining a few carefully chosen new items with some salvaged bits can save a ton of money. The key is to find materials that can withstand high heat and provide good insulation.
The Core Components
The heart of our kiln will be a heat-resistant container, usually something like a sturdy metal bucket or an old propane tank (emptied and cleaned, of course!). You’ll also need insulation to keep that heat inside. Think vermiculite, perlite, or even old ceramic fiber blankets if you can find them affordably. Don't forget some heat-resistant bricks or fire tiles to create a base and shelf inside.
- Outer Shell: A metal bucket (at least 5-gallon size) or a cleaned propane tank works well.
- Insulation: Vermiculite or perlite mixed with a binder (like cement or refractory cement) is common. You can also use pre-made ceramic fiber blanket.
- Heating Element: For simplicity, many DIY kilns use an electric heating coil designed for kilns or even a modified toaster oven element (use extreme caution here!).
- Refractory Bricks/Tiles: These form the internal structure and shelf.
- Thermocouple and Controller (Optional but Recommended): To accurately monitor and control temperature.
Where to Find Deals
I've had the most luck scavenging for parts. Old metal buckets show up at garage sales all the time for a dollar or two. Construction sites sometimes have discarded refractory bricks. For the heating element and controller, you might need to check specialized ceramic supply stores or online marketplaces, as these are harder to DIY safely.
For my kiln, I found a sturdy, old galvanized bucket for $3 at a flea market. It was a bit rusty, but the metal was thick. I also scored a bag of vermiculite for cheap at a garden supply store. The trickiest part was finding a suitable heating element – I ended up buying one online after a few unsuccessful trips to hardware stores.
Let's Get Building!
Alright, deep breaths. This part is exciting but requires focus. We're going to take these scattered bits and turn them into something functional. Remember, safety first! If you're not comfortable with electrical components, this is where a friend with more experience, or even a local maker space, can be a lifesaver.
Step 1: Preparing the Shell
First, clean out your outer container thoroughly. If you're using a metal bucket, make sure there are no sharp edges. You'll want to decide where your heating element will go – usually through the side or bottom, depending on your design. Carefully drill or cut a hole for this, ensuring a snug fit.
I ended up drilling a hole near the bottom of my bucket. It took a few tries with different drill bits because the metal was tougher than I expected. Make sure the hole is just large enough for your element to fit through without being loose, so you can seal it later.
Step 2: Installing the Heating Element
This is probably the most critical step for safety and function. You'll need to securely mount your heating element inside the shell. Ensure it's positioned so it won't be directly touched by your ceramic pieces. Many heating elements come with mounting brackets or insulators that you'll use here.
Be extra careful with electrical connections. If you're using a pre-made kiln element, follow its instructions religiously. If you're modifying something else, make absolutely sure you understand what you're doing and that all connections are insulated and protected from heat and potential damage.
Step 3: Building the Inner Chamber and Insulation
Now, we create the space where the magic happens. Use your refractory bricks to build a small inner chamber, leaving space around it for insulation. You'll also build a small shelf inside using more bricks or a fire tile. This shelf needs to be sturdy enough to hold your greenware or glazed pieces.
I used a mixture of vermiculite and refractory cement for my insulation. It’s messy stuff, so wear gloves and a mask! You mix it according to the cement instructions, then pack it around the inner brick structure, filling the space between the inner chamber and the outer shell. This layer needs to be several inches thick all around to hold in the heat.
Step 4: Sealing and Finishing
Once your insulation is in place and has had time to cure (follow the cement's instructions on drying time – this is important!), you can seal any gaps. High-temperature sealant or refractory cement is your friend here. You'll want to ensure there are no major drafts that will let heat escape.
You'll also need a way to get the power cord safely into the kiln and potentially a small vent or opening for any fumes. Again, consult specific DIY kiln plans for best practices on ventilation and cord management. For my bucket kiln, I sealed around the heating element entry point with refractory cement, and it held up surprisingly well.
Step 5: Testing and Firing
Before you put any precious ceramic pieces in there, you MUST test it. Plug it in, turn it on, and monitor the temperature. Let it run for a few hours. Does it get hot? Does it hold temperature? Are there any smoky smells (besides the initial curing smell)? Did the insulation hold up?
My first test run was a bit nerve-wracking. I hooked up a thermometer and watched it climb. It took a good hour to get to about 1000°F (538°C), which is a decent starting point for low-fire bisquing. I let it run for a few hours, and the insulation seemed to be doing its job, with the outside of the bucket only getting warm to the touch (not hot!).
Tips for Successful Firing
So, you've built your kiln. Hooray! Now comes the fun part – actually firing your ceramics. It's a different process than using a commercial kiln, and there are a few things to keep in mind to get the best results and keep your kiln happy.
Loading Your Kiln
Don't overcrowd the kiln. Your pieces need space around them for even heat distribution. Make sure nothing is touching the heating element. I like to stack my smaller items on kiln shelves or fire bricks, ensuring there's space between each item.
For my tiny animal sculptures, I placed them on a small fire brick I had cut to size. I made sure there was at least an inch of space between each one and the walls of the kiln, and a bit more space above them.
Firing Schedules
You'll likely need a simpler firing schedule than with a commercial kiln. For bisque firing earthenware, you’re aiming for around 1700-1800°F (927-982°C). This might take several hours to reach and hold. Glaze firing temperatures will depend on your specific clay and glaze, but for low-fire, you're probably looking in the 1800-1900°F (982-1038°C) range.
With my DIY setup, I've found it takes about 2-3 hours to reach a good bisquing temperature, and then I let it "soak" at that temperature for another hour by just leaving it on. Cooling is just as important as heating; let it cool completely before opening!
Safety First, Always
This can't be stressed enough. Work in a well-ventilated area, especially during the initial curing and first few firings. Never leave a DIY kiln unattended while it's on. Have a fire extinguisher nearby. Understand the electrical components you're working with. If anything smells off or looks wrong, turn it off immediately.
Building your own kiln is incredibly rewarding, but it’s also a powerful tool. Treat it with respect and always prioritize safety.
Common Pitfalls to Avoid
Even with the best intentions, things can go wrong. I’ve definitely learned some lessons the hard way, and I’m happy to share them so you don't have to repeat my mistakes!
Using the Wrong Materials
Not all materials can handle the heat. Using regular bricks or metal that isn't designed for high temperatures can cause your kiln to crack, warp, or even fail catastrophically. Always use refractory materials for anything that will be inside the hot zone.
My first attempt at an internal shelf used a piece of terracotta tile. It looked fine, but during the first firing, it cracked right down the middle, sending my tiny clay mushroom tumbling. Oops. Lesson learned: stick to fire bricks or dedicated kiln shelves.
Overcrowding and Poor Airflow
It's tempting to cram as many pieces as possible into your kiln, especially when you're only firing a few items at a time. But this is a recipe for uneven firing. Pieces that are too close together won't get enough heat, and you'll end up with parts of your glaze not melting properly or your clay not fully hardened.
Make sure there's ample space between each piece, and between the pieces and the kiln walls. Think about how the heat will flow around everything.
Opening Too Soon
The urge to peek inside and see your finished work is powerful, I know! But opening a kiln while it's still hot is dangerous for you and bad for your ceramics. Thermal shock can cause glazed pieces to crack or even explode. Be patient and let it cool down completely – usually overnight.
Ignoring Temperature Control
Without a controller and thermocouple, you're essentially guessing the temperature. This can lead to underfiring (pieces aren't hard) or overfiring (pieces melt or warp). While you can get by with just watching a heat gauge, investing in a basic controller will save you a lot of heartache and wasted clay.
Frequently Asked Questions
Can I really fire pottery with a DIY kiln?
Yes, absolutely! For small projects and lower firing temperatures (like earthenware and low-fire glazes), a well-built DIY kiln can be incredibly effective. It’s a fantastic way to get into ceramics without a huge initial investment.
What kind of clay should I use?
Stick to low-fire clays, often called earthenware. These clays are designed to mature at the temperatures your DIY kiln is likely to achieve. Avoid high-fire clays like stoneware or porcelain, as they require much hotter temperatures than most home-built kilns can safely reach.
How long does it take to fire a piece?
This varies greatly depending on your kiln design, the size of your load, and the temperature you're trying to reach. A full firing cycle (heating up, soaking, and cooling down) can easily take 12-24 hours or more. The actual "heating" portion might be 3-6 hours.
Is it safe to have a kiln in my garage?
Generally, yes, if you take the proper precautions. Your garage offers good ventilation and is usually a space where you don't have flammable materials right next to it. Always ensure the kiln is on a stable, non-flammable surface and away from anything that could catch fire. Never operate it indoors where people live or sleep.
What if I don't have a lot of space?
That's the beauty of a tabletop kiln! Designs like the bucket kiln are relatively compact. You can often scale down the design to fit your available space, as long as you maintain adequate insulation and internal volume for your pieces. It's perfect for a small workbench or a corner of your garage.
The Bottom Line
Building your own tabletop kiln is a rewarding project that opens up a whole new world of ceramic possibilities. It's about taking that leap from wanting to do something to actually doing it, even if it means a few missteps along the way.
Start small, prioritize safety, and don't be afraid to experiment. You might be surprised at what you can create with a little ingenuity and a whole lot of heat! Happy building! 👋
Related Posts
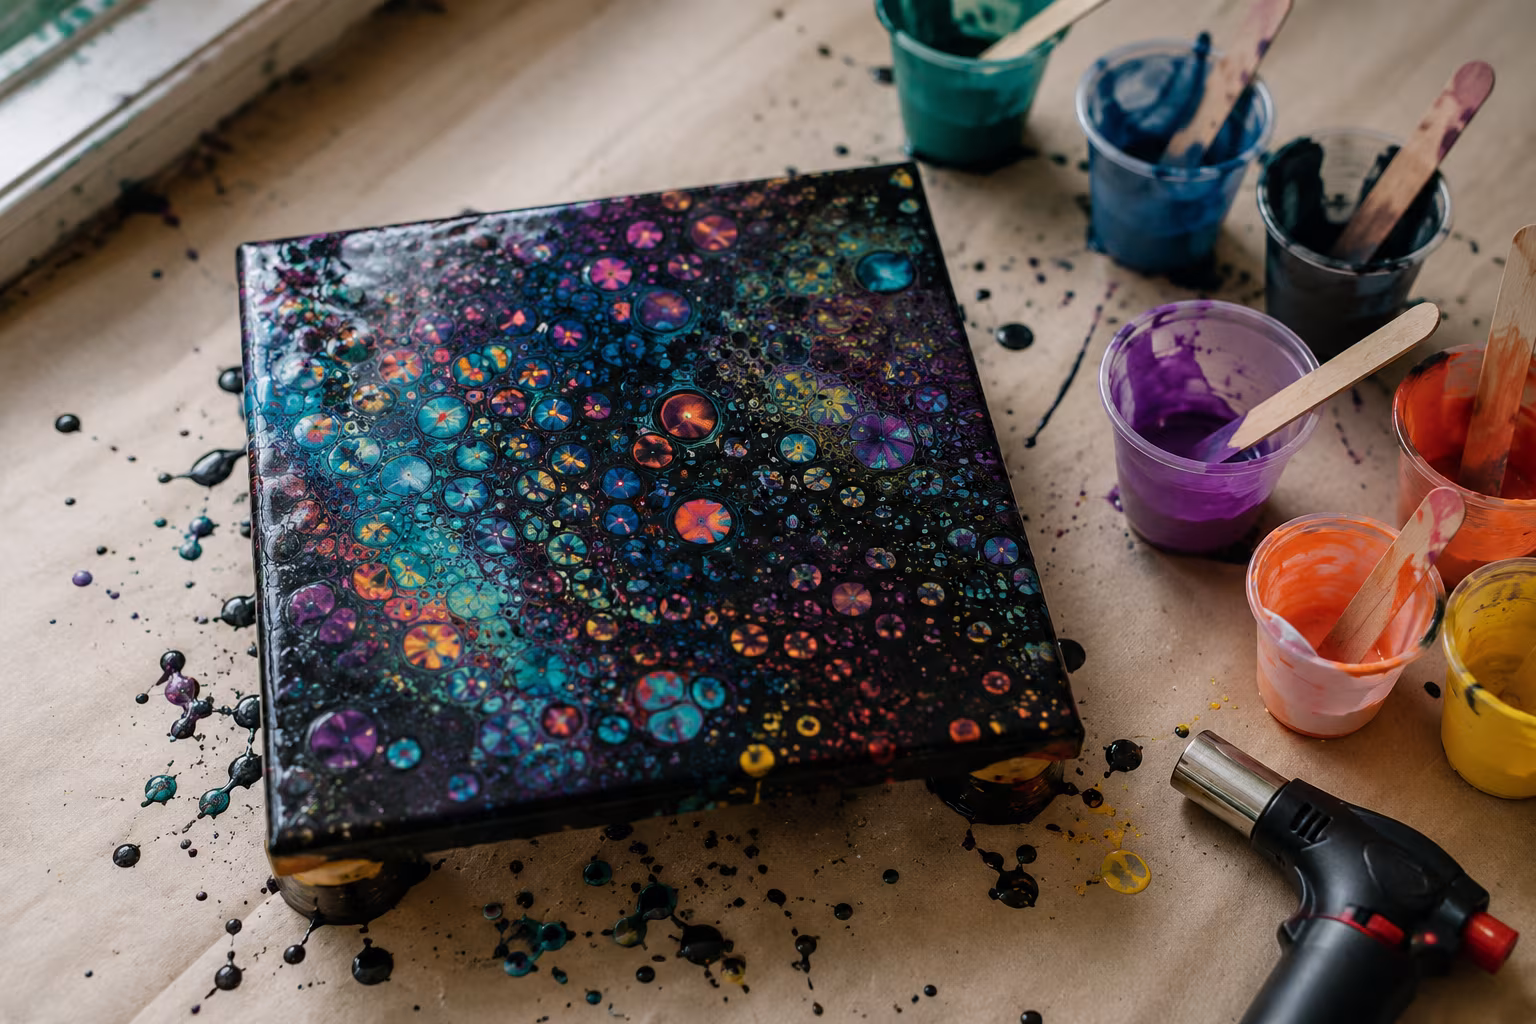
Acrylic Pouring Cells: Why They Form and How to Control
Cells in acrylic pouring come from density and surface tension differences. Understand the chemis...
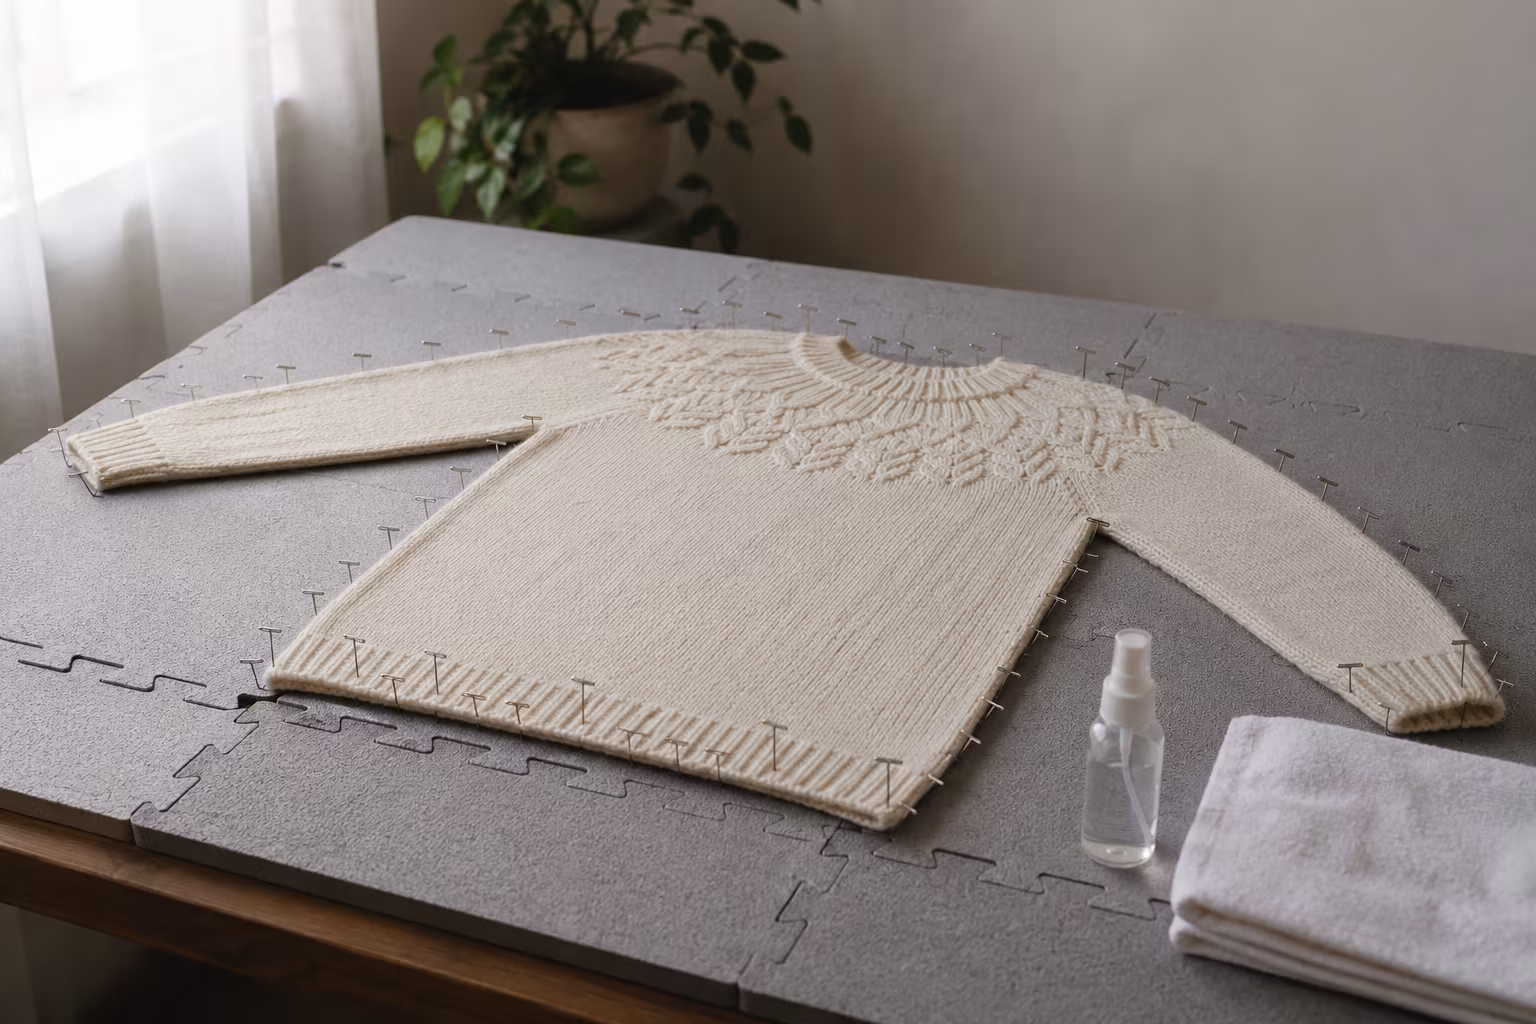
How to Block a Knitted Wool Sweater Without Felting
The blocking routine that opens stitches and sets the shape without turning your wool sweater int...
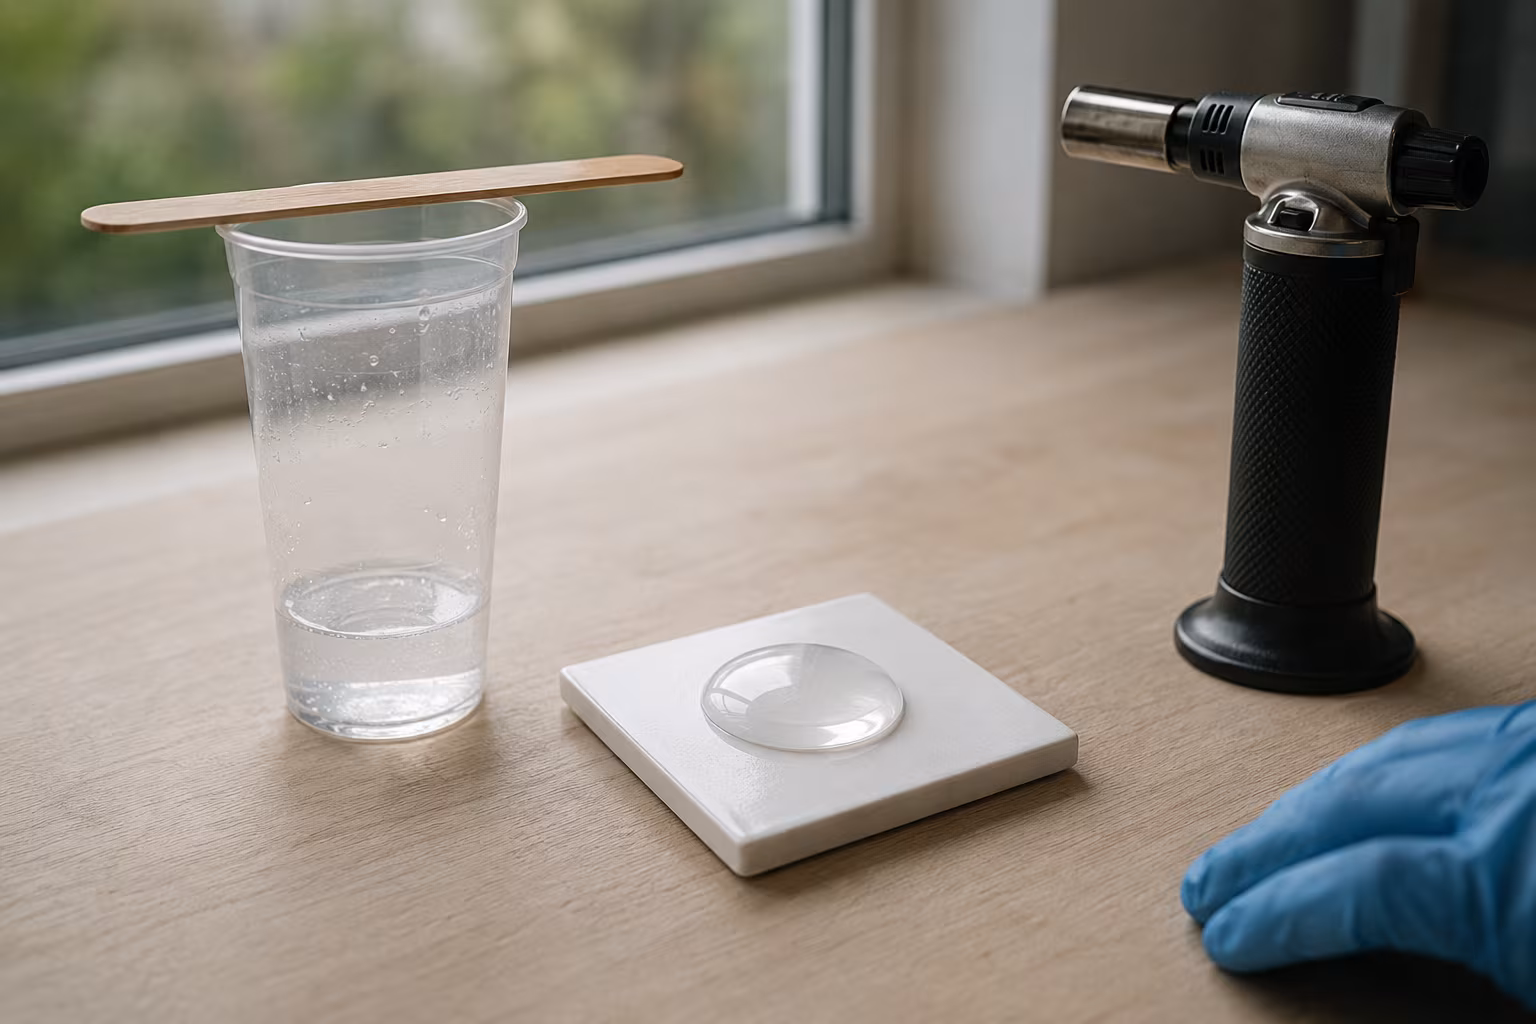
Resin Doming Without Bubbles: A Calm, Reliable Method
A repeatable doming routine that keeps bubbles out and the dome tidy — pour technique, heat metho...
Why Quilling Earrings Are the Most Profitable Craft to Sell Online
Thinking about starting a craft business? You might be surprised to learn that delicate, colorful...