Why Wainscoting Panels Make Plain Hallways Look High-End
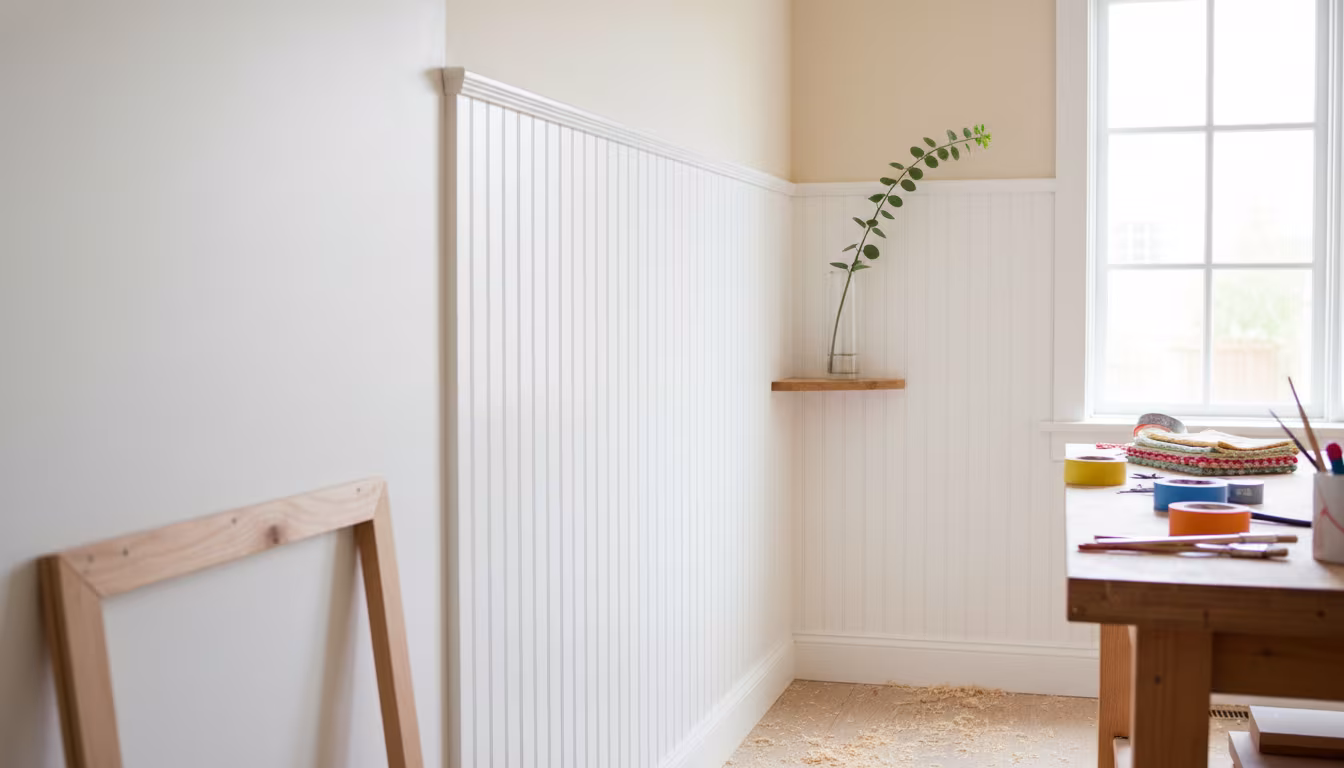
Wainscoting is decorative wood paneling applied to the lower portion of a wall, and in a plain hallway it does what paint alone cannot: it adds shadow lines, texture, and a horizontal break that makes the space read as deliberate rather than leftover. A basic beadboard or shaker-panel run using MDF and pine trim can be installed in a weekend for under $100 on a standard hallway, which is why it is one of the highest-impact interior upgrades a beginner can attempt.
The Main Styles and How to Choose
Wainscoting is an umbrella term for several distinct looks, and the style you pick sets both the difficulty and the cost:
- Beadboard — vertical grooved panels, casual and cottage-leaning. Sold in 4-foot-wide MDF sheets, it covers wall area fast and is the easiest for a first project.
- Flat panel — plain recessed rectangles, clean and modern. Built from thin plywood or MDF stiles and rails glued to the wall.
- Shaker — square recessed panels with clean lines, the most versatile middle ground between casual and formal.
- Raised panel — traditional and formal, with the center panel proud of the frame. It needs a router or a table saw and is the most demanding to build.
Traditional wainscoting stops at chair-rail height, roughly 32 to 36 inches from the floor. That proportion has held up for a reason: it sits below the eye and grounds the wall. You can run it higher (48 inches, or nearly to the ceiling for a dramatic effect) or lower for a subtle detail, but for a narrow hallway the classic 32-inch line is the safe choice and makes the corridor feel wider.
Planning, Materials, and Quantities
Measure the total linear feet of wall you plan to cover, then decide the height before you buy anything. For a 32-inch installation using 4-foot MDF beadboard, one sheet ripped down the middle yields two 24-inch strips or a single full-height run, so calculate coverage against the actual panel dimensions rather than guessing.
A typical hallway kit comes to: MDF beadboard sheets, a 1x3 pine cap rail for the top edge, cove or quarter-round trim to hide the seam where the cap meets the wall, construction adhesive, and 2-inch finishing nails. Buy at least 10 percent extra trim — mis-cuts on corners are the single most common reason for a mid-project hardware-store run. Tools you will actually need: a circular saw or a handsaw for the panels, a miter saw for clean 45-degree corner joints on the cap rail, a level, a nail gun (or a hammer and finishing nails), and a caulk gun.
Cost stays low because MDF beadboard runs a few dollars per square foot and pine trim is inexpensive. A short hallway commonly comes in under $100 in materials, with the paint and a tube or two of adhesive being the only recurring cost. If you do not own a nail gun, a hammer and 2-inch finishing nails work — you will just have more holes to fill and sand later. Locate the wall studs with a stud finder before you start so the cap rail can be nailed into solid framing rather than drywall alone.
Installing the Panels Step by Step
The sequence below assumes MDF beadboard with a pine cap rail, the most forgiving combination.
- Prep the wall. Fill any holes, sand smooth, and paint the wall section that will sit behind the panels first. Painting behind beadboard grooves after installation is nearly impossible, so do it now.
- Cut the panels. Measure twice, cut once with a circular saw. Test-fit each piece against the existing baseboard before committing — walls and floors are rarely square.
- Attach. Run a bead of construction adhesive on the back, press the panel to the wall, and set finishing nails along the top and bottom edges. Check plumb with a level on every panel; a small lean compounds across a run.
- Add the cap rail. Nail the 1x3 pine into the studs behind the panels. Miter outside and inside corners at 45 degrees, and stagger any butt joints on long walls so the seams do not line up.
- Fill and sand. Fill every nail hole with wood filler, let it cure fully, and sand flat. Caulk the seam where the cap rail meets the wall for a finished line.
- Prime and paint. If the MDF is not pre-primed, prime everything, then apply two coats of semi-gloss. Semi-gloss holds up to the scuffs and cleaning a high-traffic hallway takes.
Common Mistakes and How to Avoid Them
Most failed wainscoting jobs trace back to a handful of avoidable errors:
- Ignoring uneven walls and floors. If your baseboard is not straight, panels butted against it will look wonky. Shim behind the trim and close the gaps with caulk rather than fighting the wall.
- Skipping the level. Panels that are not plumb throw the whole run off. Check vertical on every piece and confirm the cap rail is dead level before nailing.
- Forgetting obstacles. Outlets, switches, and vent covers need to be planned around. Cut openings carefully and test the fit before adhesive goes on.
- Rushing the filler. Under-filled or poorly sanded nail holes show glaringly under paint. Run your hand over the surface — if you feel a bump, it will read once painted.
Start with a low-stakes area like a hallway or a powder room. The material cost is small, the technique is repeatable, and once the cap rail is capping a clean, level run of panels and the second coat of semi-gloss has dried, the corridor stops being a pass-through and starts reading as a designed part of the house.
Related Posts

Bathtub Resealing: When Silicone Beats Caulk and Vice Versa
Reseal a bathtub right: 100% silicone at the flexing tub-to-tile joint, acrylic caulk only on...

Fix Squeaky Hardwood Floors From Above (No Access)
Fix squeaky hardwood floors from above with no access below: talcum powder for board-on-board...

Replacing a Cracked Bathroom Tile Without Re-grouting
Swap one cracked bathroom tile with hand tools: score and saw the four grout joints, chisel the...

Patching Drywall Anchor Holes Without Sand-Through Halos
Make anchor-hole patches vanish instead of showing as halos: two thin spackle coats, sand only...