Cabinet Hinge Adjustment: Side, Depth, and Height Fix
The short answer
Modern European-style cabinet hinges — Blum, Salice, Grass, Hettich, Häfele — share the same three-axis layout: one screw moves the door left and right, one moves it in and out, one moves it up and down. The screw names differ by brand, but the diagnosis and the order never change. Fix side-to-side first, then depth, then height. Do height first and you create new side-to-side problems; do depth before side-to-side and the door sits wrong against the frame and pulls every later adjustment off.
None of this needs the door removed, the hinge unscrewed, or the mounting plate shimmed. If you are reaching for a chisel to mortise the hinge deeper, you have skipped the adjustment. Hardware makers such as Blum publish the exact screw functions for each hinge line, worth a look for an unfamiliar brand.
What each screw does, and reading the gaps
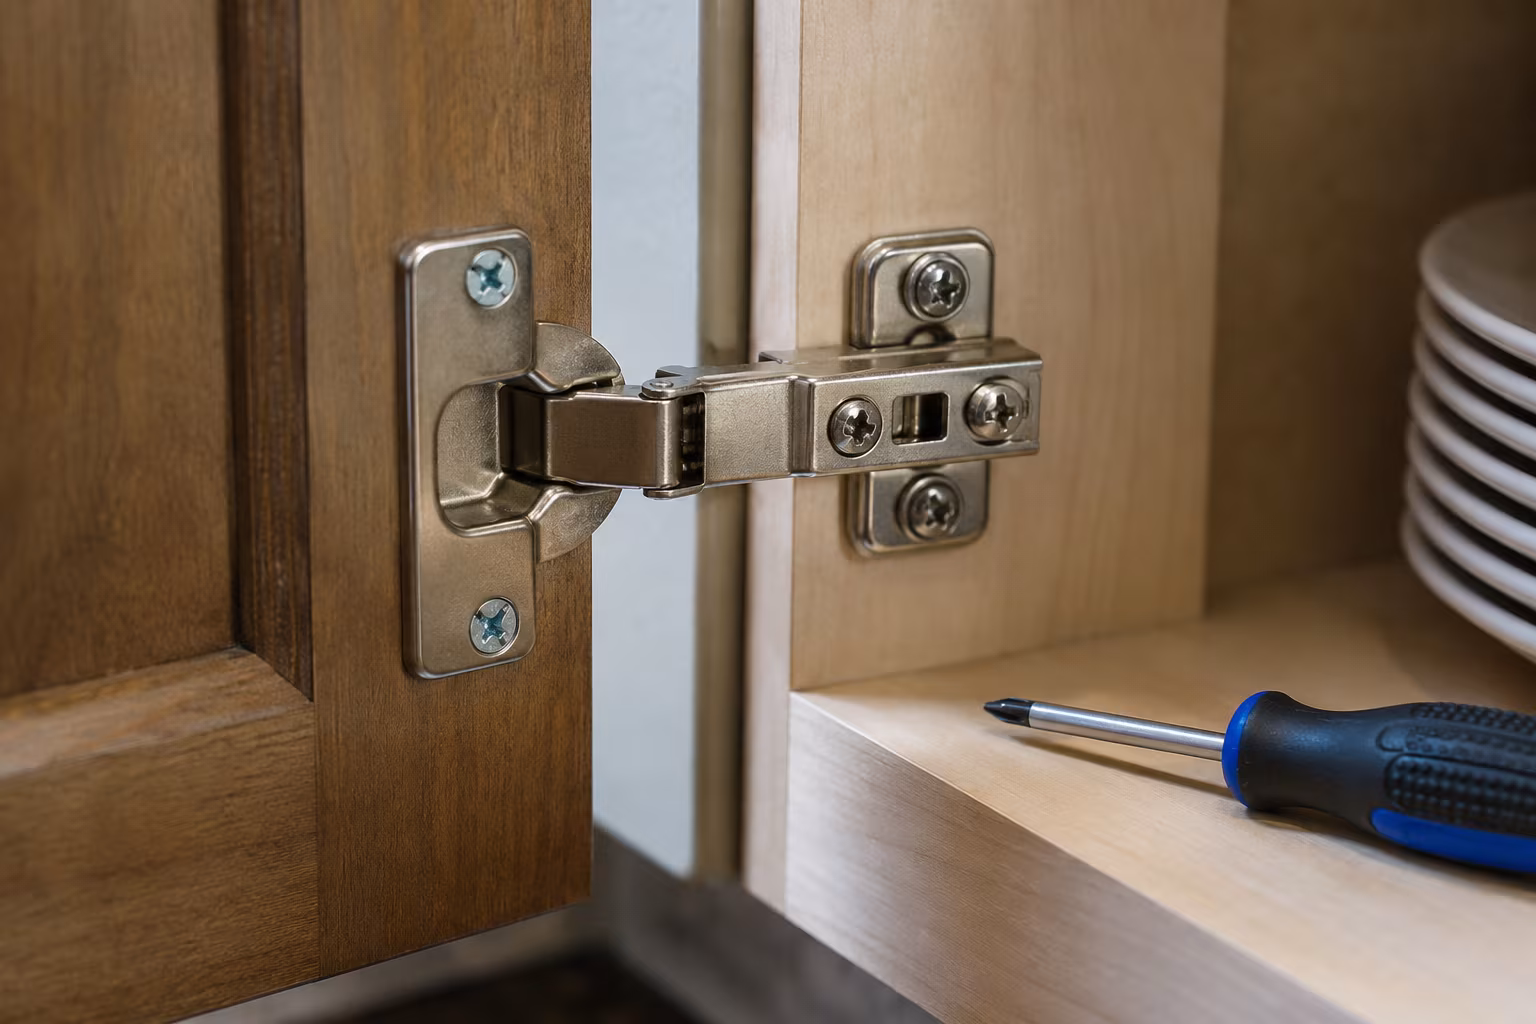
On a standard cup hinge — the round cup sits in the door, the arm reaches a mounting plate in the cabinet — three screws are exposed when the door is open. The front screw, closest to the door face, controls side-to-side: turning it rotates the door left or right in its opening. The back screw on the hinge arm controls depth, how far the door sits from the cabinet face; this is the one to use when the door catches the neighboring door or frame as it closes. The vertical adjustment lives on the mounting plate rather than the arm and controls height, how far up or down the door sits.
Diagnose before you touch anything, because the fix is usually written on the cabinet face. Read the gaps against the three axes a concealed hinge gives you:
| What you see | Axis to fix | Which screw |
|---|---|---|
| Uneven gap between two doors, wider at top or one side | Side-to-side (start here) | Front screw |
| Door catches the cabinet face or sits proud when closed | Depth | Back screw on the arm |
| Door sits low or rubs the cabinet bottom | Height | Mounting-plate screw |
| Door swings open on its own or slams from an angle | Loose plate — tighten it | Plate-to-cabinet screws |
Most real misalignment is a mix. Fix the worst issue first, then recheck whether the others remain or were caused by the first being wrong.
The three adjustments, in order
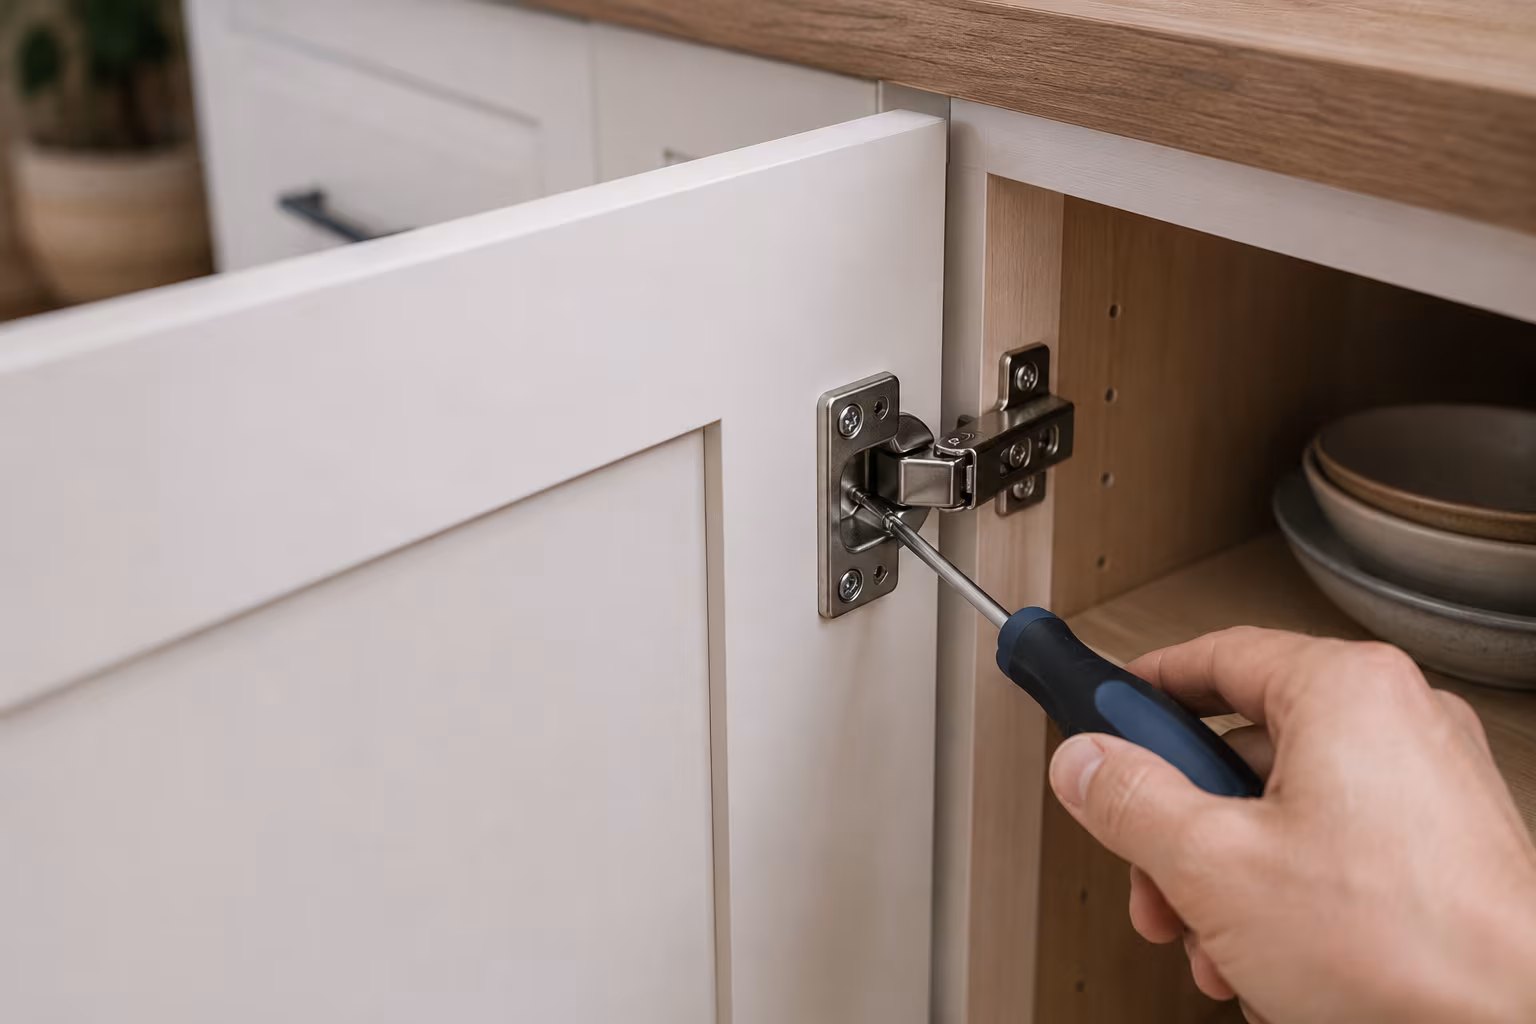
Side-to-side comes first. With the door open, find the front screw on each hinge (most doors have two, some three), and use the matching driver — Pozidriv or Phillips on many brands, a small hex on newer Blum. A quarter turn often shifts the door one to two millimeters. Turn both hinges the same direction the same amount; adjust one and not the other and the door goes parallelogram-shaped, tilting top-left and bottom-right. Close and check the gap along the strike side, and repeat in small increments until it is even top to bottom.
Depth is next. Run a finger across the closed seam — the door face should be flush with or very slightly proud of the cabinet face, never recessed behind it, which traps grease and looks unfinished. Turn the depth screw on both hinges clockwise to push the door out, counterclockwise to pull it in, a quarter turn at a time. Adjusting one hinge's depth more than the other deliberately swings the door into parallel when it does not sit true. Never back the screw out so far it stops engaging the arm, or the door floats on the cup spring and will not close reliably.
Height comes last, on the mounting plate. Loosen the plate's clamp screw or free the height screw, slide the plate up or down, hold, and retighten; some plates use a captive screw that raises or lowers directly. Adjust both hinges on a door equally, or you cock one corner up. Because raising or lowering changes how the cup sits, height is the adjustment most likely to disturb side-to-side — recheck the front screw afterward.
Soft-close that slams or stalls
Soft-close hinges carry a small dampener, usually a visible cylinder, that slows the last 20-30 degrees of travel. If the door slams anyway, the usual causes are a dampener toggled to minimum, a failing dampener (no fix but replacement), or a door light enough that the closing spring overrides the damping — some brands sell heavier-tension dampeners for light doors. If the door stalls and you have to push the last inch, the dampener is set too strong for the door's weight; lower the strength toggle, or move to a heavier-rated hinge if there is no toggle. Soft-close also degrades with age: after ten years or so the dampener oil dries and the action turns inconsistent, and a same-model replacement swaps in about five minutes per hinge.
When adjustment will not fix it

Some problems live outside the hinge's range. A cabinet box racked out of square — a parallelogram opening rather than a rectangle, common on tall pantries — cannot be solved at the door; shim the cabinet level and retighten the case screws instead. A door that has warped, usually a thin slab dried out in a hot kitchen, needs flattening with weight and humidity over weeks, or replacement. A mounting plate pulled loose from a particleboard cabinet wall holds no adjustment because the plate itself moves — fill the failed holes with toothpicks and wood glue, let it dry, and redrive into the fresh plugs. And a cup loose in the door is its own repair: refill or lengthen the stripped cup screws. If you are already painting the cabinets, it is the natural moment to sort the worst of these.
Maintenance and tools
Check alignment twice a year. Kitchens cycle through humidity that moves wood a millimeter or two — cabinets perfect in March can drift by August, and the first year after install shows the largest movement before seasonal cycles settle into small annual drift. Wood doors move more than foil-wrapped MDF, which stays stable while its cabinet box may not. Wipe the hinges with a microfiber cloth yearly, since cooking grease slows the action, and a drop of light oil on an aging pivot restores smoothness — heavy oil traps dust.
A short-shaft driver clears the cabinet interior where a long one fights the wall, and a small line penciled on each screw before turning lets you see exactly how far you went and roll back a wrong move. Diagnose first, adjust one axis at a time, and recheck after each turn; most hinge problems solve in three or four small moves. When a door still resists, the problem is usually the box or the door itself, not the hinge — the same logic that makes swapping cabinet hardware a cheap refresh applies here: small, correct moves beat force.
Related Posts

Bathtub Resealing: When Silicone Beats Caulk and Vice Versa
Reseal a bathtub right: 100% silicone at the flexing tub-to-tile joint, acrylic caulk only on...

Fix Squeaky Hardwood Floors From Above (No Access)
Fix squeaky hardwood floors from above with no access below: talcum powder for board-on-board...

Replacing a Cracked Bathroom Tile Without Re-grouting
Swap one cracked bathroom tile with hand tools: score and saw the four grout joints, chisel the...

Patching Drywall Anchor Holes Without Sand-Through Halos
Make anchor-hole patches vanish instead of showing as halos: two thin spackle coats, sand only...