Single-Bay Garage Workshop Layout Without Losing the Car
The short answer
A single-car garage (typically about 10 by 20 feet) can host a real workshop and still park a car if the layout commits to two principles: heavy tools live on locking casters and roll into perimeter positions when the car is in, and the wall perimeter holds everything that does not roll. The car centerline of the floor stays empty when needed, occupied when not.
The five-minute clear-out routine: roll the workbench against the wall, roll the table saw under its outfeed shelf, roll the cordless tool cart into its corner, push the dust collector against the back wall. Five tools, five wheeled stations, less than five minutes. The car parks where it always parked.
The single biggest mistake is buying stationary tools (a table saw bolted to the floor, a benchtop sander permanently mounted, a workbench that does not move). Once any major item is fixed, the layout no longer accommodates the car. Everything wheels or it lives on a wall.
Measuring the real available space
Before any layout, measure the garage carefully. The published "single-car garage" dimensions vary widely: small homes have 9x18 garages, modern builds have 12x24, and many garages have intrusions (water heaters, electrical panels, washing machines, support posts) that reduce usable space.
Measure the inside dimensions wall to wall, then subtract:
- Width of any wall-mounted items (water heater 24 inches, electrical panel 18 inches, etc.)
- Depth of the car (a typical sedan is 16-18 feet; a midsize SUV is 16-19 feet; a full-size pickup is 18-21 feet)
- Clearance to open the car doors (3 feet on each side minimum for comfortable entry/exit)
- Walking space from the driver door to the back door (2-3 feet typical)
What remains is the workshop footprint. For a typical 10x20 garage and a midsize sedan, you have roughly 4-5 feet of depth across the back wall and along one side wall, plus some space in front of and beside the car when it is in.
The mobile-station layout
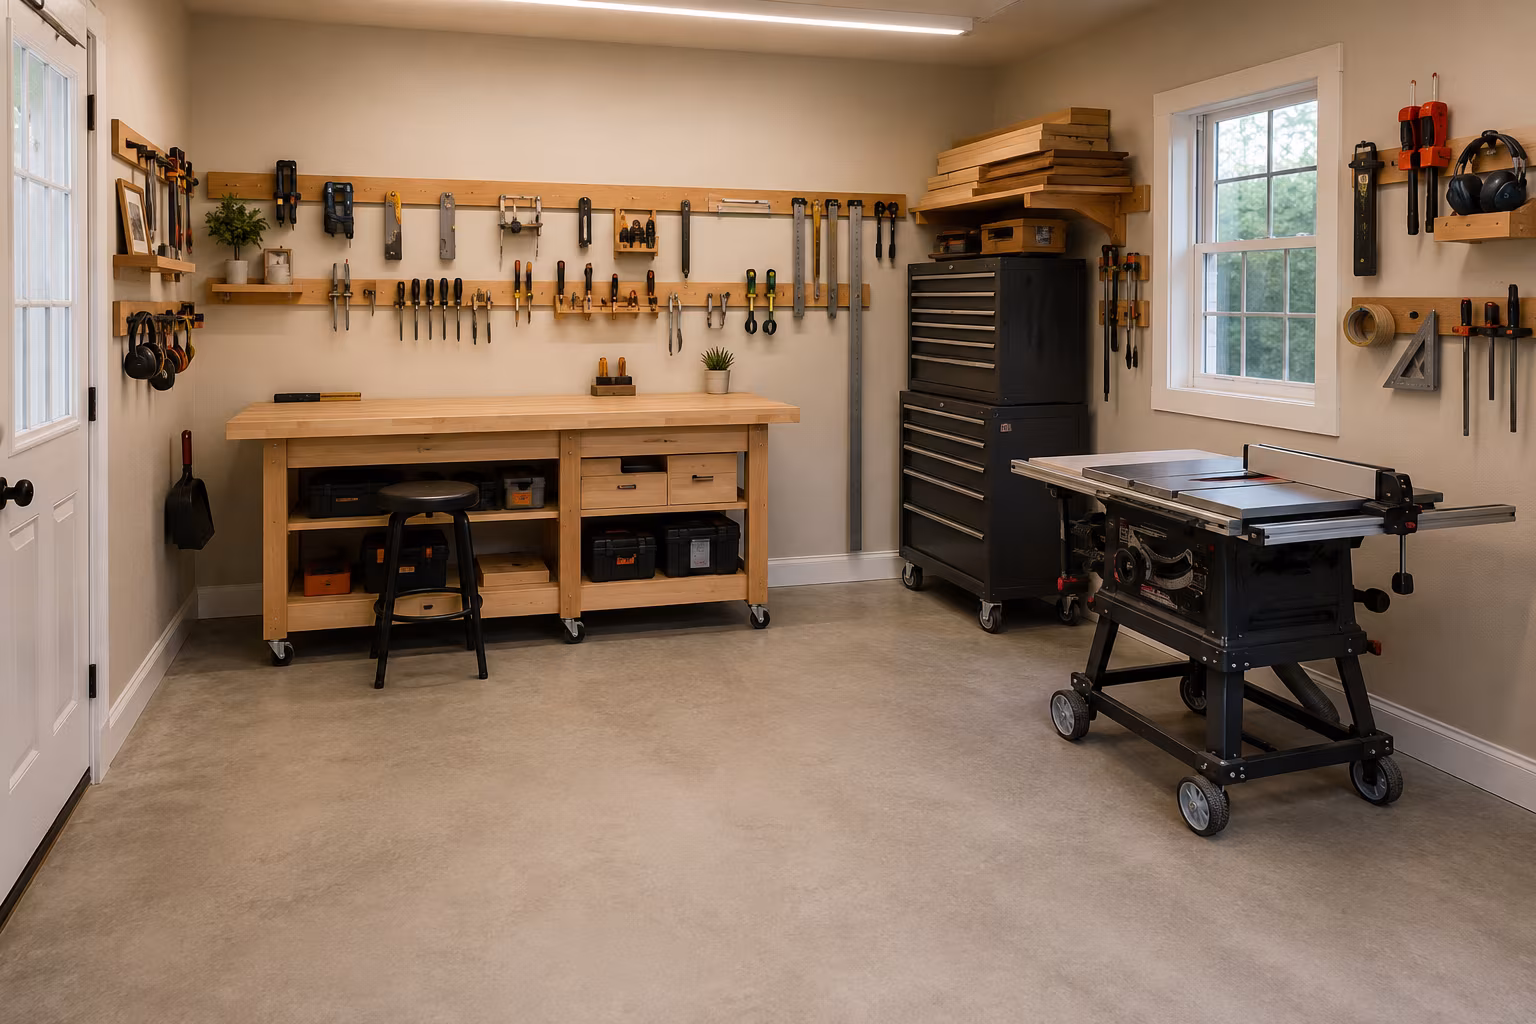
The workable layout commits to mobile heavy tools and perimeter storage.
Mobile heavy tools: the table saw, the workbench, the cordless tool cart, the planer or thickness sander (if owned), and the dust collector all sit on locking casters or wheeled cabinets. They roll into the open floor when in use; they roll against walls or into corners when the car needs to park.
Wall perimeter: hand tools on French cleats or pegboard, lumber storage racks, clamp racks, finishing supplies on shelves, and small power tools on cleated holders. Nothing on the floor that does not roll.
The geometry: when the car is out, mobile tools pull out toward the centerline. Walking around the table saw is possible because the car is not there. When the car comes back, mobile tools roll back to their wall positions and the centerline opens.
Wall-mounted dust collection ducts can run along the ceiling rafters to drop down at each mobile tool's position. The flexible hose attaches when the tool is in use; the duct retracts or hangs out of the way when the tool moves.
The right wheels matter
Casters separate "actually mobile" from "in theory mobile but never moved." The right casters:
- Locking on at least two of the four (preferably all four)
- Sized for the load — light casters under heavy tools wobble and bend
- 4-inch or larger wheels — small wheels catch on every crack in concrete and on every extension cord
- Total-locking casters (where one action locks both swivel and roll) preferred over wheel-only locks
Cheap casters fail under sustained load. Spend on the casters; they are the part you interact with every time you reposition the shop.
Some tools (table saws, mainly) come with manufacturer-specific mobile base kits. Those work but they are usually pricier than building a custom mobile base from a piece of plywood, a 2x4 frame, and four casters. The DIY base typically gives more flexibility for tool storage underneath.
Heavy tools and where they should live
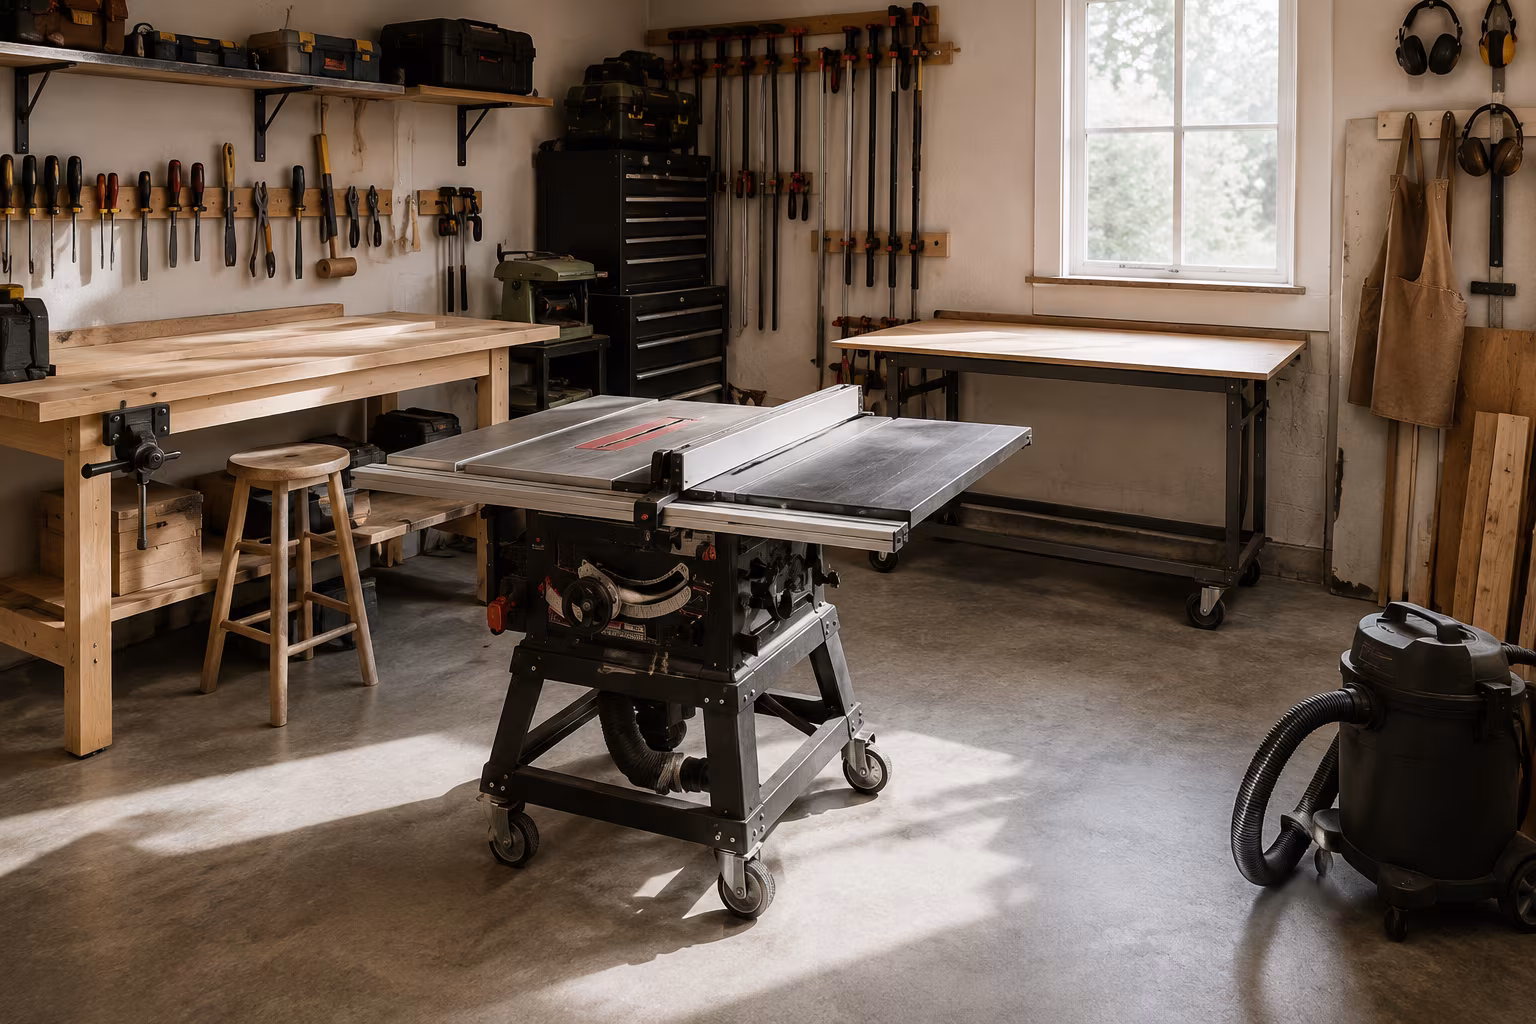
The table saw is usually the centerpiece. Roll it into the middle when ripping or crosscutting; roll it against the wall otherwise. The outfeed table — needed for any ripping longer than the saw's table — folds down or rolls out behind the saw.
The workbench (a 24-inch by 60-inch flat-top is the typical size for a small shop) lives against one wall when the car is in, perpendicular to it when the car is out. The workbench should support heavy work without rocking, which means heavy wheels and a flat bottom against the floor when locked.
The dust collector (a small two-stage cyclone or a HEPA shop vac) follows the active tool. A wheeled base with a hose hanger built in keeps the collector mobile and the hose accessible.
The cordless tool cart is a four-foot tall rolling cabinet with drawers for batteries, chargers, drills, drivers, and other small power tools. Rolls into the workbench area for work; rolls into a corner when not.
A small benchtop drill press, a benchtop bandsaw, and a benchtop oscillating sander can all share one rolling table — built like the workbench but optimized for these tools. Hot-swap between them on the same wheeled platform.
The wall layout
The walls hold everything stationary. The layout:
Above the workbench: pegboard or French cleat for hand tools used constantly. Screwdrivers, chisels, marking gauges, small squares, files.
Above the table saw position: small dust collection accessories, push sticks, blade guards in storage, and small saw-related hand tools. Anything specific to that station.
Lumber storage: along the longest wall, vertical for sheet goods, horizontal for boards. A simple wall-mounted lumber rack handles most of what a small shop accumulates.
Clamp wall: clamps live on cleats or pegs because they hang vertically and the rack should not eat floor space. A dedicated clamp wall section keeps them organized.
Finishing supplies: in closed cabinets to protect from dust, ideally above the workbench or in a dedicated corner away from where saws throw dust.
Tool battery charging: on a small wall shelf with an outlet. Multiple chargers stacked vertically takes one square foot of wall and saves a drawer of cables.
The dust collection question
Small shop dust collection is the upgrade that pays back across the entire workshop. A HEPA-rated shop vac (a Festool CT, a Fein Turbo, a Bosch Universal) connected to power tools via a small hose collects most of the fine dust at the source. Cyclone separators (a Dust Deputy or similar) extend the bag life and reduce filter clogging.
For larger volume operations (table saw, planer, thickness sander), a dedicated dust collector with 4-inch ports outperforms a shop vac but costs more and takes more space. For a single-car-garage shop, a 1-1.5 HP cyclone collector on wheels is a good compromise.
Run dust collection ducts along the ceiling if budget allows; otherwise, drag the collector to each tool. The collector should be the last thing to roll back into position when clearing the floor.
Storage strategies that recover floor
Vertical storage is the rule. Anything stored on the floor stays in the way; anything stored on the wall or ceiling stays out of the way.
Overhead lumber storage on rafter-mounted brackets (sometimes called dead storage) holds sheet goods, long boards, and seasonal items. Frees floor space at the cost of slight inconvenience.
Drawer cabinets store hand tools, hardware, fasteners, finishes, and consumables. Vertical narrow cabinets (12-18 inches wide, 6 feet tall) on casters fit between the workbench and the wall and roll out for access.
A wall-mounted folding workbench (a piece of plywood hinged at the wall, folds up when not in use) gives an emergency assembly surface without a permanent footprint.
When the layout still does not work
If after careful planning the car will not fit alongside the workshop, the problem is usually one of three:
The garage is genuinely too small (under 9x18). The workshop fits but the car does not; one or the other has to leave.
The car is too big for the garage (full-size pickup or large SUV in a small garage). Replacing the car is unlikely; living with the workshop only when the car is out is realistic.
The workshop's ambitions exceed the space (full-size cabinet saw, large drill press, full-size planer/jointer). Scaling tools down to a job-site portable level (small Bosch table saw, benchtop drill press, lunchbox planer) lets a real workshop fit alongside a car. The trade-off is lower capacity per tool, accepted as the price of having the workshop at all.
For ambitious shops in small garages, the long-term answer is a separate shed or detached workshop. The short-term answer is to use the space available efficiently and to accept that some projects need a friend's larger shop borrowed for an afternoon.
Lighting that makes the workshop usable
Single-car garages typically have one overhead bulb and a couple of windows. That lighting is inadequate for any precision work and inconsistent for finish work.
Upgrade to LED shop lights — typically 4-foot strip lights mounted to the ceiling rafters or hanging from chains. Two or three strips across the garage ceiling produce flat, even light that eliminates shadows under tools.
Add task lighting at the workbench and over the table saw. A small clip-on LED light or a flexible-arm desk light at each work station gives the precision light needed for marking, fitting, and finishing.
Avoid yellow incandescent or halogen lighting. The yellow cast distorts colour perception in finish work and the heat is unwelcome in summer.
Climate control basics
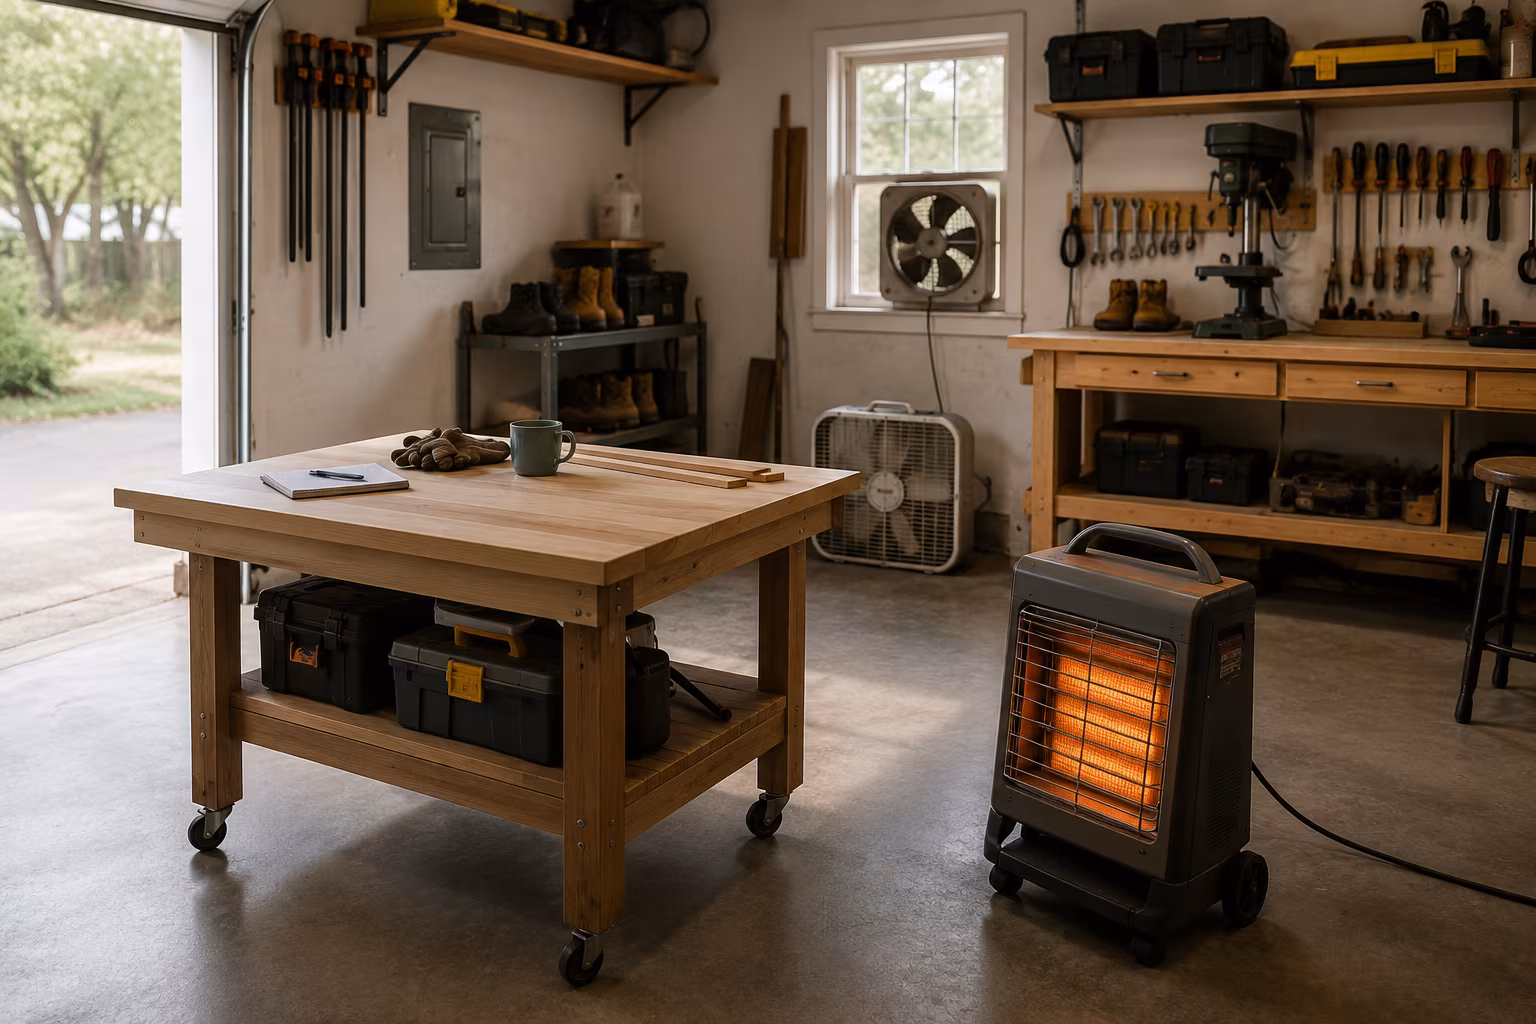
A garage workshop is exposed to outdoor temperature swings unless the garage is heated. For winter use in cold climates, a small portable electric heater warms the immediate work area; a dedicated wall-mounted heater for the garage is a larger project but transforms cold-weather workshop time.
For summer, ventilation matters more than air conditioning. A box fan in the open garage door circulates air; an exhaust fan in a window pulls hot air out. Air conditioning a single-car garage with an open door is generally impractical; the better answer is to schedule heavy work for cooler hours.
Humidity control matters for wood storage. A small dehumidifier in the garage prevents moisture cycling that warps boards over months. A hygrometer (a simple humidity meter) on the wall tells you whether the dehumidifier is doing its job.
Tool storage that doubles as workbenches
Mobile tool carts can do double duty as work surfaces. A 4-foot wide rolling tool cabinet with a thick wooden top gives drawer storage below and a 4-by-2 foot bench surface above. When the cabinet rolls to the centre of the shop, both functions are accessible; when it rolls to the wall, the surface tucks against the wall.
Workbench surfaces should be flat, durable, and replaceable. A piece of 3/4-inch MDF on top of the cabinet works as a sacrificial surface — replace every few years when the wear is too much.
For finishing work, a separate clean bench (a smaller dedicated finishing station with no drawers, kept dust-free) prevents finish contamination from regular shop work. This bench can be wall-mounted folding to save floor space.
The cumulative effect of mobile tool stations, smart wall storage, and good lighting is a single-car garage that genuinely works as a small workshop while keeping the car. The discipline is in the layout choices, not in the size of the space.
Electrical and outlets
A workshop running multiple power tools needs more outlets than a typical garage provides. The standard single-car garage has 2-3 outlets along the perimeter; a workshop needs 8-12 outlets distributed around the work area.
Adding outlets is a moderate electrical job — a licensed electrician runs a dedicated circuit or two from the panel, installs the outlets in conduit along the wall, and adds GFCI protection (required in garages).
Power strip extension cords on the floor are the wrong answer; they are tripping hazards, voltage drops at long lengths, and many shop tools draw more current than basic strips handle.
For workshops running tablesaws or compressors, a dedicated 20-amp circuit (instead of the standard 15-amp) per heavy tool prevents nuisance trips when the tool starts under load.
Air compressor placement
A small pancake or hot-dog compressor in the corner gives nail-gun and small-pneumatic-tool capability. The trade-off is noise — air compressors are loud and run frequently.
Place the compressor in the farthest corner from the workbench, run a length of air hose to a wall-mounted hose reel near the work area, and the noise is partially mitigated. Some shops install the compressor in an adjacent shed or basement with a hose run-through, eliminating the noise from the work area.
Cordless nail guns and brad nailers have improved enough that many small workshops skip the air compressor entirely. The cordless tools cost more upfront but eliminate the compressor's noise and footprint.
Fire safety in a shop
A small shop accumulates dust, paper, finishes, and combustibles that a normal garage does not. A few precautions matter:
Keep a small ABC-rated fire extinguisher on the wall near the door. Check the pressure gauge annually.
Store finishes (paints, stains, solvents) in a dedicated flammables cabinet or, at minimum, away from heat sources and out of direct sun. Rags soaked with linseed oil or other drying oils can self-ignite; store used finishing rags in a sealed metal can or spread them out flat to dry before discarding.
Dust collection reduces fire risk by removing fine combustible dust from the air. Sawdust on a hot motor or near an open flame is a real ignition source; clean shops have fewer incidents.
Smoke alarms in the garage are uncommon but useful in a workshop. A battery-powered alarm on the ceiling near the workbench detects problems early.
The single biggest predictor of whether a single-car garage workshop succeeds long term is whether the floor-clearing routine becomes reflex. Workshops that require thirty minutes of rearrangement to park the car get parked at the curb instead, and the workshop slowly fills the garage permanently. A five-minute routine repeated daily is the discipline that keeps both functions alive.
Related Posts

Pegboard vs French Cleat: The Honest Tool Wall Choice
A blunt comparison of pegboard and French cleat for shop tool walls — weight, customisation, cost...

The Complete Guide to Starting a Fiber Arts Guild in Your Town
Dreaming of a local hub for knitters, crocheters, weavers, and more? Starting a fiber arts guild ...

Why Tool Libraries Let You Try Expensive Hobbies Before Committing
Dreaming of diving into woodworking or pottery but worried about the cost of specialized tools? T...

How to Plan a Nature Journaling Walk and Sketch Workshop
Ready to blend your love for nature with your creative spirit? Learn how to plan and host your ve...