
Hand-Sewn Leather: Saddle Stitch Spacing That Actually Holds
The short answer
Spacing for hand-sewn saddle stitch in leather depends on the project. Use roughly 7 stitches per inch (SPI) for belts and large structural items, 8-9 SPI for wallets and pouches, and 9-10 SPI for fine work like watch straps and small accessories. In metric, that translates to roughly 3.5mm spacing for belts, 3.0mm for wallets, and 2.5mm for fine work.
The spacing is set by a pricking iron (which marks the leather at regular intervals) and then each hole is finished with a diamond awl. The two-step process matters because the pricking iron alone does not penetrate fully and the awl alone does not give consistent spacing. Both tools together are how professionals work.
Beyond the spacing number, the stitch angle matters as much. Each stitch should be at the same angle as its neighbours — typically a slight diagonal that lets each pull of thread cinch the stitch tight against the previous one. Inconsistent angles produce a saw-tooth seam that looks amateur.
Why saddle stitch and not machine sewing
The saddle stitch is the standard for high-quality hand-stitched leather because it uses two needles, one at each end of a single thread, working through the same hole from opposite sides. Each hole gets a thread loop from both directions, locking the stitch into the leather mechanically.
The mechanical lock means that if one stitch breaks, the surrounding stitches stay in place. A machine-sewn seam (a lock stitch with a separate bobbin thread) unravels in a long run if one stitch fails.
For products that need to hold for decades — belts, holsters, watch straps, knife sheaths, high-end wallets — the saddle stitch is the durability standard. For products meant to be inexpensive and disposable, machine sewing is faster and cheaper.
Hand-sewn saddle stitch is also visually distinct. The slight slant of each stitch and the visible thickness of the waxed thread reads as hand-made. Machine seams read as machine-made.
Stitches per inch by project type
The spacing scales with the leather thickness and the project's stress profile.
Belts (5-7 SPI). Belts are thick (typically 6-12 oz leather), wide, and stressed mostly along their length. Wider spacing keeps the leather between stitches from getting perforated, which would weaken the structural integrity. Belts can use as few as 5 SPI for working belts and up to 7 for dress belts.
Knife sheaths and holsters (6-8 SPI). Similar to belts in thickness; the wider spacing is appropriate.
Wallets and pouches (8-9 SPI). Medium leather (3-5 oz), light stress profile, frequent handling. The closer spacing gives a more refined appearance without weakening the leather.
Watch straps and small accessories (9-10 SPI). Thin leather (2-4 oz), small visible stitch lines that need to look refined. The closest spacing in common practice.
Decorative work (10-12 SPI). Some specialty items use very close stitching as a design element. Beyond about 12 SPI, the holes begin to compromise the leather's integrity and the stitch line tears more easily than a wider-spaced version would.
For your first projects, 7-8 SPI is the easiest to work with. Wider spacing reveals each stitch clearly, making it easier to learn good technique. Tighter spacing comes after the basics are solid.
The pricking iron — what it does and why
A pricking iron is a metal tool with multiple angled prongs (or teeth) that mark the leather at the correct spacing for stitching. You place the pricking iron along the planned stitch line, tap it with a maul, and lift it. The marks left behind are the stitch positions.
Pricking irons come in different SPI ratings — a 7 SPI iron is sized differently from a 9 SPI iron, and the prong angle matches the desired stitch angle.
The key insight: the pricking iron marks the stitch positions and the diagonal angle, but it does not penetrate all the way through the leather. The prongs are too short for that, and even if they were longer, hammering them through would damage the leather.
After pricking, each marked position becomes a stitch hole when finished with a diamond awl.
Pricking irons are not the same as stitching chisels (the four- or six-prong tools that punch all the way through thin leather). For traditional saddle stitch work in medium to thick leather, the pricking iron + awl combination produces a cleaner, more refined hole than chisels can.
The diamond awl
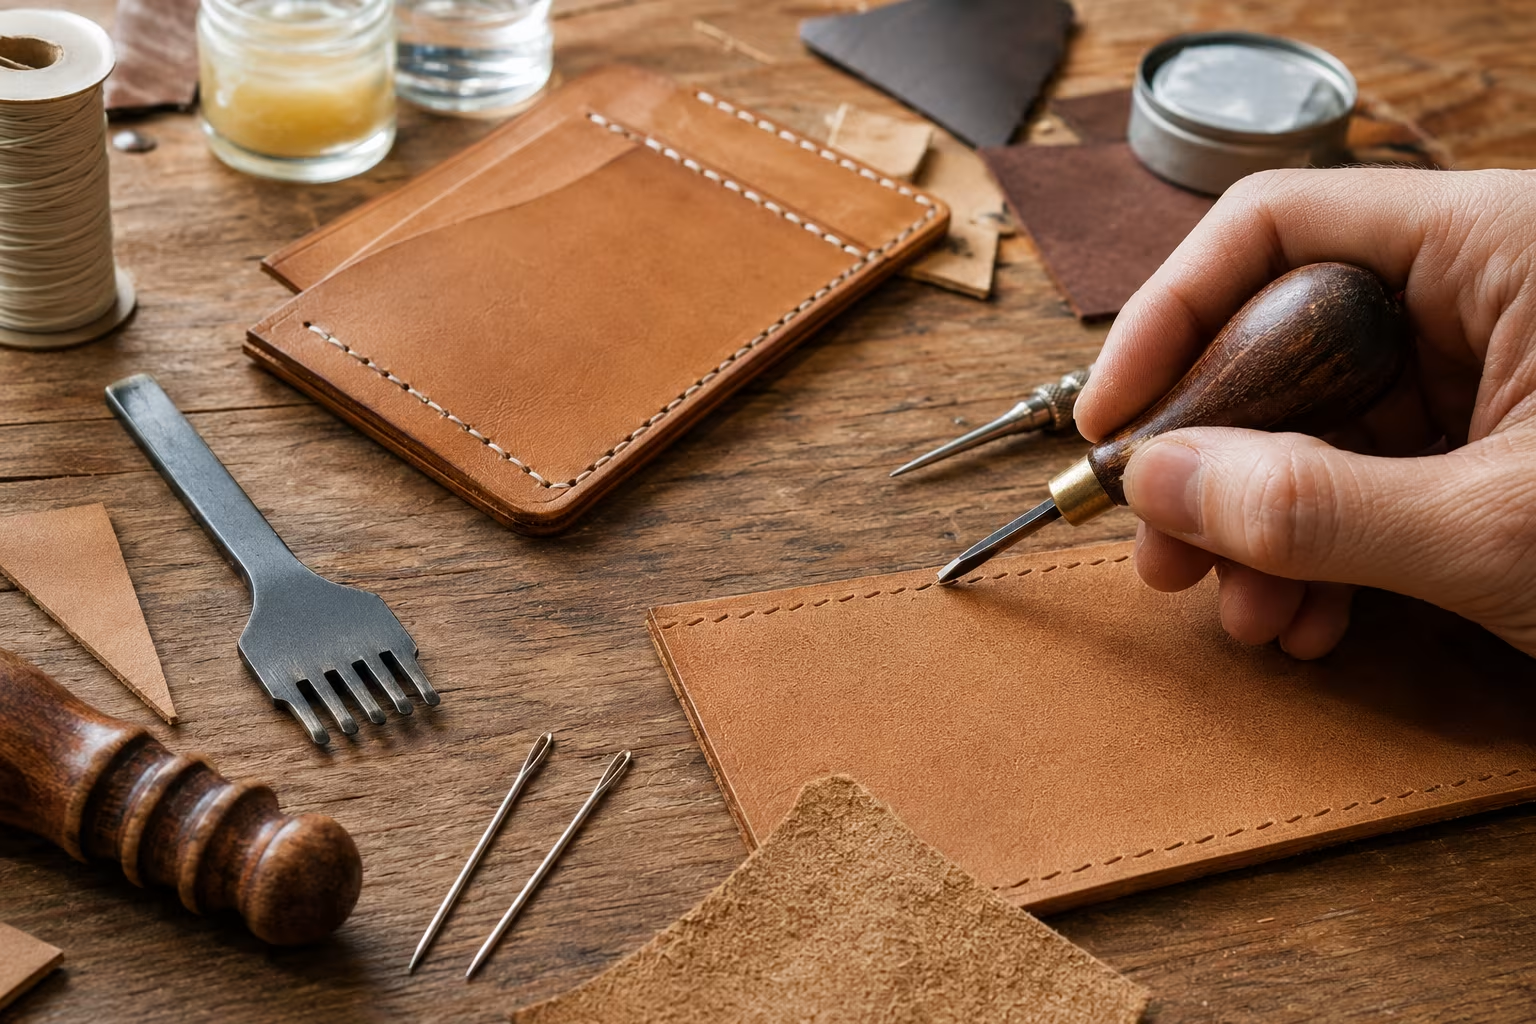
The diamond awl is a hand tool with a four-sided pointed blade (diamond cross-section, hence the name). After the pricking iron has marked the leather, you align the awl's blade with each marked angle and push the awl through the leather, finishing the hole.
The diamond shape is important. The hole left by a diamond awl closes around the thread after stitching, holding the stitch in place. A round hole (left by a round awl) is larger and the stitch sits loosely in it.
Push the awl with controlled force, with the blade aligned to the angle of the pricking iron's prong marks. The awl should pierce through cleanly with one push; multiple stabs widen the hole and weaken the leather.
For consistent angles across many stitches, hold the awl handle in the same hand position every time. The wrist angle determines the stitch angle, and inconsistent wrist position produces inconsistent stitches.
Thread sizing for the chosen spacing
The thread thickness should match the stitch spacing. Too thick and the stitches crowd each other; too thin and the visible stitch line looks weak.
For 7 SPI work (belts), thread sized at about 0.6-0.8mm is appropriate. Tiger thread (a common waxed polyester brand) in 0.6mm or 0.8mm covers most belt work.
For 8-9 SPI (wallets), 0.45-0.6mm thread is standard.
For 10 SPI (watch straps), 0.35-0.45mm thread.
The standard for traditional leather work is waxed polyester thread (Tiger, Vinymo, Ritza) or waxed linen thread (the more traditional choice; harder to handle, more elegant in finished work). Both come in many colours.
Avoid the thin cotton thread sold for general sewing — it lacks the strength and abrasion resistance leather work requires.
Stitch angle — the visual quality
Each saddle stitch has a slight diagonal angle. The angle is roughly 30-45 degrees from perpendicular, in a consistent direction along the seam.
The pricking iron sets the angle. Choose an iron with the angle you want; many makers prefer a 30-degree angle for everyday work and a 45-degree angle for finer decorative work.
Consistency matters more than the specific angle. A seam with every stitch at the same angle looks deliberate; a seam with random angles looks amateur. Match the angle from start to finish across the whole seam.
When passing through corners or sharp curves, the angle naturally shifts. Plan corner stitches in advance — sometimes shorter at the corner, sometimes wider — so the visual transition is smooth.
The two-needle technique
A saddle stitch uses one length of thread with a needle attached at each end. The thread length is typically 4-5 times the seam length (allowing for the back-and-forth across each stitch).
The stitching process with the leather clamped or held vertically, insert needle 1 through the first hole, pull half the thread through. Insert needle 2 through the same hole from the opposite side. Pull both needles to tighten. Move to the next hole; repeat.
The order matters always pass needle 2 around needle 1 in the same direction at every stitch. The consistent direction is what gives the lock-stitch appearance; inconsistent direction makes some stitches look open and others closed.
For right-handed makers, the typical convention is to pass the back-side needle behind the front-side needle. Pick a convention and hold it across the entire seam.
Common saddle stitch mistakes
Pricking iron taps too hard. Excessive force drives the iron's prongs too deep, sometimes through the leather. Use light controlled taps; the iron should mark the surface clearly without going through.
Awl held at the wrong angle. Misaligned awl produces stitches at random angles. Practice the wrist position on scrap leather before working on a real project.
Thread tension inconsistent. Some stitches pulled tight, others loose. Develop a habit of pulling each stitch to the same firmness; the muscle memory takes weeks to build.
Thread runs out mid-seam. Better to start with thread slightly too long than too short. Joining new thread mid-seam is possible but visible and creates a weak point.
Skipping the diamond awl. Some beginners try to stitch through the pricking iron marks alone. The marks are too shallow; the stitches go in crooked and uneven. The awl step is non-negotiable.
Materials worth investing in early
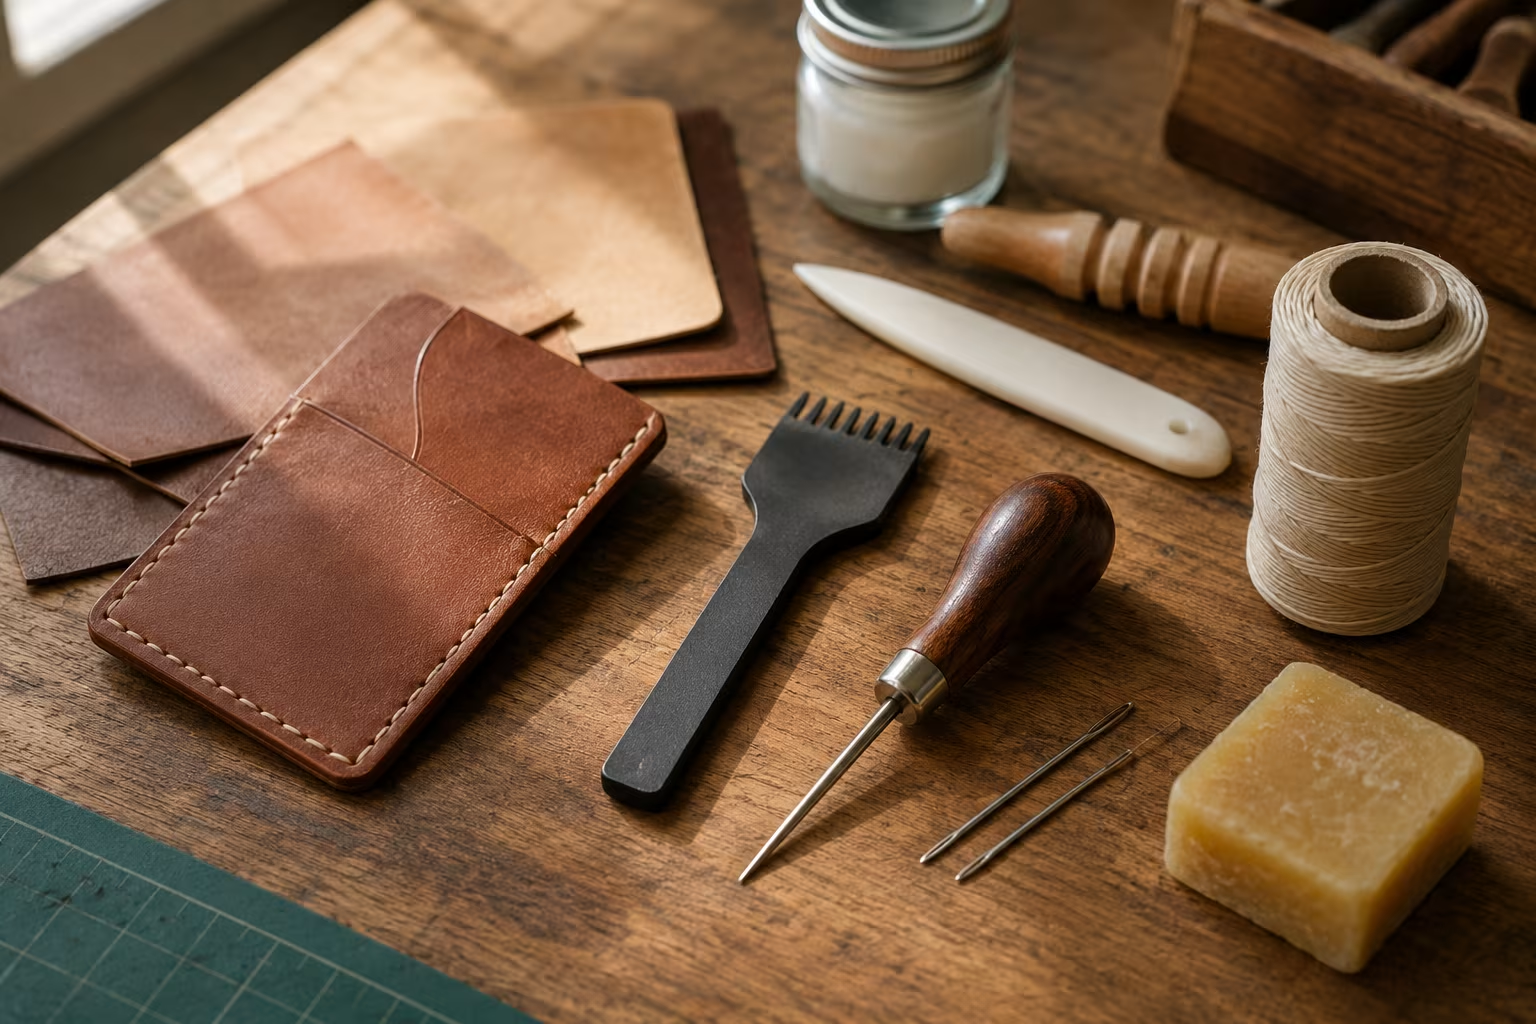
A starter saddle stitching kit includes: a pricking iron in 7 or 8 SPI (the most versatile starting point), a diamond awl, two saddler's needles (sized for the thread you plan to use), a spool of waxed polyester thread in a colour you actually want, a small mallet or maul for tapping the pricking iron, a leather clamp or stitching pony to hold work, and a piece of practice scrap leather.
The kit cost is modest. The skill investment is significant; expect twenty hours of practice before your stitching looks confidently uniform. The discipline pays back across years of projects.
For higher-stake projects (a gift wallet, a watch strap, a commissioned belt), practice the technique on scrap of the same leather thickness before committing to the actual piece. The practice runs reveal whether your spacing, angle, and tension are where they need to be for the project's visible quality bar.
Leather thickness and stitch behavior
The leather's thickness affects how the saddle stitch behaves and what spacing works.
For thin leather (1-3 oz), stitches sit close to the surface and the thread is visible from both sides. Tighter spacing (9-10 SPI) emphasizes the visible stitch pattern. Light tension pulls the stitch flat against the surface.
For medium leather (4-6 oz), stitches sit recessed in the thickness. Standard spacing (8-9 SPI) gives clean visible stitches. Moderate tension creates the slight diagonal cinching that defines the saddle stitch's look.
For thick leather (7-10 oz), stitches sit well inside the leather body. Wider spacing (7-8 SPI) is appropriate. Higher tension can pull through to the back without distorting the front.
For very thick leather (heavy belt leather, holster leather), pre-thinning with a edge beveller and using a stitching pony to hold the work firmly become important. The thick leather resists the awl; the technique slows down.
Maintaining stitching pony, irons, and awls
The saddle stitching tools last a long time with basic care.
The stitching pony's wooden jaws should be smooth and free of cracks. Wipe with a damp cloth, occasionally apply paste wax to the working surfaces. Replace any cracked or splintered parts.
Pricking irons should be cleaned of leather dust after each project session. Use a small soft brush. Avoid getting oil or solvents on the prongs; the metal is hardened steel and does not need lubrication.
Diamond awls need their points kept sharp. A leather strop with polishing compound, used briefly each work session, keeps the point cutting cleanly. A dull awl deforms holes instead of cutting them cleanly.
Waxed thread sits on the spool well. Keep covered to prevent dust accumulation. The wax stays usable for years.
With care, a quality pricking iron and diamond awl set lasts a lifetime. The tool investment is significant but durable.
Final note on stitch consistency
The difference between a hand-stitched piece that looks amateur and one that looks refined comes down to stitch consistency more than any other factor. Equal spacing, equal angle, equal tension across every stitch. The materials matter less than the discipline. Even on inexpensive leather, perfectly consistent stitching reads as quality work.
Pairing thread colour with leather
Thread colour is a styling decision as much as a technical one. Tonal thread (close to the leather colour) reads subtle and refined. Contrast thread (saddle stitch in cream on dark brown leather, or in black on natural tan) reads bold and craftsman-style. Both are valid; pick deliberately rather than by default.
Wax thread colour also affects perceived stitch quality. Thicker thread emphasizes each stitch; thinner thread blends. Match thread weight to the stitch spacing chosen earlier.
Stitch spacing by project:
| Project | SPI | Metric |
|---|---|---|
| Working belts | 5–7 | ~3.5 mm |
| Sheaths / holsters | 6–8 | — |
| Wallets, pouches | 8–9 | ~3.0 mm |
| Fine work | 9–10 | ~2.5 mm |
| Belt leather | 6–12 oz | thick + stressed lengthwise |
Related Posts
Beginner Pottery Wheel Speed for Centering
Centering clay needs high wheel speed and firm pressure. Most beginners use too low speed.

Calligraphy Ink Comparison for Cotton Paper
Modern dip pen calligraphy needs ink that doesn't bleed on absorbent cotton paper. India ink...
Knitting Needle Materials Compared: Wood vs Metal vs Plastic
Knitting needle material changes how stitches slide, how cold or warm the needle feels, and how...
Beginner Watercolor Paper Choice for Textured Washes
Watercolor paper is the single biggest gear decision a beginner makes. Weight, surface texture...
Comments
No comments yet. Be the first to share your thoughts!