Why Coiled Basket Weaving Uses the Cheapest Materials in Any Craft
Why Coiled Basket Weaving Uses the Cheapest Materials in Any Craft
You know that feeling, right? You get super excited about a new craft, buy all the supplies, and then stare at your bank account like, "Oops." I've been there more times than I can count. My garage has a whole shelf dedicated to projects I abandoned because the materials were just too pricey to keep up with.
But what if I told you there's a craft where the materials are basically free, or cost less than your morning coffee? Today, we're diving into coiled basket weaving. It's a craft that truly lets you use almost anything you can get your hands on, turning scraps into something beautiful and functional.
Why This Actually Matters
Let's be real. The cost of materials is often the biggest hurdle when trying a new hobby. It can stop you before you even start, or leave you feeling guilty when a project doesn't quite work out.
That financial pressure can totally kill the joy of experimenting. With coiled basket weaving, you don't have to worry about wasting expensive yarn or specialty cords. You can just play, try new things, and not stress if your first few attempts are, well, a little wonky.
I remember wanting to try traditional basket weaving, and the cost of reeds alone made me pause. It felt like a big commitment before I even knew if I'd like it. Coiled basket weaving takes that roadblock completely out of the equation, which is why I love it so much.
The Basics of Coiled Basket Weaving
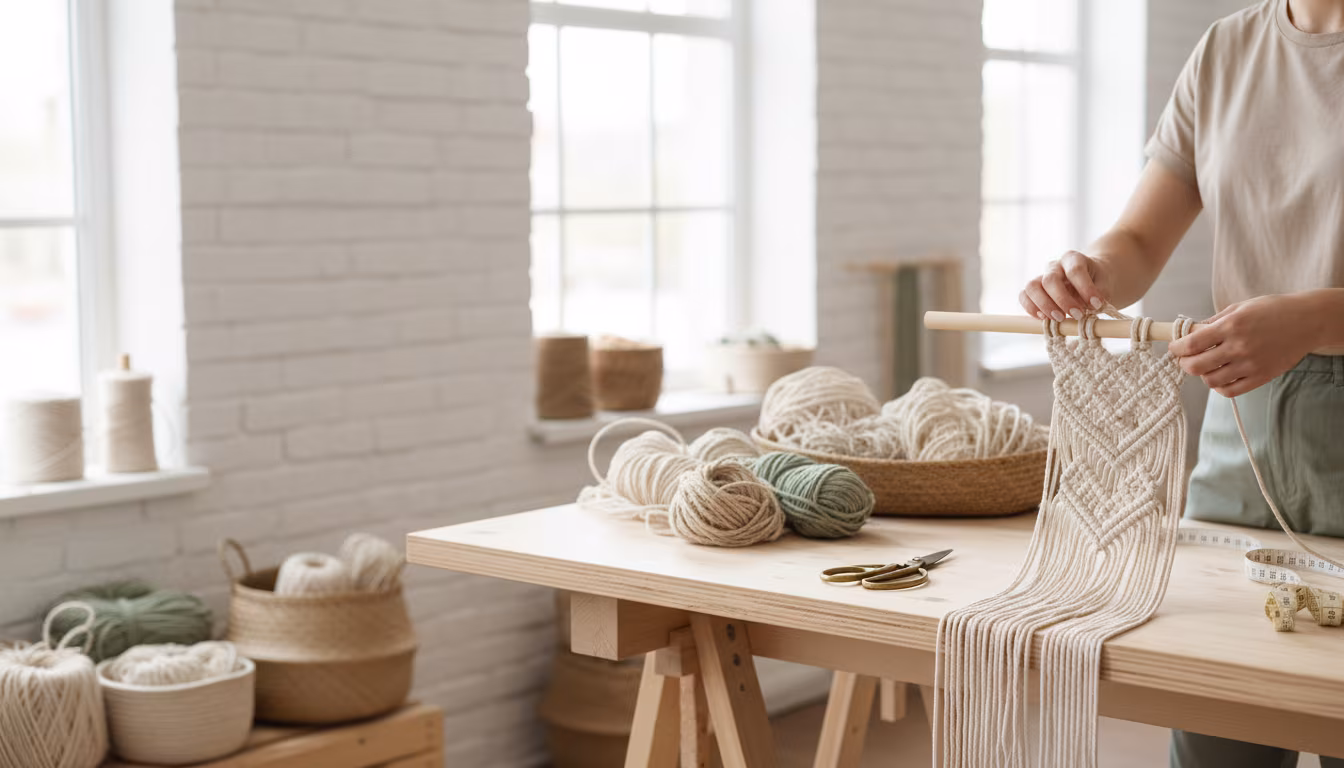
Okay, so what even is coiled basket weaving? Imagine building a basket by wrapping one long, continuous coil of material around itself, and then stitching those coils together. That's pretty much it!
You're essentially making a spiral, building it up layer by layer, and connecting each new layer to the one below it. It sounds simple, and honestly, the concept really is.
What You Actually Need (spoiler: Not Much!)
This is where the magic happens and why I say it uses the cheapest materials. You really only need two main types of material, plus a needle and scissors. That's it.
You need a "core" material, which is the thick part that forms the structure of your coil. Then, you need a "stitching" material, which is thinner and wraps around the core to hold everything together.
- Core Material: This is the backbone of your basket. Think about what you could find for free or super cheap.
- Stitching Material: This is what binds your core together. It needs to be flexible and strong enough to pull through the core.
- A Large-Eyed Needle: Sometimes called a tapestry needle or darning needle. It needs an eye big enough for your stitching material.
- Scissors: Any pair will do!
I'm talking about things like thick yarn scraps, old t-shirts cut into strips, clothesline, natural grasses you find on a walk, raffia, even plastic grocery bags cut into strips. The possibilities are huge and almost always free or under five bucks.
Embroidery floss, thin yarn scraps, twine, dental floss (yes, really!), fine wire, or even more t-shirt strips work great. Again, these are often things you already have lying around, or you can grab a big spool of twine for a few dollars.
You can often find these in thrift store sewing kits for a dollar or two, or a pack at a craft store won't break the bank.
Seriously, just grab your craft scissors, kitchen shears, whatever you have. No special fancy snips needed here.
I've made baskets entirely from old bedsheets cut into strips and some embroidery floss I already owned. Cost? Zero. The satisfaction? Priceless.
How to Actually do It
It can look a little intimidating when you see a finished coiled basket. The intricate stitches, the perfect shape! But honestly, it's just a series of simple steps repeated over and over. You've got this.
Step 1: Gather Your Core Material
First things first, get your core ready. If you're using something like clothesline or rope, you're good to go. If you're using fabric scraps or plastic bags, cut them into long, consistent strips. Aim for about an inch wide, but you can adjust based on how thick you want your coil to be.
Make sure you have enough to start with. You can always add more later, but having a decent length to begin avoids fiddly joins too early on. I usually start with about 5-6 feet of material, just to get a feel for it.
Step 2: Choose Your Stitching Material
Pick something that contrasts or complements your core, depending on the look you're going for. Cut a piece about 3-4 feet long. You'll thread this onto your large-eyed needle. Don't go too long, or it will get tangled constantly, which is super frustrating.
I often use embroidery floss because it comes in so many colors, and I always have scraps from other projects. If you're using twine, a single strand usually works well, but you can double it for more strength.
Step 3: Start the Coil (the Base)
Take one end of your core material and tightly curl it into a small, flat spiral – this will be the very center of your basket's bottom. Make it as tight as you can, like a tiny cinnamon roll.
This first coil can feel a bit awkward to hold while you start stitching. Don't worry, it gets easier once you have a few stitches in place to secure it. Just take your time and hold it firmly.
Step 4: Stitching the First Row
Once your tiny spiral is formed, push your needle through the center of that first coil, from the back to the front. Pull your stitching material almost all the way through, leaving about a 3-inch tail on the back. You'll weave this tail into your stitches later to secure it.
Now, bring your core material around to form the second coil directly next to the first one. You're basically laying the second coil right against the edge of the first spiral you made. Make sure it’s snug.
Take your needle and go over the new (second) coil, then push it through the center of the first coil again, emerging from the back. Pull tight. You're essentially looping over the new coil and anchoring it to the old one. Repeat this stitch every 1/4 to 1/2 inch around the entire first coil.
Step 5: Building up the Sides (shaping)
Once your base is the size you want (a flat circle, for example), you'll start to build the sides. Instead of laying the new coil directly next to the previous one, you'll start to angle it on top of the previous coil. Just slightly.
This subtle shift upward is what creates the wall of your basket. The more you angle the new coil upwards, the steeper the sides will be. If you keep laying it flat, your basket will just get wider and wider, like a placemat.
Experiment here! Don't be afraid to pull out a few stitches if the shape isn't working. I've often made a flat coaster by accident when I was trying for a bowl. It happens to everyone.
Step 6: Adding New Core Material
Eventually, you'll run out of your core material. When that happens, simply lay the end of your new core material right next to the end of the old core material, overlapping them by about 3-4 inches. Then, just keep coiling and stitching as if it were one continuous piece.
The stitches will secure the overlap, making a strong, almost invisible join. This is super handy for using up smaller scraps or switching between different core materials for a patterned look.
Step 7: Adding New Stitching Material
Your stitching thread will run out too. When it gets to about 6 inches long, weave the end through a few existing stitches on the inside of the basket to secure it, then trim it close. Get a new piece of stitching material, thread your needle, and start a new tail in the same way you did at the beginning, tucking it into the existing stitches.
Then, just continue stitching as before. It's a really seamless way to keep your project going without any noticeable breaks.
Step 8: Finishing the Edge
When your basket reaches the desired height, you need to finish off the rim. You can simply cut your core material a few inches past your last full coil and taper it down. Wrap your stitching material tightly around this tapered end, securing it with several stitches back into the existing coils.
Then, weave your stitching material's tail into the rim stitches for a few inches, snip the excess, and you're done! You can also create a decorative edge by adding extra loops or knots, but for a first basket, a simple finish is totally fine.
Making It Stick / Common Mistakes
Like any craft, coiled basket weaving has its quirks. You're going to hit some bumps, and that's totally okay. I've unraveled more baskets than I've probably finished, especially in the beginning.
Mistake 1: Stitches are Too Tight or Too Loose
If your stitches are too tight, your basket will pucker and be stiff. If they're too loose, it'll look floppy and won't hold its shape. The key is consistent, firm tension. You want it snug, not strangle-tight.
Practice helps a ton. Try making a few small coasters just to get the feel of the tension before you commit to a big basket. You'll quickly find what feels right.
Mistake 2: Uneven Coils
Sometimes your core material might get thicker or thinner, or you might pull it tighter in some spots than others. This can make your basket look lumpy. Try to keep your core material consistently thick as you coil it.
If you're using natural materials like grass, embrace the irregularity! It adds character. If you want more uniformity, a pre-made core like clothesline is a good starting point.
Mistake 3: Losing Shape Control
One minute you're making a bowl, the next it's a wavy disc. Shaping is probably the trickiest part initially. Remember, for a flat base, keep the new coil directly next to the previous one. For walls, angle it slightly on top.
Step back often and look at your work from different angles. You can gently push or pull the coils into shape as you go, before the stitches are too set. It's like sculpting with thread.
Mistake 4: Running out of Material Mid-stitch
This is just annoying. Always keep an eye on your stitching material length. When it gets short (say, less than 6 inches), it’s better to finish it off and start a new piece than to try and make it stretch.
For your core material, try to anticipate when you'll need to join a new piece. It's easier to plan a join in a less conspicuous spot, like on the inside of the basket.
Mistake 5: Impatience
Coiled basket weaving is meditative, not speedy. It takes time. Don't rush it, or you'll likely make mistakes and get frustrated. Put on some music, listen to a podcast, or just enjoy the quiet rhythm of the stitches.
"The beauty of a handmade basket isn't in its perfection, but in the story of the hands that made it." This craft really teaches you to appreciate the process, not just the finished product.
Frequently Asked Questions
What kind of materials can I really use for the core?
Honestly, almost anything flexible and somewhat sturdy! I've seen baskets made from old denim jeans cut into strips, newspaper twisted into cords, even discarded electrical wire. Natural fibers like tall grasses, corn husks, or even pine needles are also fantastic once dried.
Is It Hard to Learn the Basic Stitch?
The basic stitch itself isn't difficult, but getting the tension consistent and figuring out how to hold everything can take a little practice. My first few attempts were pretty wonky, but after an hour or so, it started to click. Don't be afraid to unravel and restart!
How do I Make Different Basket Shapes, Like Square or Oval?
For square or oval bases, you won't just coil in a continuous spiral. You'll essentially coil back and forth for the straight sides, creating turns at the corners. It's a bit more advanced than a round basket, but totally doable once you've mastered the basic circular coil. YouTube tutorials are your best friend here.
What if My Basket Looks Messy or Uneven?
Guess what? That's handmade! Embrace the "rustic" look. Every little wobble or uneven stitch tells a story and makes your basket unique. As you practice more, your stitches will naturally become more uniform, but there's charm in imperfection too.
How Long does a Typical Coiled Basket Take to Make?
That really depends on the size and complexity! A small coaster might take an hour or two. A medium-sized bowl (say, 6-8 inches across) could easily take 6-10 hours, spread over several sessions. Larger baskets can take significantly longer. It's definitely a marathon, not a sprint.
Can I Use a Regular Sewing Needle for This?
You can, but it might be tricky. Regular sewing needles are usually quite thin and have small eyes, making it hard to thread thicker stitching materials and push through dense core coils. A darning or tapestry needle with a blunt tip and larger eye is usually much easier to work with and less likely to split your core material.
The Bottom Line
Coiled basket weaving isn't just a craft; it's a way to unlock creativity without the usual financial gatekeepers. It teaches you to see potential in everyday scraps and turns the act of making into a mindful, accessible experience.
So, clear out that junk drawer, snip up an old t-shirt, and grab some yarn scraps. You don't need fancy tools or expensive supplies to create something truly special. Just start small, enjoy the process, and see what you can coil into existence. Happy weaving! 👋
Related Posts
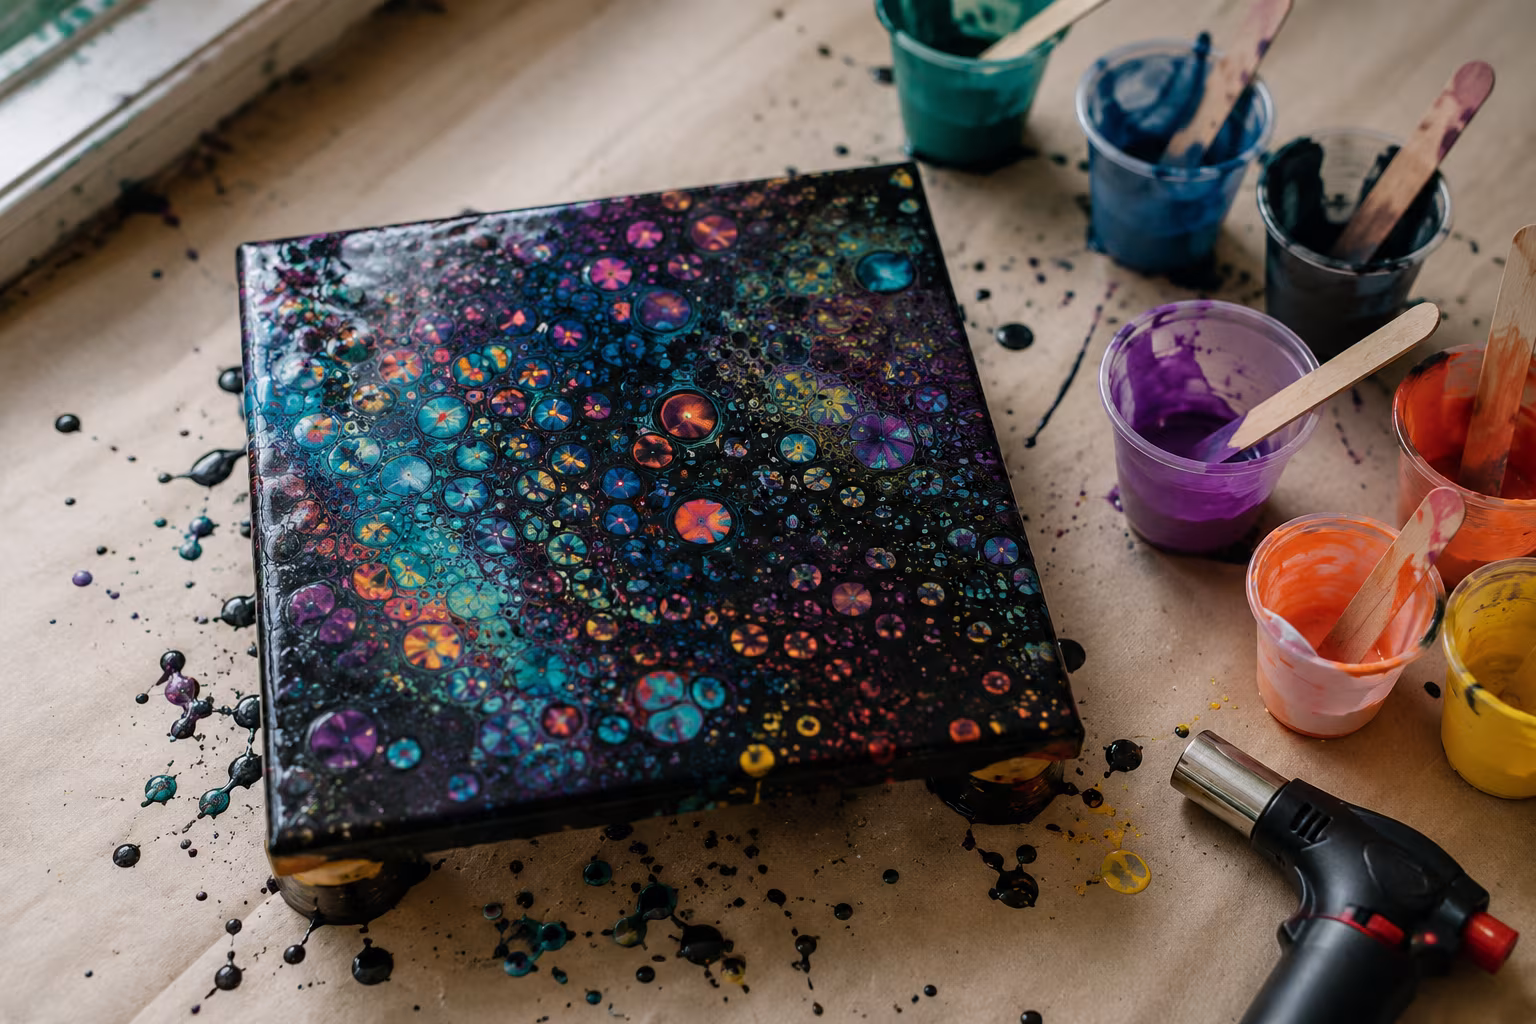
Acrylic Pouring Cells: Why They Form and How to Control
Cells in acrylic pouring come from density and surface tension differences. Understand the chemis...
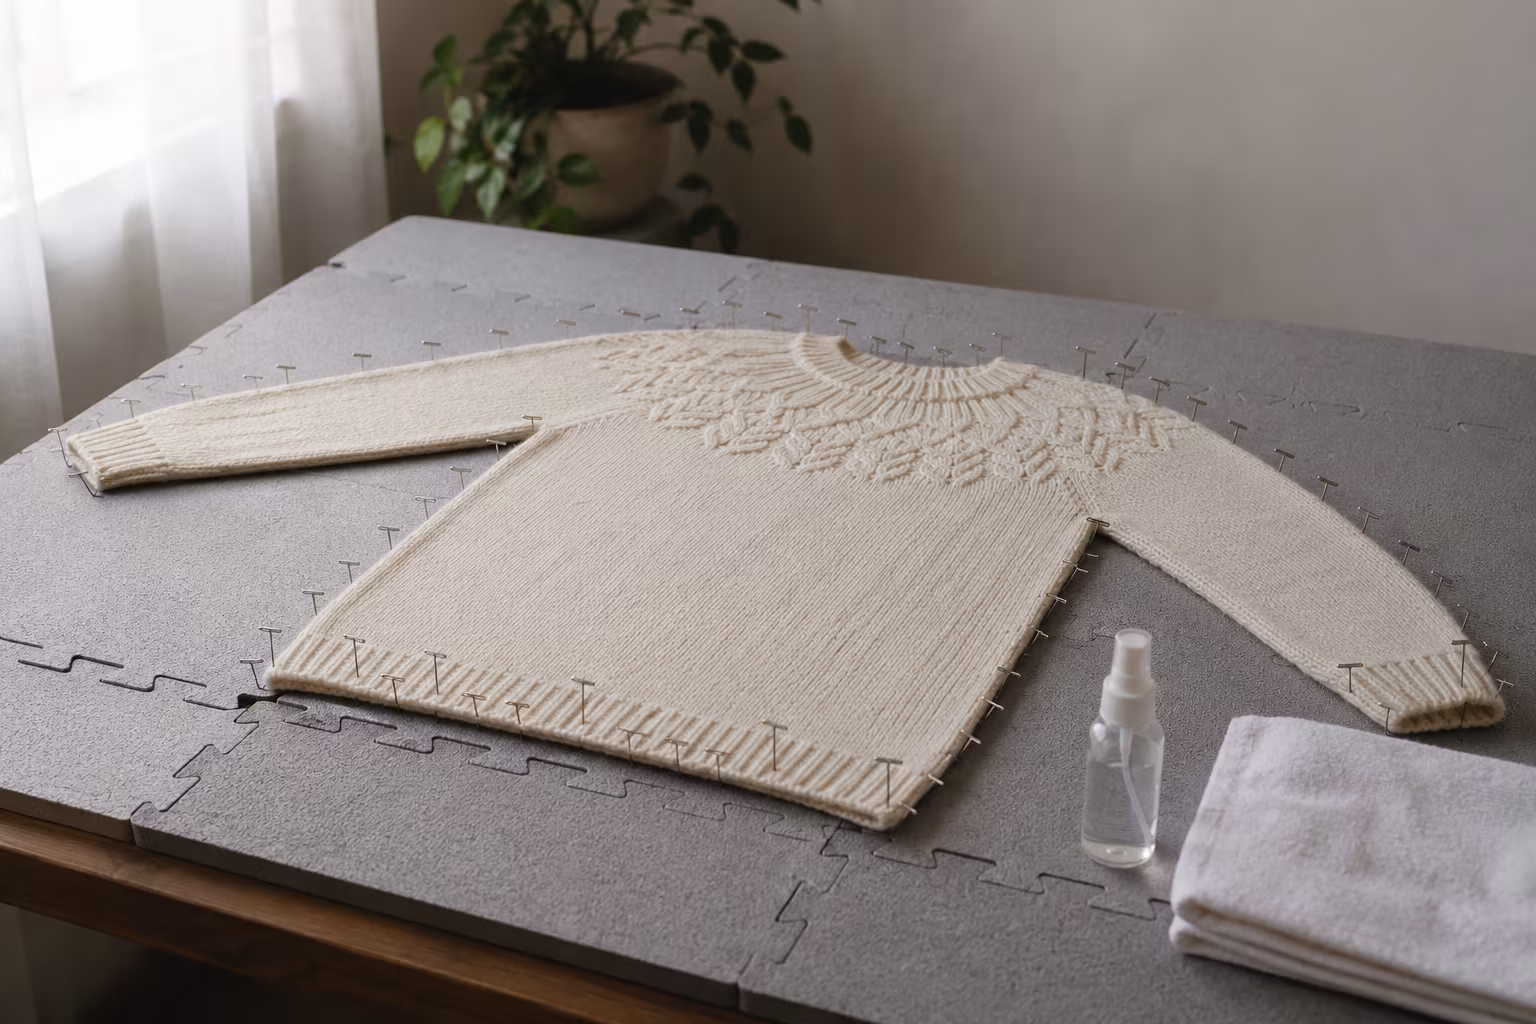
How to Block a Knitted Wool Sweater Without Felting
The blocking routine that opens stitches and sets the shape without turning your wool sweater int...
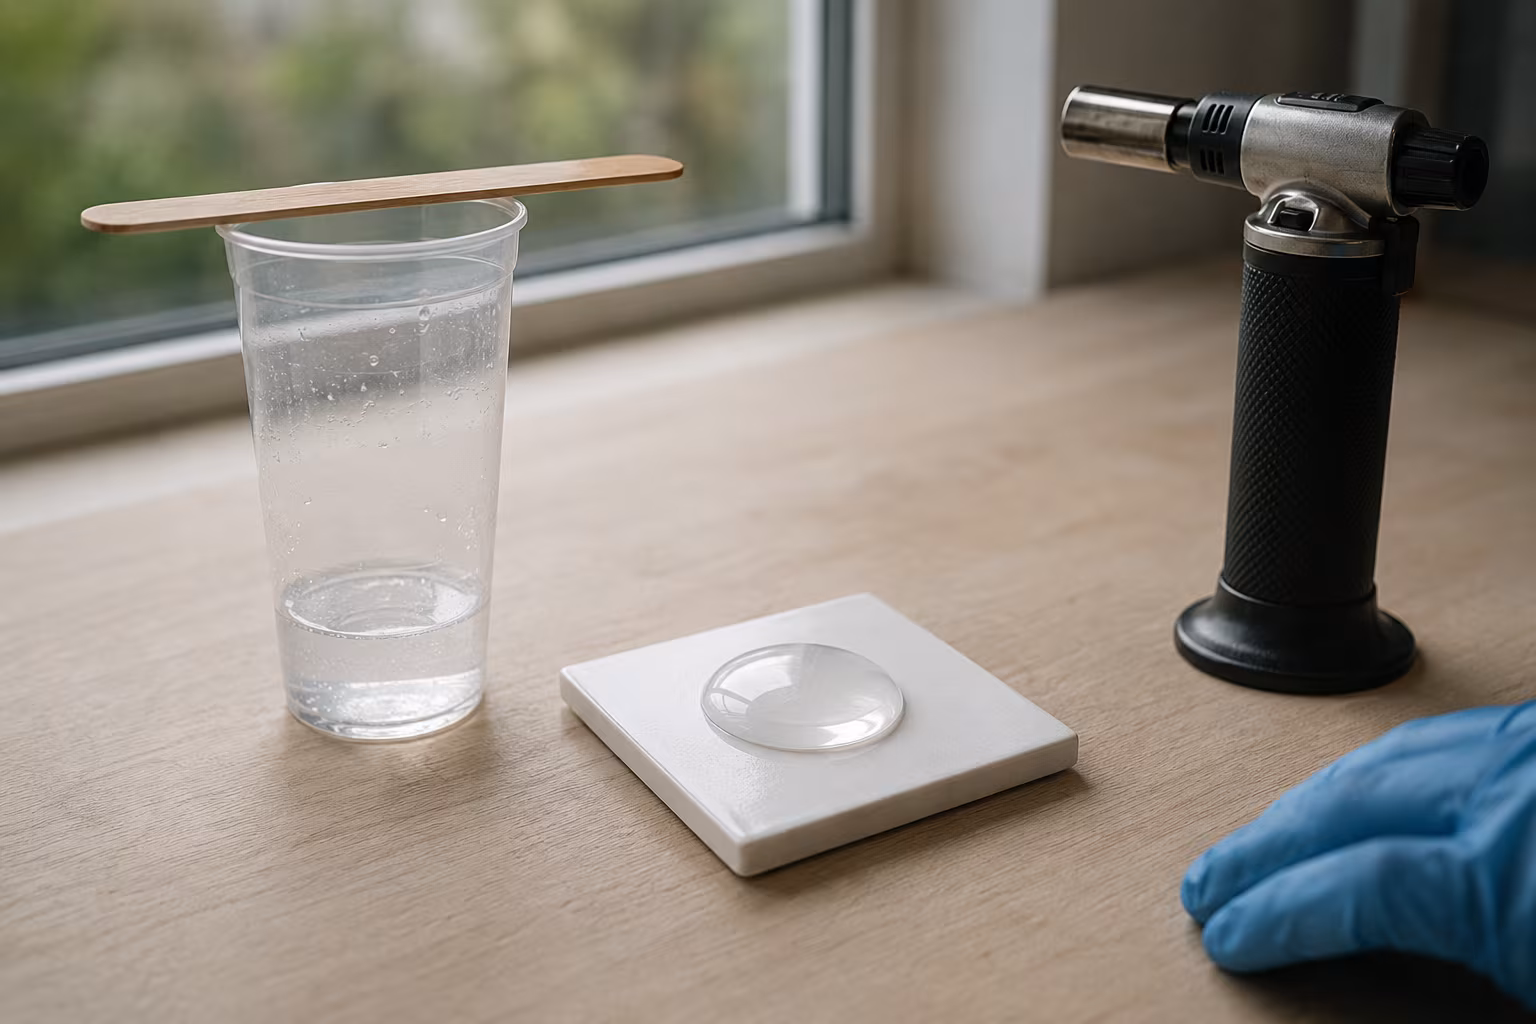
Resin Doming Without Bubbles: A Calm, Reliable Method
A repeatable doming routine that keeps bubbles out and the dome tidy — pour technique, heat metho...
Why Quilling Earrings Are the Most Profitable Craft to Sell Online
Thinking about starting a craft business? You might be surprised to learn that delicate, colorful...