How to Build a Raised Garden Bed Using Only Hand Tools
How to Build a Raised Garden Bed Using Only Hand Tools
You know that feeling, right? You scroll through beautiful garden photos online, envisioning fresh tomatoes and crisp lettuce growing just outside your door. Then you remember your tiny yard, or worse, your complete lack of intimidating woodworkingpower tools.
It’s easy to feel stuck before you even begin. Maybe you’ve looked at those fancy garden bed kits and thought, "Nope, not my budget." Or you’ve seen woodworking videos and felt overwhelmed by all the loud, expensive machinery. I've totally been there, staring at my patchy lawn dreaming of green things, but feeling intimidated by the hardware store's power tool aisle.
But guess what? You don't need a massive workshop or a credit card-busting tool collection to build something truly useful and beautiful for your home. Today, we're going to dive into building a sturdy raised garden bed using only the simplest hand tools. Think quiet sawdust, not roaring motors. It’s totally doable, and honestly, super satisfying.
Why This Actually Matters
Building things with your hands, especially useful things, connects you to a project in a way buying never can. This isn't just about growing vegetables; it's about growing your confidence as a maker. Plus, it saves you a ton of money compared to pre-made beds.
I remember my first attempt at gardening in the ground here in Portland. Our soil is… well, it’s a journey. My plants struggled, and honestly, so did I trying to amend that heavy clay. A raised bed was the answer, but the idea of lugging heavy kits or firing up a circular saw felt like too much for a weekend project. That's when I realized, "What if I just tried with what I have?" And honestly, it changed everything.
You get to control your soil, which means happier plants. You get better drainage, fewer weeds, and a comfortable working height. It’s a game-changer for anyone with challenging soil or a bad back. And when you build it yourself, with your own two hands and a few simple tools, that first harvest tastes even sweeter.
Planning Your Perfect Patch: the Basics
Before you even think about grabbing a saw, let's talk about the fun part: planning! This isn't about rigid blueprints, but rather a little friendly forethought to make sure your bed fits your space and your plants.
Think about where your garden bed will live. How much sun does that spot get? Most veggies love at least six hours of direct sunlight a day. I learned that the hard way with a sad, shaded tomato plant my first year.
Location, Location, Location!
Your bed's home is crucial for happy plants. Pick a spot that's relatively level to avoid your bed looking like it's leaning. Also, consider water access.
Hauling watering cans across the yard gets old fast. Try to place it near a hose or somewhere easy to water. Trust me on this; your future self will thank you when summer hits.
- Sunlight - Aim for at least 6-8 hours of direct sun daily for most vegetables. Observe your yard throughout the day.
- Level Ground - A flat surface helps prevent bowing and makes construction easier. You can always do a little light digging or add some gravel to level things out if needed.
- Water Access - Place your bed conveniently close to a water source. It makes daily care so much simpler.
Choosing Your Wood: the Foundation of Your Garden Dreams
This is where things can get a little tricky if you don't know what to look for. You want wood that will stand up to the elements and won't leach harmful chemicals into your soil. Resist the urge to grab the cheapest treated lumber.
Treated wood is great for decks, but definitely not for growing food! Look for untreated, naturally rot-resistant options. My go-to is always cedar.
Cedar is fantastic because it’s naturally resistant to rot and insects. It’s also beautiful and smells amazing. Pine or fir are cheaper alternatives, but they won't last as long. However, if budget is tight and you're okay with replacing boards in 5-7 years, untreated pine works just fine. I actually used pine for my first small herb bed, and it's still holding up after three years, so don't feel like you have to break the bank.
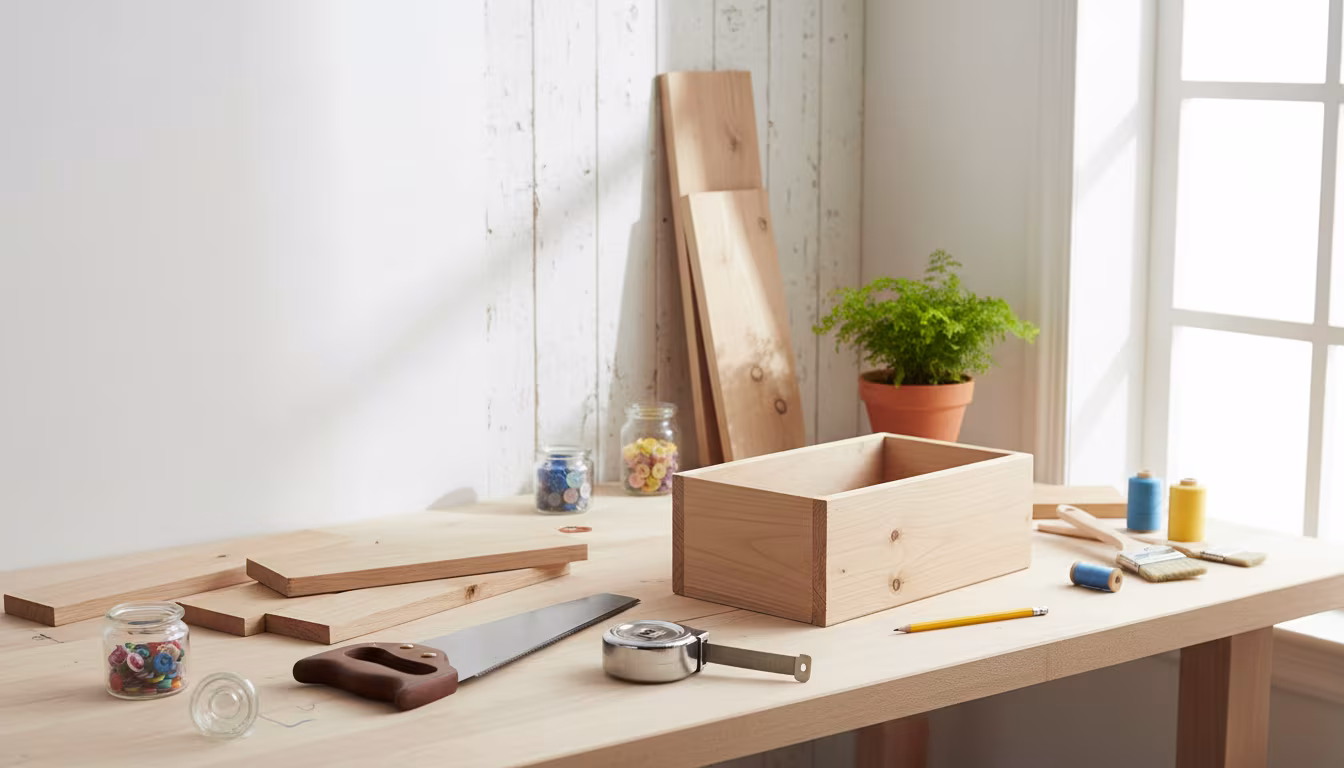
Gathering Your Hand Tools: the Minimalist Workshop
Okay, here’s the exciting part! You really don’t need much. This is about making do and doing well. I've built entire projects with tools I found for $5 at yard sales.
It's all about having the right basics and understanding how to use them effectively. These are the workhorses of a hand-tool workshop, and they'll serve you well beyond this one project.
- Hand Saw - A sharp cross-cut saw is your main cutting tool. Don't worry about perfectly straight cuts yet; we'll get there. Mine cost $18.
- Measuring Tape - Essential for accuracy. A 16-foot tape is usually plenty.
- Pencil - For marking your cuts. A carpenter's pencil is sturdy, but any pencil works.
- Speed Square or Combination Square - For marking straight lines and ensuring square corners. This tool is a lifesaver. I use mine on almost every project.
- Clamps (2-4) - These are your extra hands! They hold wood steady while you cut or assemble. Bar clamps or F-clamps are great.
- Drill (Hand Brace and Bit or Cordless Drill) - For pre-drilling holes. A hand brace is silent and requires no electricity, which is awesome. If you have a cordless drill, that works too!
- Hammer or Mallet - For tapping things into place, driving nails (if using), or chiseling.
- Wood Chisel (optional, if doing lap joints) - For removing small amounts of wood with precision. If you’re sticking to butt joints, you might not need this for your first build.
- Sandpaper (various grits) - For smoothing rough edges. A small block helps.
- Wood Glue (exterior rated) - Adds strength to your joints.
- Screws (exterior rated) - Galvanized or stainless steel deck screws are best. Choose screws long enough to go through one board and at least halfway into the second board you’re joining.
How to Actually do It: Step-by-step Construction
Alright, you've got your wood, you've got your tools, and you've got a vision. Let's make some sawdust! This process is surprisingly straightforward, even if you’ve never built anything like this before.
Take your time, measure twice (or three times!), and don't be afraid to make mistakes. That's how we learn. My first cut with a hand saw was incredibly crooked, and I just laughed, marked a new line, and tried again. It’s all part of the process.
Step 1: Measuring and Marking Your Lumber
This is where precision pays off. Decide on your bed's dimensions. A common size is 4 feet by 8 feet, as it’s easy to reach across, but you can go with anything that fits your space. I'd recommend sticking to common lumber lengths (like 8-foot boards) to minimize waste and cuts.
Lay out your boards on a flat surface, like a driveway or garage floor. Use your measuring tape and pencil to mark the lengths for your side pieces. If you're building a 4x8 foot bed, you'll need two 8-foot boards and two 4-foot boards for each "level" of your bed. For a two-board-high bed, you'll need double that.
Use your speed square to draw a perfectly straight line across the board at your mark. This line will guide your saw, so make it crisp and clear. It really helps keep your cuts straight later on.
Step 2: Making Your Cuts with a Hand Saw
Now for the main event: cutting the wood! This takes a little practice to get a feel for it, but you'll be surprised how quickly you get the hang of it. You'll want to support your wood securely while you cut.
If you have saw horses, great! If not, prop the board up on two sturdy chairs with the cut line extending past the edge. Or, clamp it to a workbench if you have one. The key is to keep the wood from wiggling around.
Start your cut gently on the waste side of your line, pushing the saw forward with short, light strokes to create a groove. Once you have a good groove, you can start using longer, more fluid strokes. Let the saw do the work; don't force it. Use your thumb as a guide for the initial groove if you're feeling unsteady, but move it away quickly once the blade is set.
Keep your eye on the line and try to maintain a consistent angle. It might not be perfect, and that's okay! We're building a garden bed, not a fine piece of furniture. You'll make two long side pieces and two short end pieces for each level of your bed.
Step 3: Preparing the Corner Joints
For a beginner-friendly approach, we're going to use simple butt joints reinforced with interior corner blocks. This is sturdy, easy, and forgiving. You’ll need some extra pieces of wood for these blocks, perhaps some leftover scraps or another 2x4 cut into 12-18 inch lengths.
Cut four (or eight, if doing two layers high) pieces of wood to about 12-18 inches long. These will act as our internal corner braces. They don't need to be perfectly pretty; their job is purely structural.
Take your four main side pieces. Lightly sand any really rough edges where you made your cuts. This just makes handling them nicer and helps the glue stick better. Don't worry about perfection, just knock off the splinters.
Step 4: Assembling Your First Layer
This is where your box starts to take shape! Lay one of your long side pieces on its edge. Take one of your short end pieces and butt its end against the end of the long piece, forming a corner.
Apply a bead of exterior wood glue along the end of the short piece where it meets the long piece. This glue adds incredible strength, even though screws will hold it together. Now, take one of your corner blocks and place it on the inside of this corner, spanning both pieces of wood. You want it flush with the top edge of your frame.
Clamp the corner block and the two side pieces together to hold everything snug. Now, grab your drill. Using a drill bit slightly smaller than the shank of your screws (the part without threads), pre-drill two holes through the face of your long side piece into the end of the short piece. Then pre-drill two more holes through the face of the short side piece into the end of the long piece.
Pre-drilling is SO important, especially with hand tools and softer woods, to prevent splitting. Now, drive your screws into these pre-drilled holes. You should feel a solid connection. Repeat this for all four corners of your first layer.
Step 5: Adding the Second Layer (optional, for Taller Beds)
If you want a taller garden bed, which I highly recommend for better drainage and deeper root growth, you'll repeat the previous step. Once your first layer is assembled, place your second set of long and short boards on top of the first layer.
Stagger the joints if you can for added strength (meaning, if the corner of your first layer is at one spot, try to make the corner of your second layer slightly offset from it). Apply wood glue along the top edge of your first layer where the second layer will sit. Then align your second layer, ensuring the corners line up, and add your internal corner blocks.
Clamp everything securely. Pre-drill and screw these boards together, both into each other at the corners, and through the corner blocks. You’ll also want to screw the top layer down into the bottom layer along the long sides, every 1-2 feet, just for extra stability. More screws mean a sturdier bed. I usually put about 3-4 screws along each long side, screwing the top board into the bottom board.
Step 6: Final Touches and Site Prep
Once your box is assembled, take a moment to admire your handiwork! It's a real accomplishment. Do a quick check for any sharp edges or splinters and give them a quick pass with sandpaper. This just makes it safer for you and anyone else working in the garden.
Now, move your completed raised bed to its final location. If you haven’t already, ensure the ground is relatively level. You can use a shovel to clear any grass or weeds from the footprint of the bed. I usually put down a layer of cardboard on the bottom of my beds to suppress weeds, and then wet it thoroughly. It breaks down over time and adds organic matter to the soil.
Finally, fill your bed with a good quality raised bed soil mix. This is a mix of topsoil, compost, and other organic materials designed for optimal drainage and nutrient content. It’s crucial for giving your plants the best start. My go-to recipe is usually a 60/30/10 mix of good quality garden soil, compost, and perlite or vermiculite for drainage.
Making It Stick: Avoiding Common Mistakes
Learning any new skill means you'll probably bump into a few snags. That's totally normal, and honestly, it's how you learn best! I’ve made all these mistakes myself, sometimes more than once.
The goal isn't to be perfect right out of the gate, but to anticipate common challenges and learn how to work through them. Think of it as part of the creative process, not a failure.
Mistake 1: Not Measuring Twice (or Thrice!)
Oh, this one gets everyone! You measure, you mark, you cut... and then you realize it’s an inch too short. Sound familiar? It’s happened to me with everything from shelves to picture frames.
The solution is simple but requires discipline: literally measure your mark again before you cut. Use your square to draw a clean line. Measure from that line to the end of the board. Double-check. It takes an extra 10 seconds and saves so much frustration (and wasted wood!).
Mistake 2: Rushing Your Cuts
When you're eager to see your project take shape, it's easy to just saw away. But rushing with a hand saw often leads to jagged, uneven cuts that are hard to join neatly. Your hand will get tired, and you'll want to speed up. Don't!
Instead, take breaks. Focus on keeping a steady, even stroke. Let the saw's weight do the work. If your blade starts to bind, ease up on the pressure. A smooth, rhythmic motion is much more effective than brute force.
Mistake 3: Skipping Pre-drilling
This is a big one, especially if you're using softer woods or driving screws close to the edge of a board. Without pre-drilling a pilot hole, the screw can act like a wedge, splitting your wood. It’s disheartening to hear that crack after all your hard work.
Always, always pre-drill. Use a bit that's slightly smaller than the screw's shank (the smooth part of the screw, not the threads). It guides the screw, prevents splitting, and makes driving the screw so much easier, especially if you're using a hand brace.
Mistake 4: Not Using Exterior-rated Hardware
You’re building something that’s going to live outside, exposed to rain, sun, and damp soil. If you use regular indoor screws, they'll rust and weaken quickly, and your beautiful bed will fall apart sooner than you expect.
Invest in galvanized or stainless steel screws. They cost a little more, but they’re specifically designed to resist corrosion. It’s a small detail that makes a huge difference in the longevity of your project.
Mistake 5: Overthinking It and Not Starting
This is probably the biggest mistake anyone can make with a new hobby. You research, you plan, you buy some tools, and then… you get stuck in analysis paralysis. The fear of not doing it perfectly keeps you from doing it at all.
"Done is better than perfect, especially when you're learning something new. Just start."
Your first raised bed doesn't need to be magazine-perfect. It needs to hold soil and grow plants. Every cut, every screw you drive is a learning experience. Embrace the imperfections; they tell the story of you learning a new skill. My first piece of furniture I made has a wobbly leg, but it's my wobbly leg.
Frequently Asked Questions
What Kind of Wood Should I Use for My Raised Garden Bed?
I always recommend untreated cedar because it’s naturally rot-resistant and lasts a long time without chemicals. Untreated pine or fir are also options if you're on a tighter budget, but they won't last as many years. Just make sure whatever you choose is untreated, especially if you're growing food!
How Deep Should a Raised Bed be for Most Vegetables?
For most common vegetables, a depth of 10-12 inches is usually sufficient. This allows for good root growth and drainage. If you plan to grow root vegetables like carrots or potatoes, a 18-24 inch deep bed would be even better, or you can opt for shallower varieties.
Do I Need to Line the Inside of My Raised Bed?
You don't absolutely have to, but I often line the bottom with a layer of cardboard to suppress weeds and the sides with landscape fabric. The cardboard helps break down any existing weeds, and the fabric keeps soil from washing out through cracks while still allowing drainage. Just avoid plastic liners, which can prevent proper drainage and aeration.
Can I Use Nails Instead of Screws for Assembly?
Yes, you definitely can use nails! Choose exterior-rated galvanized or stainless steel nails. They can be a bit trickier to get truly secure connections without strong clamps and good hammering technique, but it's entirely possible. I find screws offer a bit more holding power and are easier to remove if you make a mistake, but nails are certainly a viable option.
What if My Cuts Aren't Perfectly Straight? Will My Bed Fall Apart?
Don't worry, your bed won't fall apart just because a cut isn't laser-straight! Mine rarely are, honestly. As long as the pieces are generally aligned and you use plenty of exterior wood glue and screws (or nails) at the joints, your bed will be sturdy. A slight gap here or there is part of the charm of handmade projects, and your plants won't mind a bit. Just fill it with soil!
How Long does This Project Usually Take for a Beginner?
With just hand tools, I'd budget a full weekend for a project like this, maybe 8-12 hours total spread out over two days. That includes time for measuring, cutting (which takes longer by hand), assembling, and dealing with any little hiccups. It's not a race, it's about enjoying the process. My first one took me a bit longer because I was figuring things out.
Is This Worth It for Someone with a Small Balcony or Patio?
Absolutely! Raised garden beds are fantastic for small spaces. You can customize the size to fit perfectly on your balcony, and you get all the benefits of controlling your soil without needing a big yard. Just make sure your balcony can support the weight of a soil-filled bed, which can be considerable. Small beds are perfect for herbs and salad greens. I have two small ones on my patio right now!
The Bottom Line
Building a raised garden bed with just hand tools isn't just about constructing something practical; it's about building your confidence as a maker. It’s about slowing down, connecting with the materials, and realizing you don't need fancy equipment to create something wonderful.
It might not be perfect, and you might even make a mistake or two (I certainly did!), but that's part of the story. You'll learn, you'll grow, and you'll end up with a beautiful, functional garden bed that you built with your own hands. So grab those tools, find some wood, and just start. Your future garden, and your future self, will thank you. Happy making! 👋
Related Posts
Cabinet Hinge Adjustment: Side, Depth, and Height Fix
Three screws, three directions, one diagnosis. Stop fighting misaligned cabinet doors — learn whi...
How to Hang a Heavy Mirror on Drywall Without Studs
No stud where you want the mirror? The anchor choices, weight math, and install routine that hold...
The Best Way to Weatherproof and Stain an Old Wooden Deck
Is your old wooden deck looking a little worse for wear? We'll show you the easiest, most effecti...
Why Wainscoting Panels Make Plain Hallways Look High-End
Dreaming of a more sophisticated entryway? Learn why wainscoting panels are a game-changer for ma...