
Strip Painted Brass Hardware Without Eating the Patina
The short answer
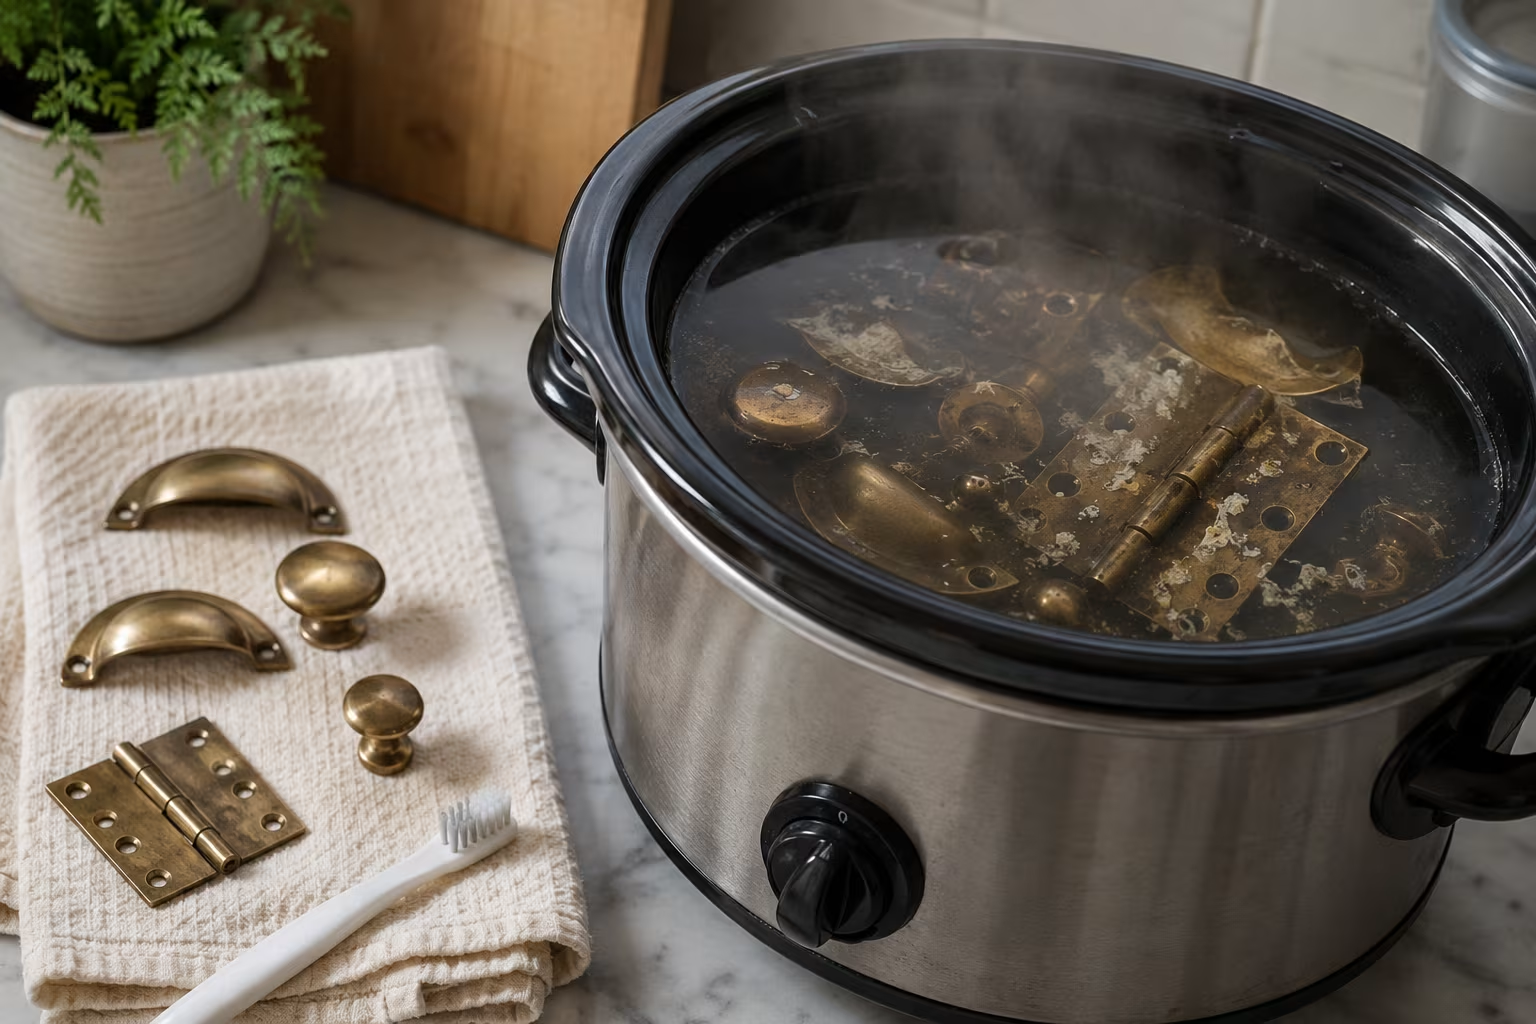
Submerge painted brass hardware in a slow cooker filled with hot water on the low setting for several hours. The heat and time soften the paint, and most coats peel away with light brushing using a soft toothbrush. The brass underneath emerges with its patina intact because no abrasive material has touched it.
Avoid the methods that look faster but damage patina: metal scrapers, wire brushes, abrasive scouring pads, sandpaper, polishing compounds, and bath-brass-cleaners with chemical strippers in them. Any of these strips the aged surface along with the paint. Once the patina is gone, no amount of artificial aging brings it back convincingly.
The slow-cooker approach takes a half day of mostly-unattended time but produces hardware that looks like it has lived for decades because it has — the surface you see when the paint comes off is the same surface that has been there for years under the paint.
Why patina matters
Patina is the surface oxidation layer that forms on brass over years of exposure to air, oils from human contact, and moisture. The layer is microscopically thin but visually significant — it gives brass its aged warm appearance, the slight darkening in recessed areas, the subtle colour variation across surfaces.
When someone painted over brass hardware (often during a previous renovation, when brass was out of fashion), the paint trapped the patina beneath it. Removing the paint without removing the patina recovers the original surface intact.
The alternative — stripping aggressively and polishing the brass back to bright yellow — produces hardware that looks new, but the visual effect is jarring in a home where everything else has aged. A bright-polished brass hinge next to a hundred-year-old door reads as wrong even before you can articulate why.
The decision to keep the patina is largely an aesthetic one. For homes that want a deliberate vintage look, the patina is the goal. For homes that want a modern fresh look, polishing to bright brass may be preferred — but that path is harder to undo.
The slow cooker method step by step
Materials needed: a slow cooker (or crockpot) you no longer use for food, water, a soft toothbrush, and tongs or a small slotted spoon for handling hot hardware.
Place the painted hardware in the slow cooker. Fill with water to cover the hardware completely. Set to low and cover.
Leave for 4-8 hours. The exact time depends on how much paint is on the hardware, how old the paint is, and how thick the layers. Older, multi-layer paint takes longer; fresh single-coat paint comes off faster.
Check progress occasionally. The water may darken as paint releases; this is normal.
When the paint appears soft or has begun lifting from the brass, remove a piece with tongs. Set on a folded towel to cool briefly (the brass is hot enough to burn).
Brush the softened paint off with the soft toothbrush. Hot water from the slow cooker on the brush helps release stubborn spots. The paint comes off in small fragments or in larger flakes; both are normal.
Return any pieces with remaining paint to the slow cooker and continue. Multiple cycles are fine for stubborn paint.
Once paint is removed, rinse the brass under warm water and dry with a soft cloth. Inspect for any small paint specks; address with the toothbrush.
The patina remains intact under the paint because the hot water and soft brushing do not abrade the brass surface.
What not to use
The methods that damage patina are tempting because they work faster. They also produce hardware that looks like it has been refinished rather than restored.
Metal scrapers and putty knives. Even careful use scratches the brass surface. Each scratch shows as a bright line where the patina has been removed.
Wire brushes. Either hand wire brushes or wire wheels on a drill. The bristles scour the patina off along with the paint.
Steel wool or 3M scouring pads. Designed to abrade. Will remove patina across any surface they touch.
Sandpaper. Even fine grits remove the very thin patina layer along with the paint. Visible polishing marks remain.
Brass polish and chemical brass cleaners. Most contain mild abrasives plus acids designed to strip oxide layers. Will brighten the brass and remove the patina simultaneously.
Acetone, denatured alcohol, lacquer thinner. These dissolve paint but also strip the wax coatings that sometimes preserve patina. Use only when slow-cooker method has failed for stubborn modern paints, and accept that some patina may degrade.
Vinegar and salt solutions. These remove brass oxides quickly. They also produce the bright-polished brass appearance that destroys patina.
The discipline is patience over force. The slow cooker takes longer but preserves the brass's character.
Alternative methods when the slow cooker is unavailable
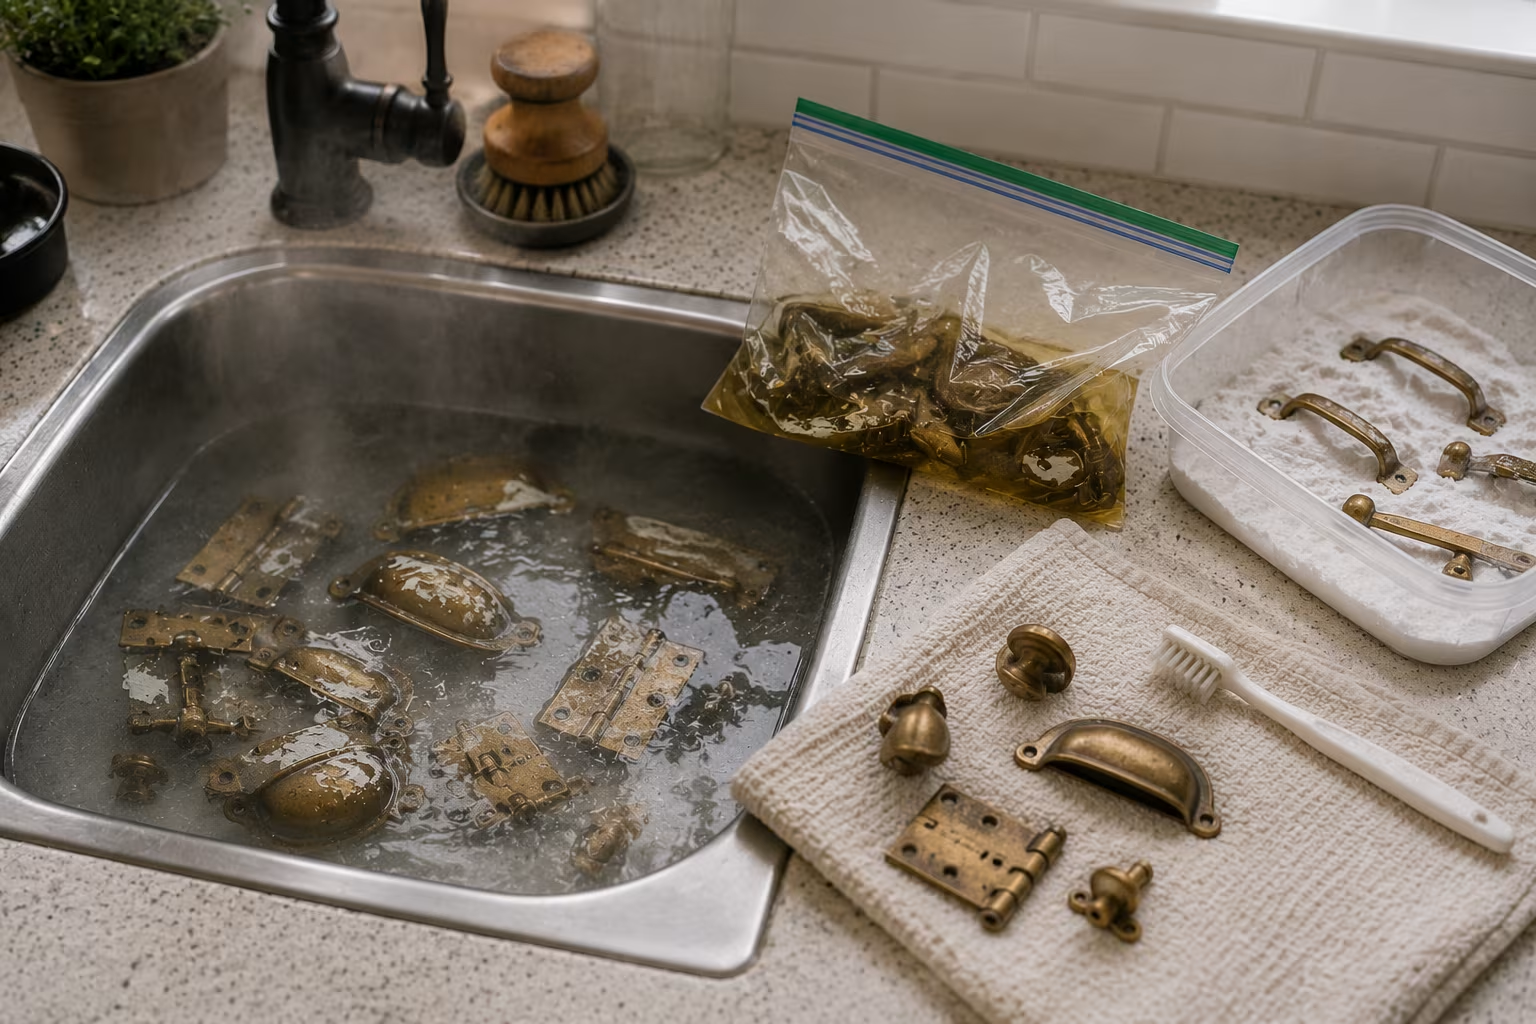
For situations without a dedicated slow cooker, several alternatives work with adapted techniques.
Hot water immersion in a sink. Fill a sink with very hot tap water, immerse the hardware, and leave for an hour. Refresh with more hot water as it cools. Slower than the slow cooker but uses no special equipment. Brush off softened paint with a soft toothbrush.
Sealed bag with paint stripper. Place hardware in a heavy-duty zip bag with a small amount of commercial paint stripper. Seal and leave overnight. The stripper softens the paint chemically. Rinse thoroughly afterward. This method works but uses chemicals; ventilation matters and patina protection is less certain because stripper can react with brass.
Steam bath. Hold each piece of hardware in steam from a pot of boiling water for 5-10 minutes. The steam softens paint similarly to immersion but requires patient piece-by-piece work. Useful when only one or two pieces need stripping.
The slow cooker is the recommended approach because it requires no chemicals, applies uniform heat for hours, and works in the background while you do other things.
Handling delicate hardware
Some brass hardware has features that need extra care during stripping.
Pierced or filigree work. Small openings can be difficult to clean. Use a wooden toothpick or a soft natural-bristle brush to access tight spaces.
Engraved or stamped details. Recessed areas may retain paint after the main surface is clean. Repeated short slow-cooker sessions with brushing between each one clear stubborn paint from recesses without aggressive scrubbing.
Cast hardware with porous surfaces. Cast brass sometimes has tiny surface pits that hold paint. Patient repeated cycles work; aggressive cleaning damages the surrounding patina.
Mixed-material hardware. Some pieces combine brass with iron screws, steel inserts, or wood. Disassemble where possible before stripping to handle each material separately. Iron and steel react differently to long water immersion; remove screws before extended soaks.
Lacquered brass. Some brass hardware has a clear lacquer finish from manufacture. Lacquer survives hot water but degrades over time. After stripping painted surfaces, the lacquer may show wear; full restoration requires either re-lacquering or accepting an exposed brass surface.
What to do after stripping
Once the paint is removed and the brass dry, consider what finish to apply.
Leave bare. The patina is visible. No additional finish needed. The brass continues to age naturally with use. Best for hardware that gets handled (door knobs, drawer pulls) where natural oils from hands maintain the patina.
Wax with paste wax. A thin coat of carnauba or museum wax protects the patina from accelerated oxidation. Apply with a soft cloth, buff with a clean cloth. The wax is invisible but slows future surface changes.
Clear lacquer. A spray-on clear lacquer locks in the current appearance. Best for hardware that does not get handled much (cabinet faces, decorative pieces). Lacquer can yellow slightly over years and is hard to remove if you ever want to change the finish.
Renaissance wax. A specialty microcrystalline wax used in museums for preserving metal artifacts. Higher cost than household wax but provides excellent long-term protection without altering appearance.
For most home applications, paste wax is the right compromise. It protects without committing to a permanent finish change.
When the underlying brass is damaged
Sometimes removing paint reveals brass that was scratched, dented, or corroded before the painting happened. The paint was hiding the damage.
Light surface scratches can be polished out with a very fine compound and a soft cloth. Be aware that polishing removes patina in the polished area; the repaired spot will look different from the surrounding aged surface.
Deeper scratches and dents are essentially permanent without significant restoration work. Accept the damage as part of the hardware's history, or consider whether the piece is worth professional restoration.
Severe corrosion (green or white powder, deep pitting) may indicate the hardware was exposed to caustic conditions at some point. Heavy cleaning may be needed to remove the corrosion products, but the surface beneath is often pitted permanently.
For valuable or irreplaceable hardware, a professional metals conservator can assess and restore the piece more sensitively than home methods allow.
Reinstalling stripped hardware
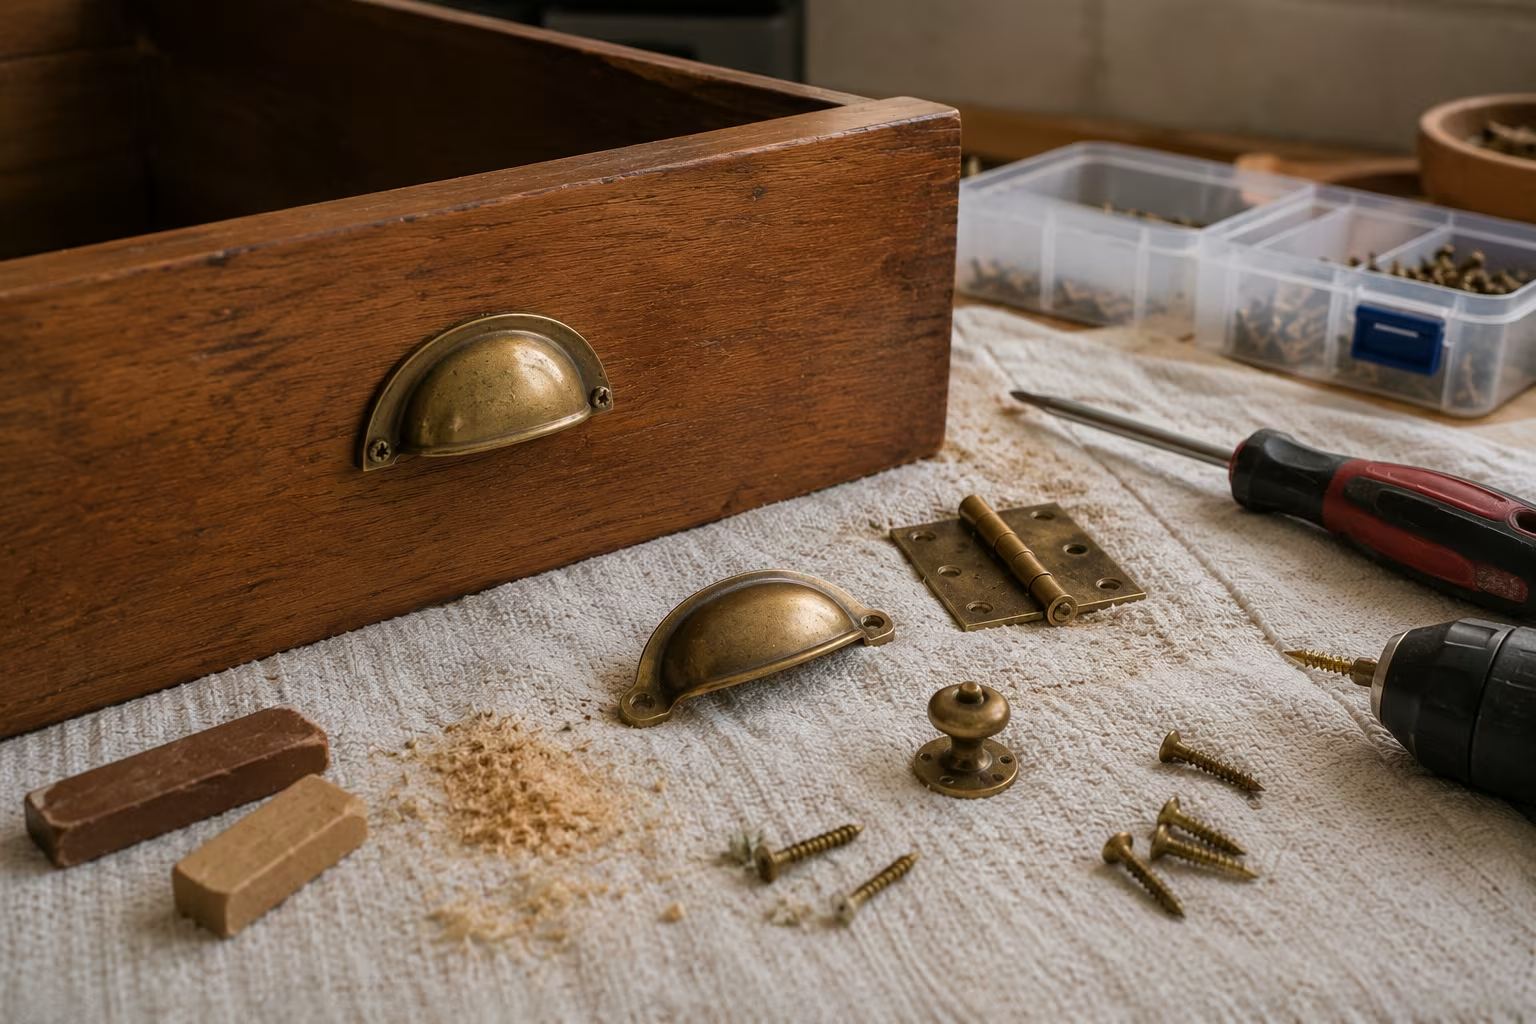
After stripping, the hardware goes back where it came from (or somewhere new).
Original screws often have paint too. Run them through the same slow-cooker cycle if they are decorative; for plain screws, replacement is usually easier.
The screw holes in wood may also have paint that needs scraping or filling. Address the wood surfaces around the hardware separately.
If the hardware is being moved to new locations, drill new pilot holes appropriately for the screws. Old wood holes that no longer hold screws can be filled with toothpicks and wood glue for fresh purchase.
The restored hardware should fit and function the same as it did before painting. The visual character — the warm aged patina — is the change you have recovered through careful stripping.
Long-term care of restored brass
Restored brass hardware needs little ongoing maintenance to keep its character.
Dust occasionally with a soft cloth. Avoid commercial dusting sprays that contain silicone — silicone builds up on brass and interferes with future restoration efforts.
For waxed pieces, refresh the wax annually. The protective layer wears with handling.
Avoid harsh cleaners and abrasive sponges anywhere near the brass. The cleaning approach is dry or barely-damp soft cloth only.
Accept that the patina will continue to age. Hardware that gets handled darkens further in the high-touch areas (the part of a door knob you grip, the centre of a drawer pull). This continued aging is part of the patina's evolution; it is not damage.
The discipline of preserving patina once you have it pays back over decades of the hardware's life. A restored piece of brass with intact patina holds its character through generations; an aggressively polished piece needs re-polishing as soon as fingerprints accumulate.
When the original brass is plated, not solid
A significant portion of decorative hardware is brass-plated steel rather than solid brass. The thin brass layer (often less than 0.001 inch thick) sits over a steel base. Aggressive scrubbing during paint removal can wear through the plating, exposing the steel and ruining the piece.
The slow-cooker method is gentle enough that plated hardware survives intact in most cases. Soft brushing during paint removal does not abrade the plating layer. Once stripped, the plated piece looks identical to solid brass at normal viewing distance.
To test whether your hardware is solid or plated: examine the edges or screw holes for any visible steel coloration showing through. Magnetic test also helps — solid brass is non-magnetic; plated steel is magnetic. A small magnet pulled along the hardware reveals whether the base material is steel.
For plated hardware that has worn through to the steel in spots, the piece is essentially terminal — brass plating cannot be reapplied at home. The hardware can still function but will show the steel underneath until eventually replaced.
Working through large hardware quantities
For whole-home restoration projects where many pieces of hardware need stripping, the slow-cooker method scales but requires patience.
A standard slow cooker holds 6-12 pieces of typical hardware at once depending on size. Process in batches. A weekend can handle 40-60 pieces with periodic checking.
A dedicated second slow cooker speeds the process by allowing parallel batches. Thrift store slow cookers cost little and work fine for paint stripping.
Keep batches organized — label pieces with their original locations so they return to the right doors and cabinets. Photos of each location before removal help with reinstallation months later when the restoration finishes.
The stripping schedule:
| Method | Time | Capacity |
|---|---|---|
| Slow cooker soak | 4–8 hours | 6–12 pieces per pot |
| Steam (delicate pieces) | 5–10 min over boiling water | — |
| Weekend total | 40–60 pieces | with periodic checks |
| Plated warning | brass layer often <0.001 in over steel | magnet sticks = plated — do not scour |
Related Posts

Toilet Seat Slow-Close Hinge Replacement
A broken slow-close hinge makes the toilet seat slam or fail to stay up. Replacement is a...

Drywall Corner Bead Replacement After Damage
Damaged drywall corners with dented or split corner bead show ugly visible damage. The...
Bathtub Resealing: When Silicone Beats Caulk and Vice Versa
Reseal a bathtub right: 100% silicone at the flexing tub-to-tile joint, acrylic caulk only on...
Fix Squeaky Hardwood Floors From Above (No Access)
Fix squeaky hardwood floors from above with no access below: talcum powder for board-on-board...
Comments
No comments yet. Be the first to share your thoughts!