
Drywall Corner Bead Replacement After Damage
The short answer
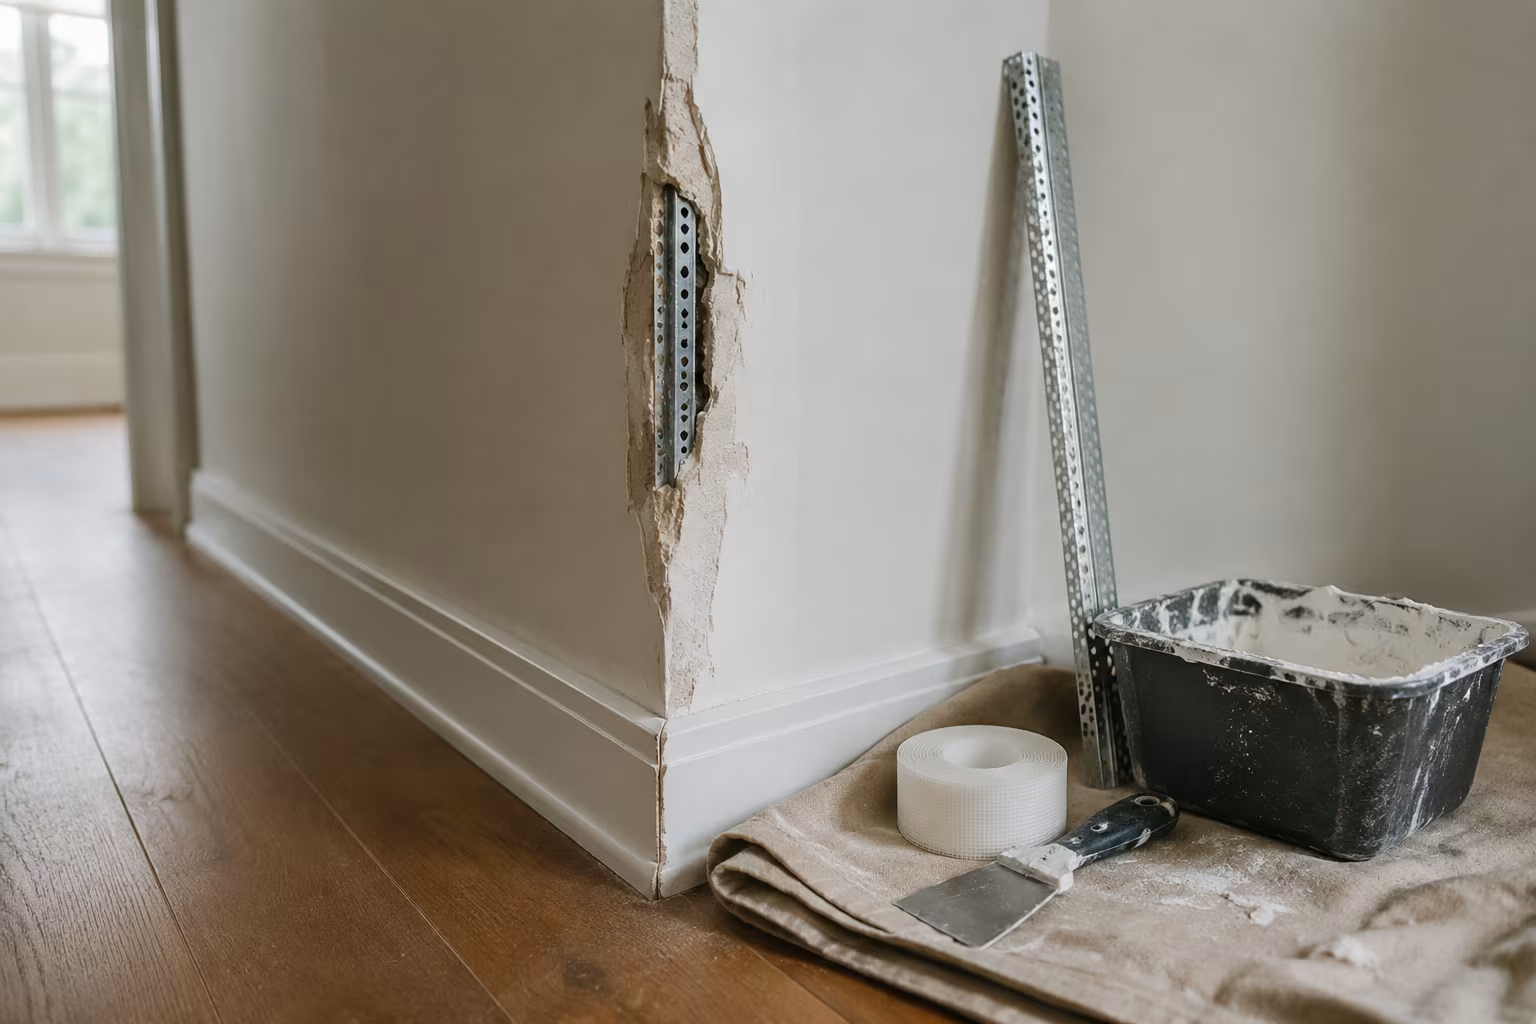
When a drywall corner gets damaged — dented from furniture, split from impact, exposed metal after paint failure — surface spackle won't fix it. The corner bead (the strip of metal or paper-faced metal that protects the corner) is damaged, and the repair requires removing the old bead and installing a new one.
The work takes a few hours over two days (mud needs to dry between coats). The materials cost is modest: replacement corner bead, drywall joint compound, drywall tape, sandpaper. The skill needed is mid-level DIY; an unfamiliar person can do it carefully, but it will take longer the first time.
The result, done correctly, is invisible. The corner returns to its original look with no visible repair after primer and paint.
Identifying the damage
Surface paint damage with intact corner bead: skim coat with spackle and repaint. Doesn't need bead replacement.
Dented bead under intact paint minor visible damage. Decide if it bothers you enough to justify the repair work.
Split or cracked bead structural damage to the corner. Replacement is the right answer.
Exposed metal bead under paint the paint film failed and you can see the bead through. Replacement may not be needed; spot-skim with mud and repaint.
Bent or detached bead structural damage. Replacement.
Removing the old corner bead
Score along both sides of the bead with a utility knife. Cut through the existing tape and paint layer.
Pry the bead away from the corner with a putty knife or small pry bar. The bead may come off in one piece or in sections depending on installation method.
Clean the corner edge. Remove any remaining adhesive, screws, or old mud.
Inspect the underlying drywall. If the corner has structural damage to the drywall itself, more involved repair is needed (replacing a section of drywall).
Installing new corner bead
Two main types of corner bead:
Metal corner bead traditional. Sharp edges, durable, holds up to impact. Standard for residential and commercial.
Paper-faced corner bead (No-Coat) newer. Less prone to denting, easier to install for beginners, better for high-impact areas like kitchens.
Cut the new bead to length. Use tin snips for metal; a sharp utility knife scores paper-faced for breaking.
Test fit. The bead should sit flush with both drywall surfaces along the entire length.
Install with screws (metal bead) or with joint compound and embedding (paper-faced bead). Drywall screws every 6 inches for metal; embed paper-faced firmly in compound.
Mudding and taping
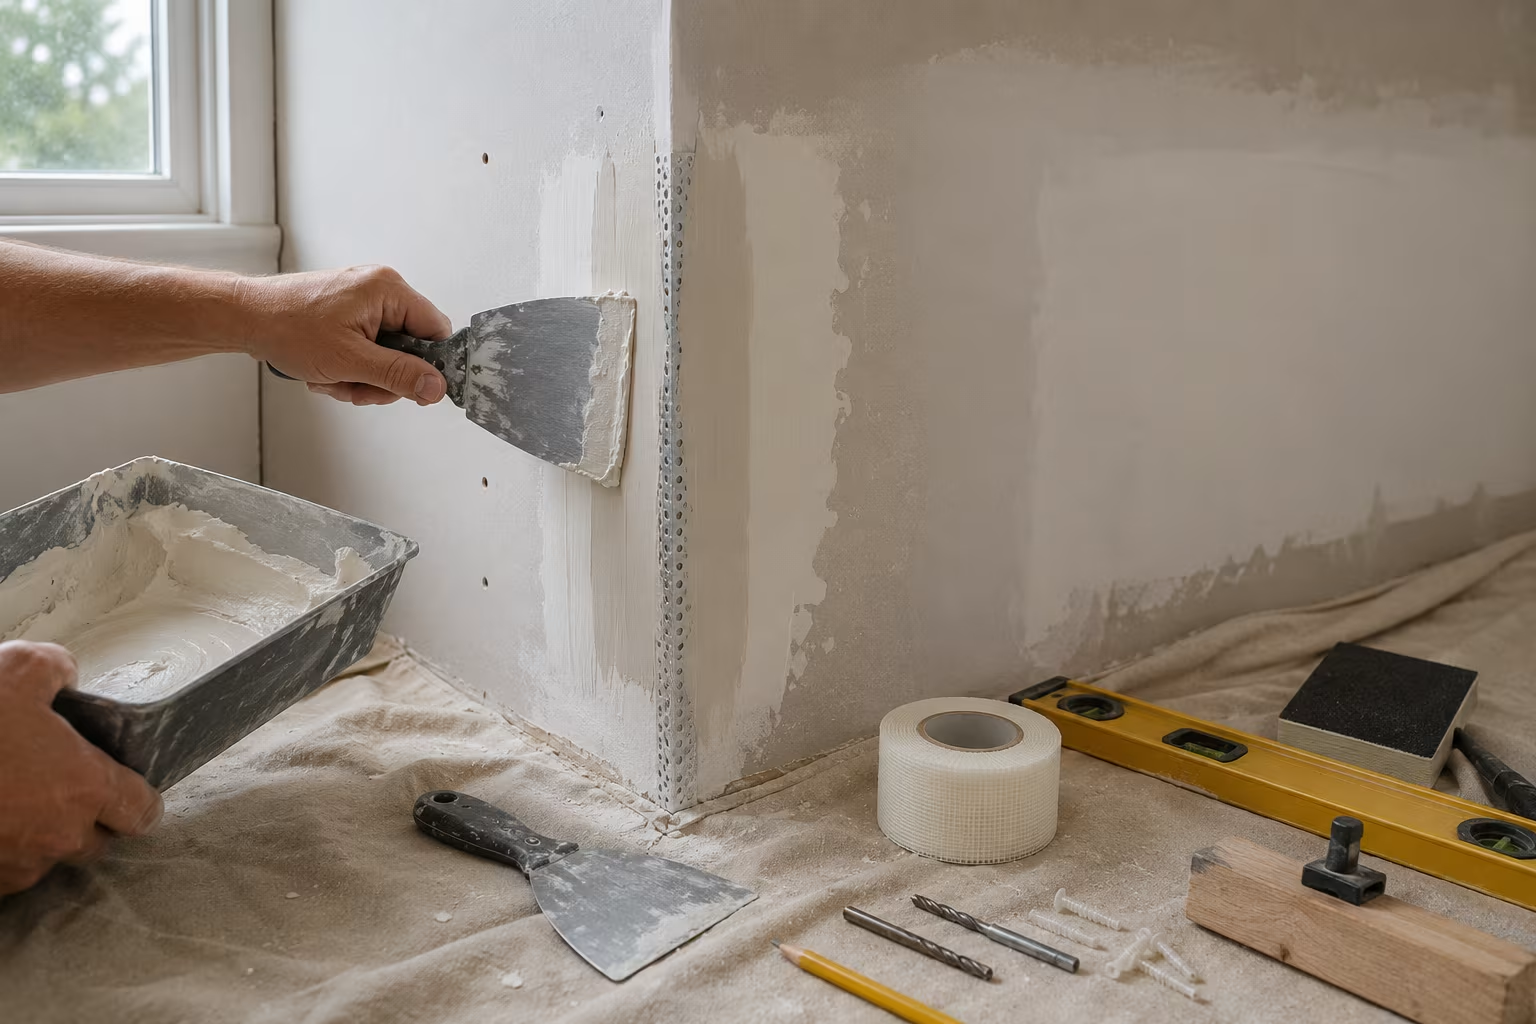
After bead is installed, the repair gets multiple coats of joint compound.
First coat bed coat. Apply compound 4-6 inches wide along each side of the bead. Embed any tape needed (over screw heads on metal bead). Let dry 24 hours.
Second coat fill coat. Wider application, 8-10 inches each side, feathering the edges. Let dry.
Third coat skim coat. Very thin, 12+ inches wide, smoothing all transitions. Let dry.
Sand between coats and after the final coat. Use 120-grit for between coats, 220-grit for final smoothing.
The mud feathers out so the corner blends invisibly with the surrounding wall. Done correctly, you cannot see the repair after paint.
Painting and finishing
Prime the repaired area with drywall primer. The new compound absorbs paint differently than the surrounding wall; primer equalizes this.
Paint two coats matching the existing wall paint. Feather the edges of the painted area so it blends with the surrounding wall.
For colored walls, the color match is critical. Use the existing paint can if available, or have the store color-match a fresh chip.
After painting, the corner should look identical to undamaged corners in the room. Up close inspection might reveal slightly different texture; from normal viewing distance the repair is invisible.
Common mistakes
Trying to repair damaged bead without removing it. Skim coats over dented bead reveal the dent through the paint.
Insufficient mud feathering. Visible compound lines after paint dries. Each coat should extend wider than the previous.
Sanding too aggressively. Removes too much compound or damages the corner edges. Light pressure with progressively finer grits.
Painting before primer. Mud absorbs paint differently; primer is non-negotiable for invisible result.
Choosing the wrong bead type for the location. High-impact areas (corners near doors, in hallways with traffic) benefit from paper-faced bead. Low-traffic areas accept metal bead.
When professional help makes sense
Several situations justify hiring a drywall contractor.
Multiple damaged corners across a home: the time and learning curve adds up. A professional can do many corners in a day.
Damage extending into the corner from a larger impact: torn drywall, structural damage to framing.
Texture that matches existing knockdown or orange peel: matching existing wall texture is harder than smoothing flat. Pros have the right tools and skill.
Time pressure: if you need the repair done before a deadline, a contractor is faster.
For a single damaged corner with a confident DIYer, the work is achievable. The result is permanent and looks professional when done with care.
Corner Bead Types and Selection
The drywall industry produces several distinct corner bead types, each suited to specific situations and damage scenarios:
Metal corner bead (galvanized steel) the classic option for 90-degree outside corners. Strong, durable, and inexpensive at 1-3 USD per 8-foot section (as of 2026 — confirm current pricing). Standard width 1-1/4 inches per leg. Installs with drywall screws or nails every 8-10 inches. Can dent under impact and the dent permanently shows even after mud repair.
Vinyl corner bead more flexible than metal, better for areas prone to settling or movement. Doesn't rust in humid bathrooms. Slightly more expensive at 2-4 USD per 8-foot. Adhesive-backed versions install without fasteners but cost more.
Paper-faced corner bead (No-Coat, Strait-Flex): pre-laminated paper edge over metal or composite core. The paper edge eliminates the need for paper tape over the corner. Industry standard for modern professional drywall finishing. About 3-6 USD per 8-foot.
Bullnose corner bead rounded profile for soft, transitional corners. Commonly used in arched doorways, niches, and modern Mediterranean-style designs. 4-8 USD per 8-foot.
Off-angle corner bead for corners that aren't 90 degrees (135-degree corners, 45-degree returns). Specialized professional product, usually 8-15 USD per section.
Aluminum corner bead lighter than steel, doesn't rust, won't show through finish coat after years. Used in moisture-prone areas. About 4-7 USD per section.
Tools Required for Replacement
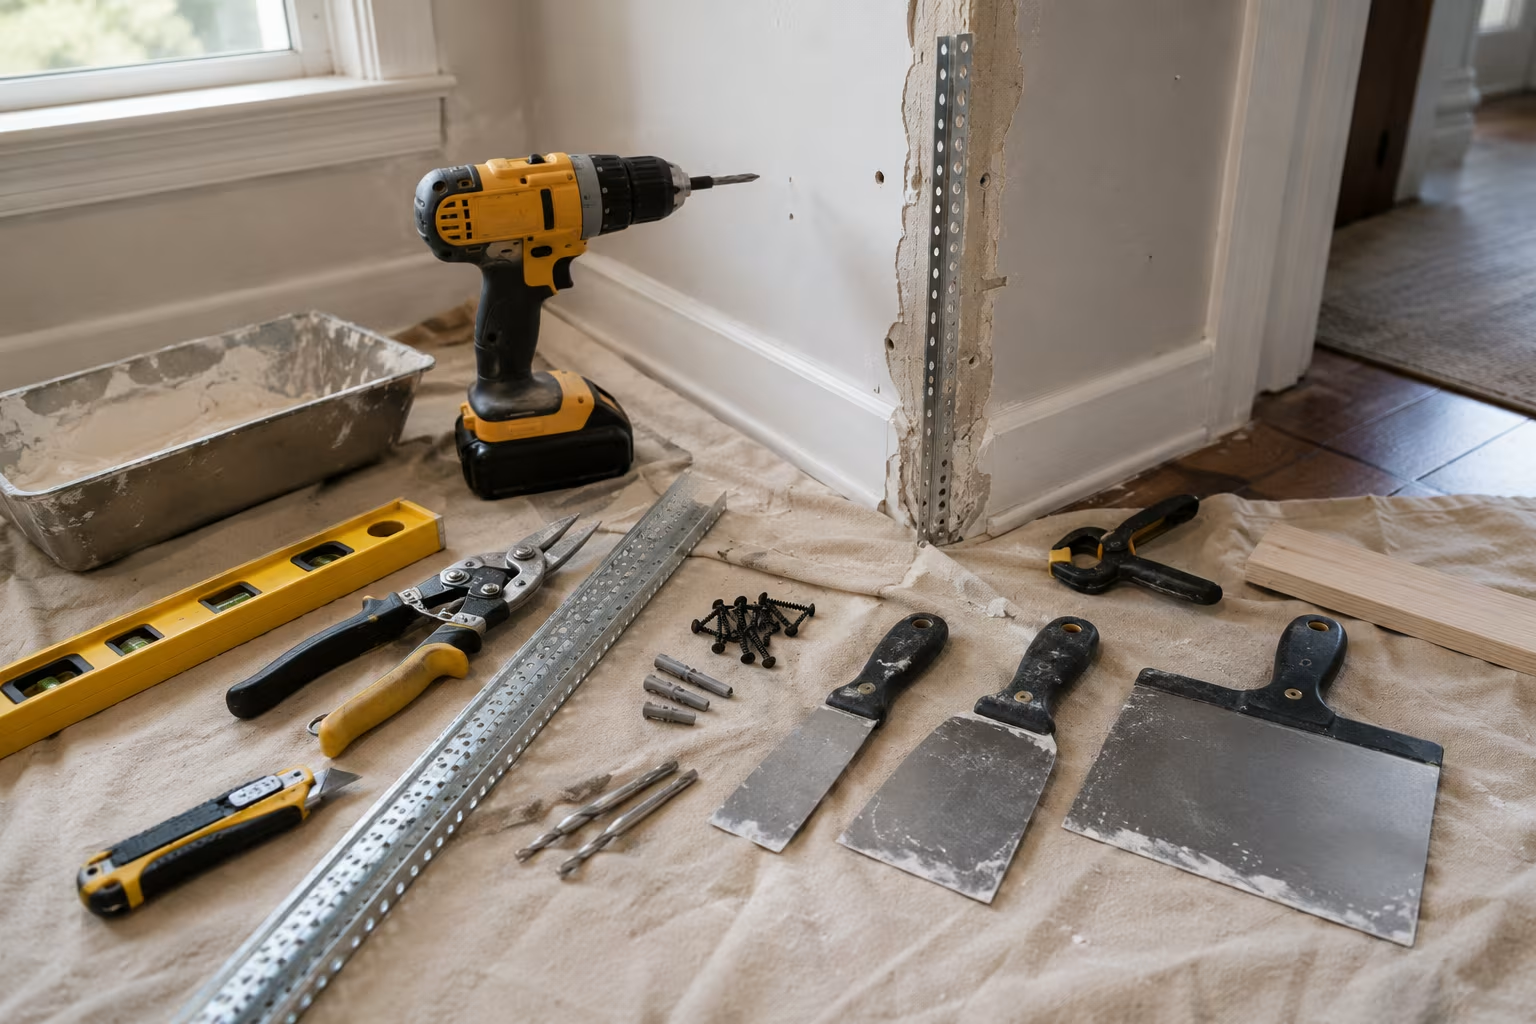
A proper corner bead replacement requires specific tools that distinguish quick from quality results:
Utility knife with sharp blades for cutting away damaged section.
Tin snips or aviation snips for cutting new metal/vinyl corner bead to length.
Cordless drill with drywall screw bit (Phillips or square drive head).
Drywall screws 1-1/4 inch or 1-5/8 inch length, fine thread for steel studs and coarse thread for wood studs.
Drywall mud knife (taping knife) in 6-inch, 10-inch, and 14-inch widths. The progressive widths apply mud in successive coats.
Mud pan (mud hawk) holds compound for application.
Sanding block with 120 and 220 grit sandpaper.
Joint compound: lightweight all-purpose for fast work, or setting-type "hot mud" (20-minute, 45-minute, 90-minute working times) for harder finished surfaces. Box of 4.5 gallons typically 18-35 USD.
Drop cloths and dust masks for cleanup.
Total tool investment: 80-200 USD if starting from scratch; far less if basic carpentry tools already on hand.
Step-by-Step Replacement Process
Step 1 Remove damaged corner bead. Use utility knife to score along the seam where existing corner bead meets the drywall. Pry the damaged bead away with a flat bar, working slowly to avoid tearing surrounding drywall paper. Remove all screws and old compound residue.
Step 2 Inspect drywall corner condition. If the underlying drywall is crushed or broken, cut back to firm material and patch with new drywall. Small dents under 1/4 inch can be filled with compound after the new bead is installed.
Step 3 Cut new corner bead to length. Most door and window openings need 1-2 sections; longer corners may need 2-3. Use tin snips for clean cuts; rough cuts at corners require additional mud to hide.
Step 4 Install new corner bead. Position over the corner ensuring straight and plumb alignment. Drive drywall screws every 8-10 inches along both legs, recessing screw heads just below the bead surface (to be covered by mud later).
Step 5 Apply first mud coat with 6-inch knife. Press compound into the bead and feather outward 4-6 inches on each side. Don't try to create a perfect finish in this coat; the goal is to fill the bead profile and overlap onto drywall.
Step 6 Allow 24 hours drying (longer in humid weather). Lightly sand any high spots.
Step 7 Apply second mud coat with 10-inch knife. Feather 6-10 inches on each side. The increasing knife width creates the wide, invisible transition.
Step 8 Allow 24 hours, sand smooth.
Step 9 Apply third skim coat with 14-inch knife. Feather 12-14 inches on each side. This coat fills any remaining imperfections.
Step 10 Final sanding with 220 grit. The surface should feel completely smooth to the touch.
Step 11 Prime with drywall primer (PVA primer) before painting. The new compound absorbs paint differently than aged painted drywall; primer evens the surface.
Common Mistakes and Fixes
The most common DIY mistakes: applying too much mud in early coats (creates ridges hard to sand smooth), not feathering wide enough (visible transition lines), sanding too aggressively between coats (removes mud rather than smoothing it), painting before primer (color blotching), and skipping the third skim coat (visible imperfections in raking light).
When mistakes happen, more sanding and another thin mud coat usually fix them. Patience between coats is crucial; rushing dries compound while still moist underneath, causing future cracking.
Working Around Pre-Existing Damage
Real-world corner bead replacement rarely involves perfectly clean surrounding surfaces. Adjacent drywall often shows cracks, screw pops, or texture inconsistencies that need addressing in the same session. Screw pops (where screws push outward as the wood dries) are repaired by setting the screw deeper, adding a new screw nearby, and skim-coating both with compound. Hairline cracks at corner returns get a thin strip of fiberglass mesh tape (5-10 USD per 100-foot roll) embedded in compound before the corner bead work begins.
For high-traffic areas like hallways and entryways, consider upgrading from standard metal corner bead to vinyl bullnose or rigid PVC corner protector. The slightly higher cost (5-12 USD per section) eliminates future repairs from luggage scuffs, vacuum cleaner bumps, and toddler impact.
If the corner damage extends beyond a single section — for example, where a door slam has cracked the drywall 18 inches above the floor — the patch area needs careful integration. A full bead replacement with proper feathering blends seamlessly; an attempt to mud over crushed drywall always shows in raking light. Cutting back to undamaged material always produces better results than fighting compromised substrate.
Texturing and Paint Matching
Walls with stipple texture, knockdown texture, or orange peel finish need texture matching after corner bead replacement. Spray-on texture cans (Homax Wall Texture, USG Easy Touch Texture) cost 12-25 USD per can and produce reasonable matches with practice. Apply texture only after final mud coat is fully cured (48+ hours), prime with PVA, then spray texture, then paint.
Paint matching is rarely achievable with retail paint chips alone. Most major paint stores (Sherwin-Williams, Benjamin Moore, Behr) offer free computerized color matching from a chip of existing paint. Bring a 2x2 inch sample of the original paint (cut from inside a closet or behind a switch plate cover) for accurate matching. Reapply paint to the entire wall section, not just the repaired area, to hide subtle sheen differences.
Corner bead replacement is a foundational drywall skill that pays back the investment many times over. A homeowner who can confidently handle this repair saves 300-800 USD per incident in professional drywall service calls and gains the broader confidence to tackle related repairs like patch holes, ceiling stains, and small renovation projects. A focused weekend project produces lasting results that look entirely professional. The patience required for proper coat drying separates rushed work from finished work that lasts decades. Done well, the repair becomes invisible and the home's value preserved. The skill carries over to many adjacent repairs.
Related Posts

Toilet Seat Slow-Close Hinge Replacement
A broken slow-close hinge makes the toilet seat slam or fail to stay up. Replacement is a...


Strip Painted Brass Hardware Without Eating the Patina
The slow-cooker method strips paint from brass cleanly while keeping the aged surface intact....
Bathtub Resealing: When Silicone Beats Caulk and Vice Versa
Reseal a bathtub right: 100% silicone at the flexing tub-to-tile joint, acrylic caulk only on...
Fix Squeaky Hardwood Floors From Above (No Access)
Fix squeaky hardwood floors from above with no access below: talcum powder for board-on-board...
Comments
No comments yet. Be the first to share your thoughts!