Why Magnetic Paint Under Regular Paint Creates Hidden Organization

Why Magnetic Paint under Regular Paint Creates Hidden Organization
Okay, let's talk about that one spot in your house that just devours everything. You know the one. For me, it was always the area right next to the kitchen counter where the mail piled up, or the side of my fridge covered in a haphazard collection of magnets, half of which barely held a single drawing.
It's like a black hole for notes, photos, and all those tiny things you need to remember. You want to be organized, but you don't want your home looking like a bulletin board exploded, right? We're trying for cozy, not chaotic.
Well, what if I told you there's a way to tackle that clutter without adding another visible piece of organizing furniture? We're going to dive into the magic of magnetic paint – specifically, how to use it underneath your regular wall paint for some seriously hidden organization. Stick with me, it's easier than you might think.
Why This Actually Matters
The whole point of our homes is to be a comfortable, functional space. But sometimes, especially if you're like me and have a million little projects or a growing collection of inspiring tidbits, things just get messy.
You find yourself constantly searching for that one receipt, or forgetting about an appointment because the note got lost in the shuffle. It's frustrating, and it eats up precious time you could be spending making something cool in your workshop.
I remember trying to organize my craft room wall. I nailed up a pegboard, which was great for tools, but I still had little notes, fabric swatches, and design ideas needing a home. That's when I started looking for a less "in-your-face" solution. This magnetic paint trick really saved me from adding another visible clutter-catcher.
It's about making your space work harder for you, without shouting about it. Think about it: a wall that looks totally normal, but can secretly hold up a grocery list with a magnet. Or a hidden spot for your kids' artwork that doesn't mess with your decor.
The Basics of Magnetic Paint Magic
So, what exactly is magnetic paint? It's not actually magnetic itself, which is a common misconception. Think of it more like a special primer that has finely ground iron particles mixed into it.
These iron particles are what magnets stick to. It's the same principle as your fridge, just in a paint can. You apply it to your surface, let it dry, and then you can paint right over it with any color you want.
The beauty of this is that once your topcoat is on, you can't even tell the magnetic paint is there. It's your little secret organizing superpower. You get all the functionality of a magnetic surface without the industrial look of a metal sheet or a traditional magnetic board.
What Makes It Stick? the Science (simplified)
It’s all about those tiny iron dust particles suspended in the paint. When you apply the paint, these particles create a ferrous surface. Ferrous just means it contains iron, and iron is what magnets are attracted to.
The more coats you apply, the more iron particles build up, and the stronger the magnetic pull will be. This is a pretty important detail we’ll definitely talk about when we get to the "how-to" part.
- It's a primer: Most magnetic paints are designed to go on first, just like any other primer. You treat it as your base layer.
- It needs topcoats: You always paint over magnetic paint. This protects it, gives you your desired color, and keeps those iron particles sealed in.
- Strength varies: Different brands and numbers of coats will give you different magnetic strengths. Don't expect it to hold up a heavy toolkit, but it's perfect for paper and small items.
How to Actually do It: Your Step-by-step Guide
Alright, let’s get down to business. This isn't a super tricky project, but there are a few key steps to make sure you get it right. I learned some of these the hard way, so you don't have to!
Step 1: Prep Your Surface
Just like with any painting project, preparation is everything. Clean your wall thoroughly. Remove any dust, dirt, or grease that might be hanging around. A quick wipe-down with a damp cloth and a little soap works wonders, then let it dry completely.
If your wall has any holes or cracks, now's the time to fill them with spackle and sand them smooth. You want a nice, even surface for the magnetic paint to stick to. Don't skip this; uneven surfaces will look even worse with multiple layers of paint.
Step 2: Tape off Your Area
Decide exactly where you want your magnetic surface. Maybe it’s a whole wall, a section above your desk, or a strip in your entryway. Use good quality painter's tape to create crisp lines.
I usually use FrogTape because it gives me the sharpest edges. Press the tape down firmly to prevent any bleed-through. You want to protect the surrounding areas from accidental drips, especially if you're not painting the whole wall.
Step 3: Stir That Paint! (seriously)
This is probably the most crucial step for magnetic paint specifically. Those iron particles are heavy, and they settle at the bottom of the can really quickly. You need to stir the paint thoroughly before you even open the can, and then continuously throughout the application process.
I mean, stir it for a good 5-10 minutes with a paint stirrer. Every time you dip your brush or roller, give the can another quick stir. If you don't, you'll end up with weak spots where there aren't enough iron particles, and your magnets won't stick reliably.
Step 4: Apply Your First Coat of Magnetic Paint
Using a short-nap roller or a good quality brush, apply your first thin, even coat of magnetic paint. Don't try to go too thick here; multiple thin coats are always better than one thick one.
Magnetic paint is usually dark gray or black, so it might look a little intense at first. That's totally normal. Just make sure you're covering the entire taped-off area smoothly.
Step 5: Let It Dry and Sand Lightly
Check the manufacturer's instructions for drying times, but generally, you'll need at least 2-4 hours between coats. Once completely dry, give the surface a very light sanding with a fine-grit sandpaper (around 220-grit).
This helps create a better surface for the next coat to adhere to, and it smooths out any little bumps. Remember to wipe away any sanding dust before your next coat.
Step 6: Apply More Coats (the Key to Strength!)
This is where the magic happens and where you decide how strong you want your magnetic area to be. Most magnetic paints recommend at least 3-4 coats for decent magnetic strength. For anything heavier than a single piece of paper, I'd honestly go for 4-5 coats.
Remember to stir the paint before each coat and let it dry completely between applications. Sand lightly and clean between each coat too. It feels like a lot of repetition, but it's totally worth it for a strong, reliable magnetic surface.
Step 7: Test Your Magnetic Power
After your final coat of magnetic paint is dry (and I mean dry dry, maybe even overnight), grab a magnet and give it a test. See how well it sticks. Can it hold a piece of paper? A couple of photos?
If it feels weak, don't panic. You can always add one or two more coats of magnetic paint. It’s much easier to add more magnetic paint now than to try and fix it after you’ve applied your topcoat.
Step 8: Apply Your Topcoat
Once you’re happy with the magnetic strength, it's time for the fun part: painting your wall the color you actually want! You can use any latex or acrylic interior paint over magnetic paint. It really won't affect the magnetic properties.
Apply 2-3 coats of your chosen topcoat, following the drying times on the can. You'll want to make sure the dark magnetic paint is completely covered and you get even color saturation. The number of topcoats might slightly reduce the magnetic strength, so consider an extra magnetic coat if your chosen topcoat is very thick or dark.
Step 9: Remove Tape and Enjoy!
Carefully remove your painter's tape while the final topcoat is still slightly wet (this helps prevent paint from peeling with the tape). Stand back and admire your handiwork!
You now have a beautifully painted wall that doubles as a hidden organizational gem. Get creative with your magnets – think small shelves, hooks, or just classic picture display. It's awesome to have that secret functionality.
Making It Stick: Avoiding Common Mistakes
I've definitely learned a few things the hard way when experimenting with magnetic paint. Here are the biggest pitfalls to watch out for, so your project goes smoothly from start to finish.
The most common complaint I hear about magnetic paint is that "it doesn't work!" And almost every time, it comes back to one of these points. It's not the paint's fault, usually, it's just a user error (we've all been there!).
"Patience isn't just a virtue in crafting; it's the secret ingredient for projects that actually work."
Mistake 1: Not Stirring Enough
Like I stressed before, this is the number one culprit for weak magnetic surfaces. Those iron particles are heavy. They'll drop to the bottom of the can faster than you can say "DIY disaster."
If you don't stir it continuously, you'll be applying mostly binder with very few magnetic particles, resulting in a wall that looks painted but won't hold a single magnet. Set a timer and make sure you're getting deep down into the can.
Mistake 2: Not Enough Coats
People often treat magnetic paint like regular primer, thinking one or two coats will do the trick. Nope. You need a good build-up of those iron particles to create a strong magnetic field.
Aim for a minimum of 3-4 coats, and for high-traffic areas or heavier items, 5 coats isn't overkill. Each coat adds more magnetic power. Skimping here will only lead to disappointment later.
Mistake 3: Too Thick of a Topcoat
While a few coats of regular paint over the magnetic paint won't kill its strength, going overboard with a super thick, heavy-duty topcoat can definitely weaken the magnetic pull. Thick paint creates more distance between your magnet and the iron particles.
Stick to 2-3 standard coats of your chosen wall paint. If you need a more durable finish, consider a semi-gloss or satin paint, which is naturally more resistant than flat, rather than applying five thick coats.
Mistake 4: Using Weak Magnets
This one might seem obvious, but it's worth mentioning. Even the best magnetic paint can't make a weak, flimsy magnet work miracles. Those cheap, flat refrigerator magnets that can barely hold a piece of paper on your fridge? They won't perform much better on your wall.
Invest in some strong neodymium magnets. They're small but mighty, and they'll make a huge difference in how well your hidden magnetic surface functions. You can find them pretty easily online or at craft stores.
Mistake 5: Not Letting It Cure Completely
Yes, paint can be "dry to the touch" in a few hours, but it takes much longer to fully cure. Magnetic paint, especially with multiple layers, needs time for all those particles to really settle and bond.
Resist the urge to test your magnets or apply your topcoat too soon. Give it at least 24 hours after the last magnetic coat before you even think about painting over it. Impatience can ruin all your hard work.
Frequently Asked Questions
Does Magnetic Paint Actually Work Well?
Yes, it absolutely can work really well, but it depends heavily on proper application. If you stir it thoroughly, apply enough coats, and use decent magnets, you'll have a wonderfully functional hidden magnetic surface. It's not a magical force field, but it's great for papers, light tools, and small decor items.
Is Magnetic Paint Safe for Kids' Rooms?
Most magnetic paints are water-based and low-VOC, making them perfectly safe for kids' rooms once fully cured. Always check the specific product's label for safety information, but generally, it's just like any other interior wall paint. I've used it in my niece's playroom for displaying her artwork.
Can I Paint over Existing Wallpaper with Magnetic Paint?
I wouldn't recommend it. Wallpaper often isn't the most stable surface, and the weight of multiple layers of magnetic paint, plus your topcoat, could cause it to bubble or peel. It's always best to remove wallpaper, prep the wall, and then apply magnetic paint directly to the primed drywall.
How Long does Magnetic Paint Last?
Once applied and cured, magnetic paint will last as long as your wall paint does. The magnetic properties don't degrade over time. It's a pretty permanent solution for hidden organization, so you won't need to reapply it unless you're repainting the entire wall for other reasons.
Will Magnetic Paint Affect Electronics on the Other Side of the Wall?
No, magnetic paint creates a very localized, weak magnetic field that won't interfere with electronics on the opposite side of the wall. You're not creating an electromagnet, just a surface that responds to magnets. Your TV, Wi-Fi, and other devices are completely safe.
Can I Use Magnetic Paint on Surfaces Other Than Drywall?
Absolutely! I've used it on plywood for a custom craft board and even on the back of a hollow-core door for a hidden message center. Just make sure the surface is clean, smooth, and properly primed if needed. It works great on wood, plaster, and even some metal surfaces (though that might be redundant!).
Is Magnetic Paint Expensive? is It Worth the Cost?
It's generally a bit more expensive than regular primer, usually in the $20-$40 range for a quart, sometimes more for a gallon depending on the brand. Given that you need multiple coats, it can add up. For me, the hidden organizational benefits and the clean aesthetic are totally worth the investment, especially in high-clutter areas. It beats buying a clunky bulletin board! ❤️
The Bottom Line
Magnetic paint is one of those clever DIY tricks that genuinely makes a difference without shouting about it. It’s a subtle way to add serious functionality to your walls, transforming a plain surface into an organizing powerhouse for notes, photos, and small tools.
Don’t be afraid to experiment a little, and definitely don't skimp on those coats or the stirring. You’ll be so glad you took the time when you're effortlessly sticking up your grocery list or a new design inspiration on a seemingly normal wall. Give it a try – you might just wonder how you lived without it!
Related Posts
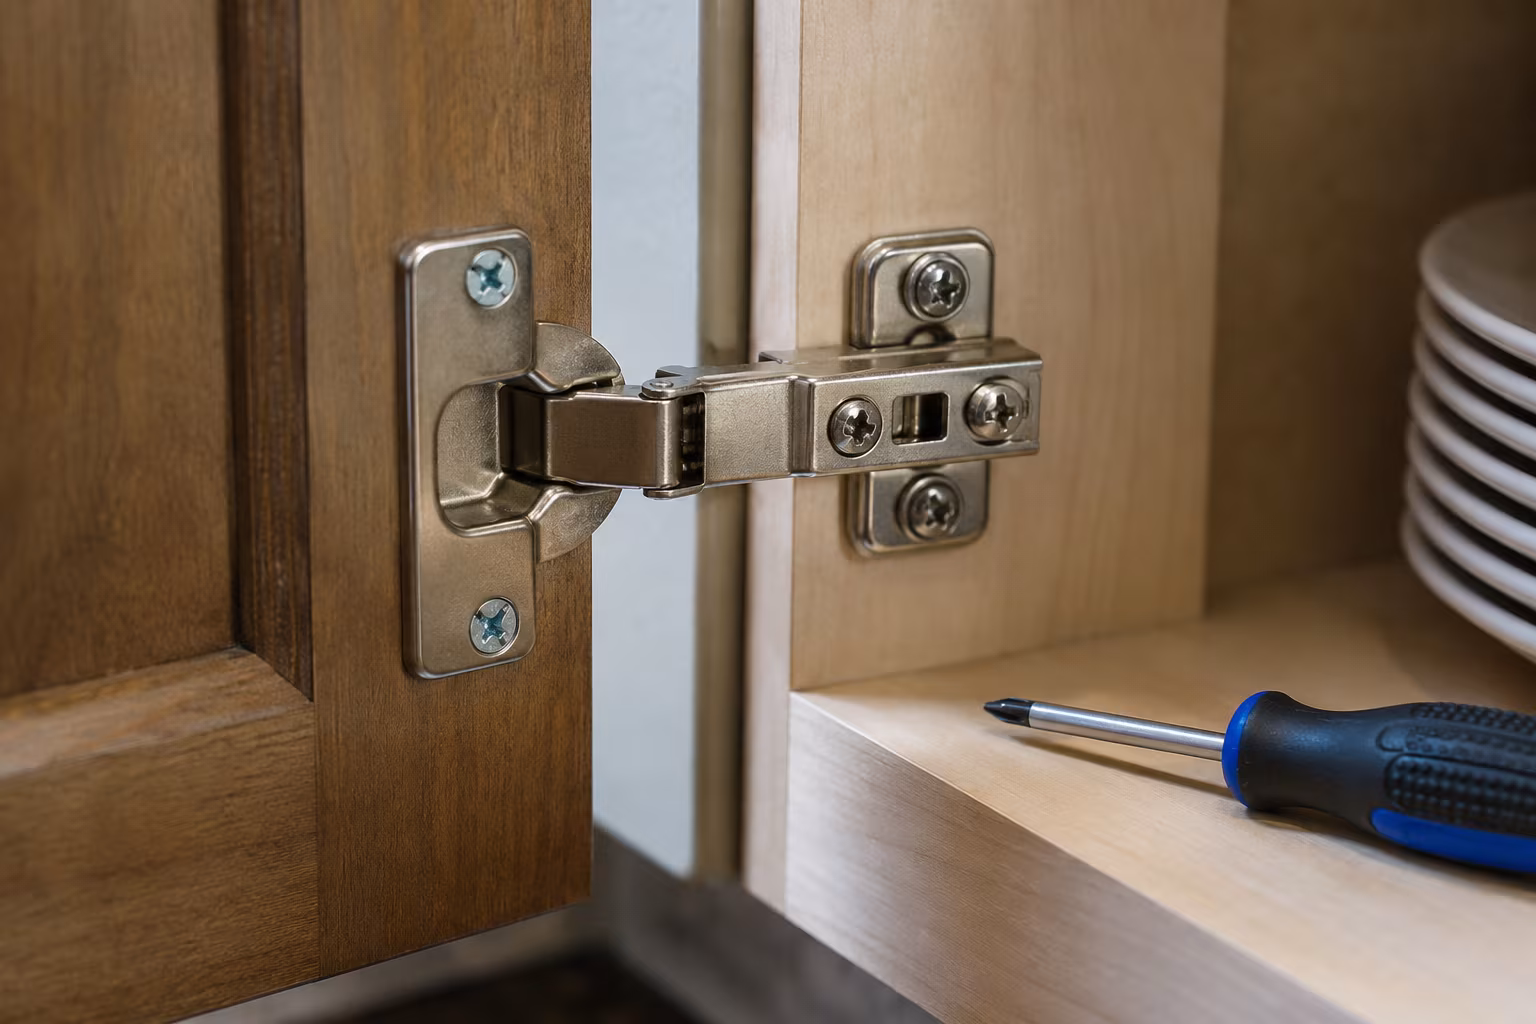
Cabinet Hinge Adjustment: Side, Depth, and Height Fix
Three screws, three directions, one diagnosis. Stop fighting misaligned cabinet doors — learn whi...
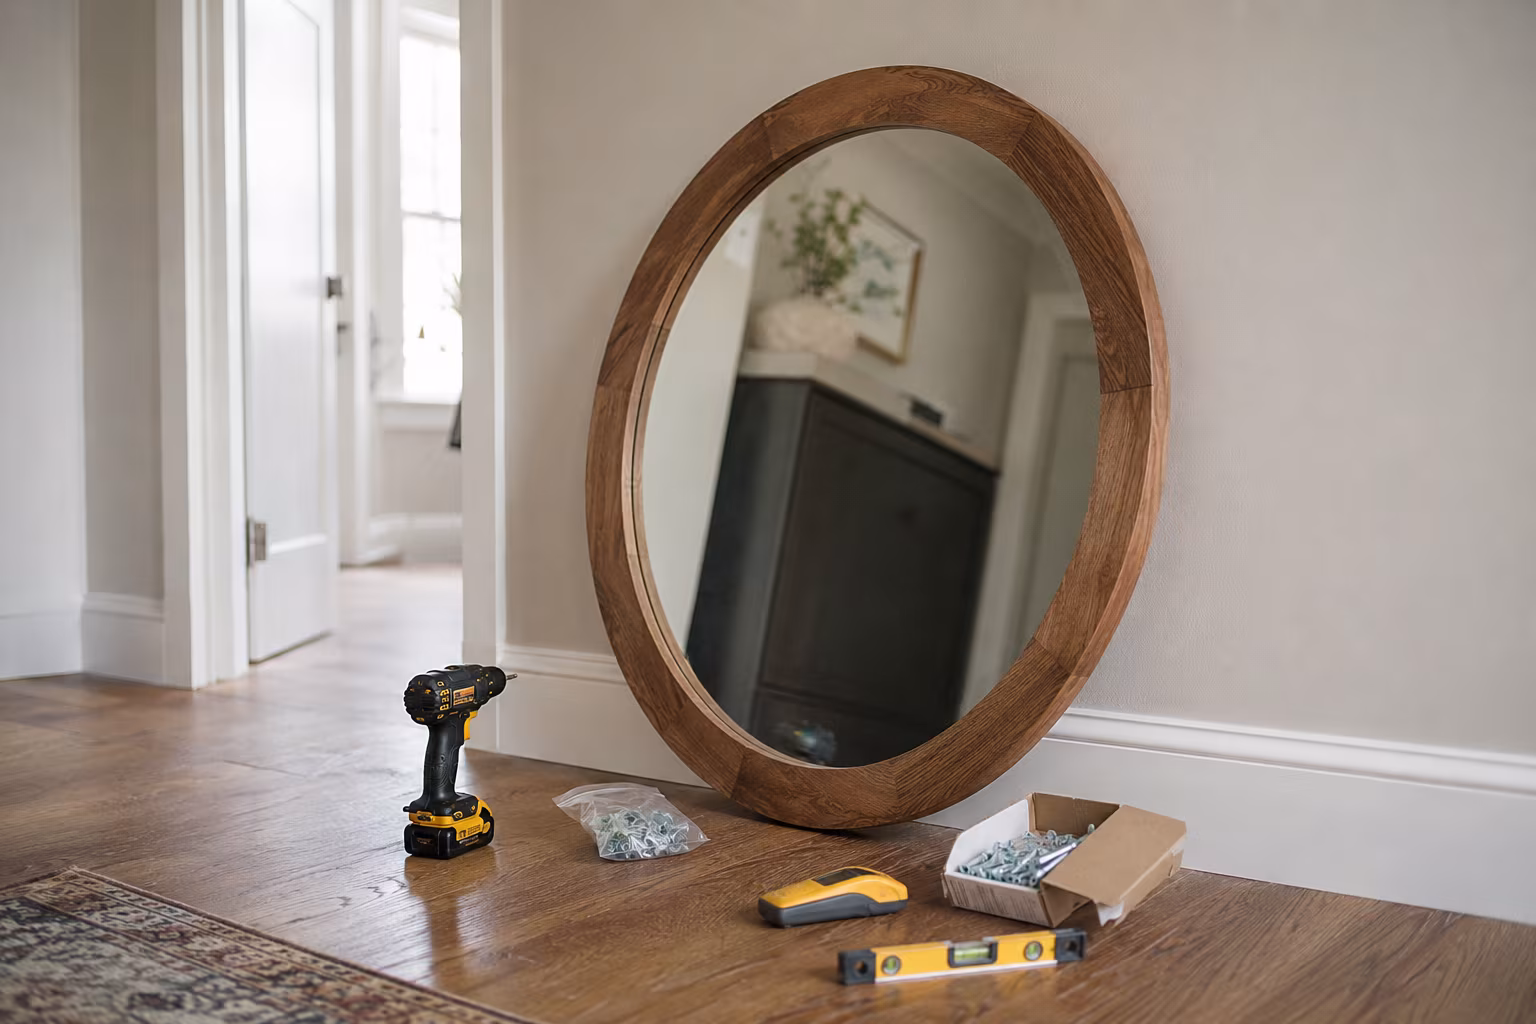
How to Hang a Heavy Mirror on Drywall Without Studs
No stud where you want the mirror? The anchor choices, weight math, and install routine that hold...
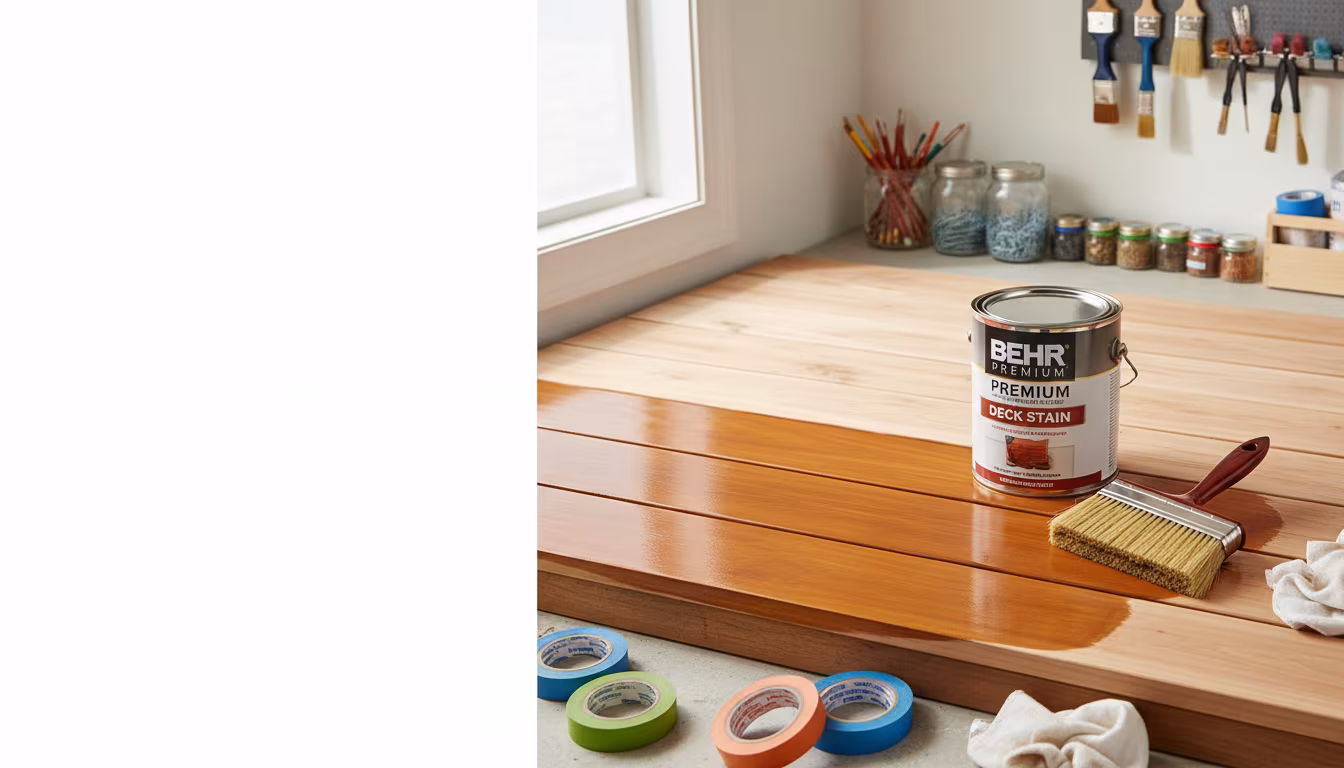
The Best Way to Weatherproof and Stain an Old Wooden Deck
Is your old wooden deck looking a little worse for wear? We'll show you the easiest, most effecti...
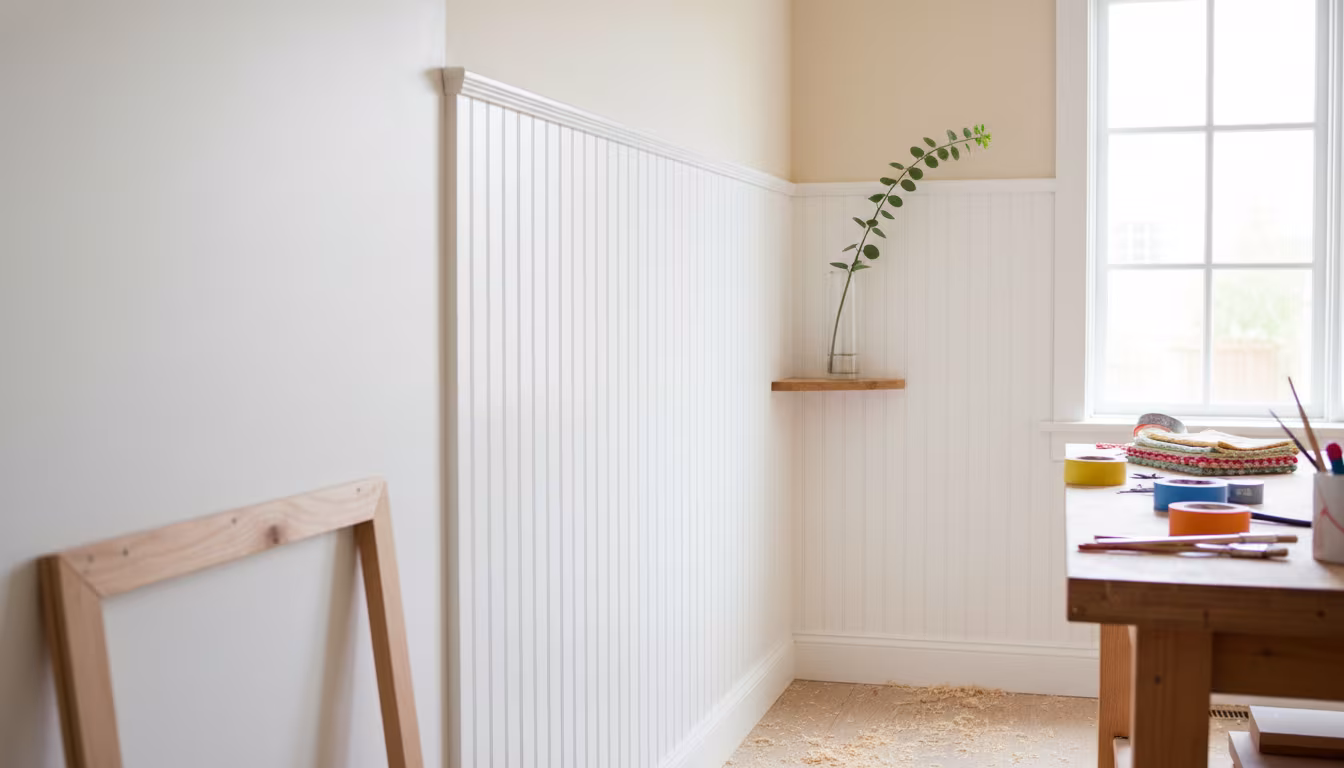
Why Wainscoting Panels Make Plain Hallways Look High-End
Dreaming of a more sophisticated entryway? Learn why wainscoting panels are a game-changer for ma...