Outdoors

Building a Rain Garden That Actually Drains in Clay Soil
Building a Rain Garden That Actually Drains in Clay Soil

The short answer

A rain garden in clay soil works only if you dig deeper and amend the soil more aggressively than the standard rain garden plans suggest. The reliable approach is: remove 12-18 inches of native clay, replace with a mix of about 50% coarse sand, 25% topsoil, and 25% compost, keep the garden depth at no more than 6 inches at the lowest point, and plant species that tolerate occasional flooding combined with otherwise dry conditions.

The non-negotiable step before any digging is a percolation test. Dig a small test hole, fill it with water, and time how fast the water drains. If the drainage rate is below 0.5 inches per hour, the location will not work as a rain garden even with amendments — the underlying clay layer is too impermeable. Either pick a different location or commit to deeper excavation that reaches a more permeable layer below.

Rain gardens in clay are real and they work. They just take more dirt-moving than the same garden in loamy soil.

What a rain garden is supposed to do

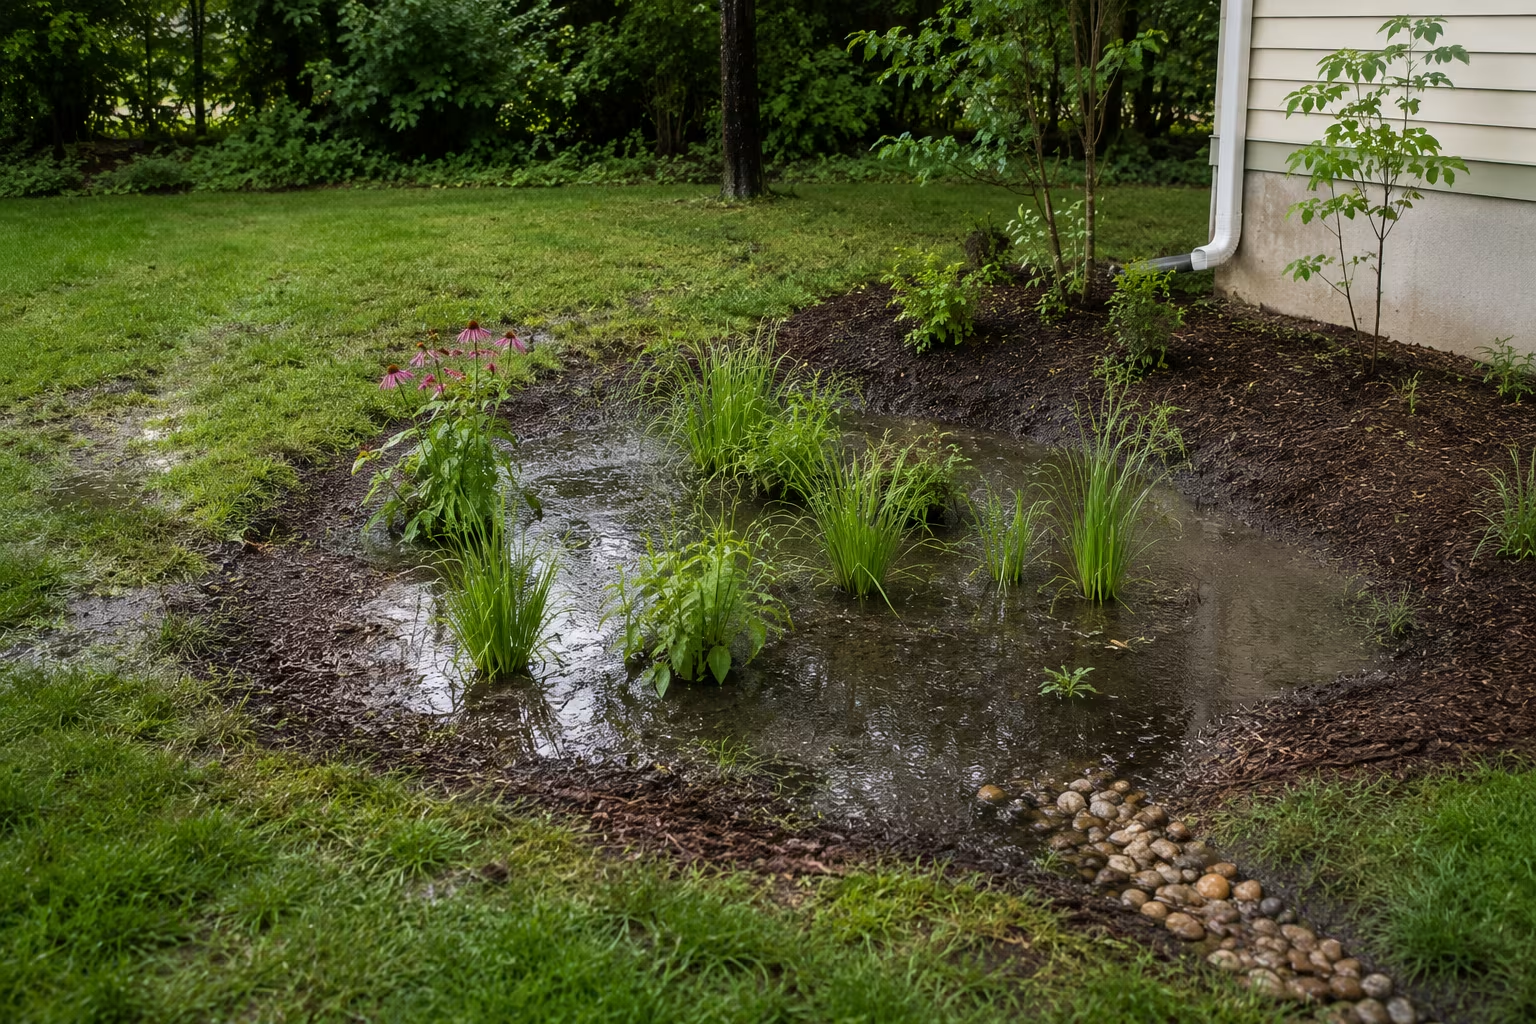
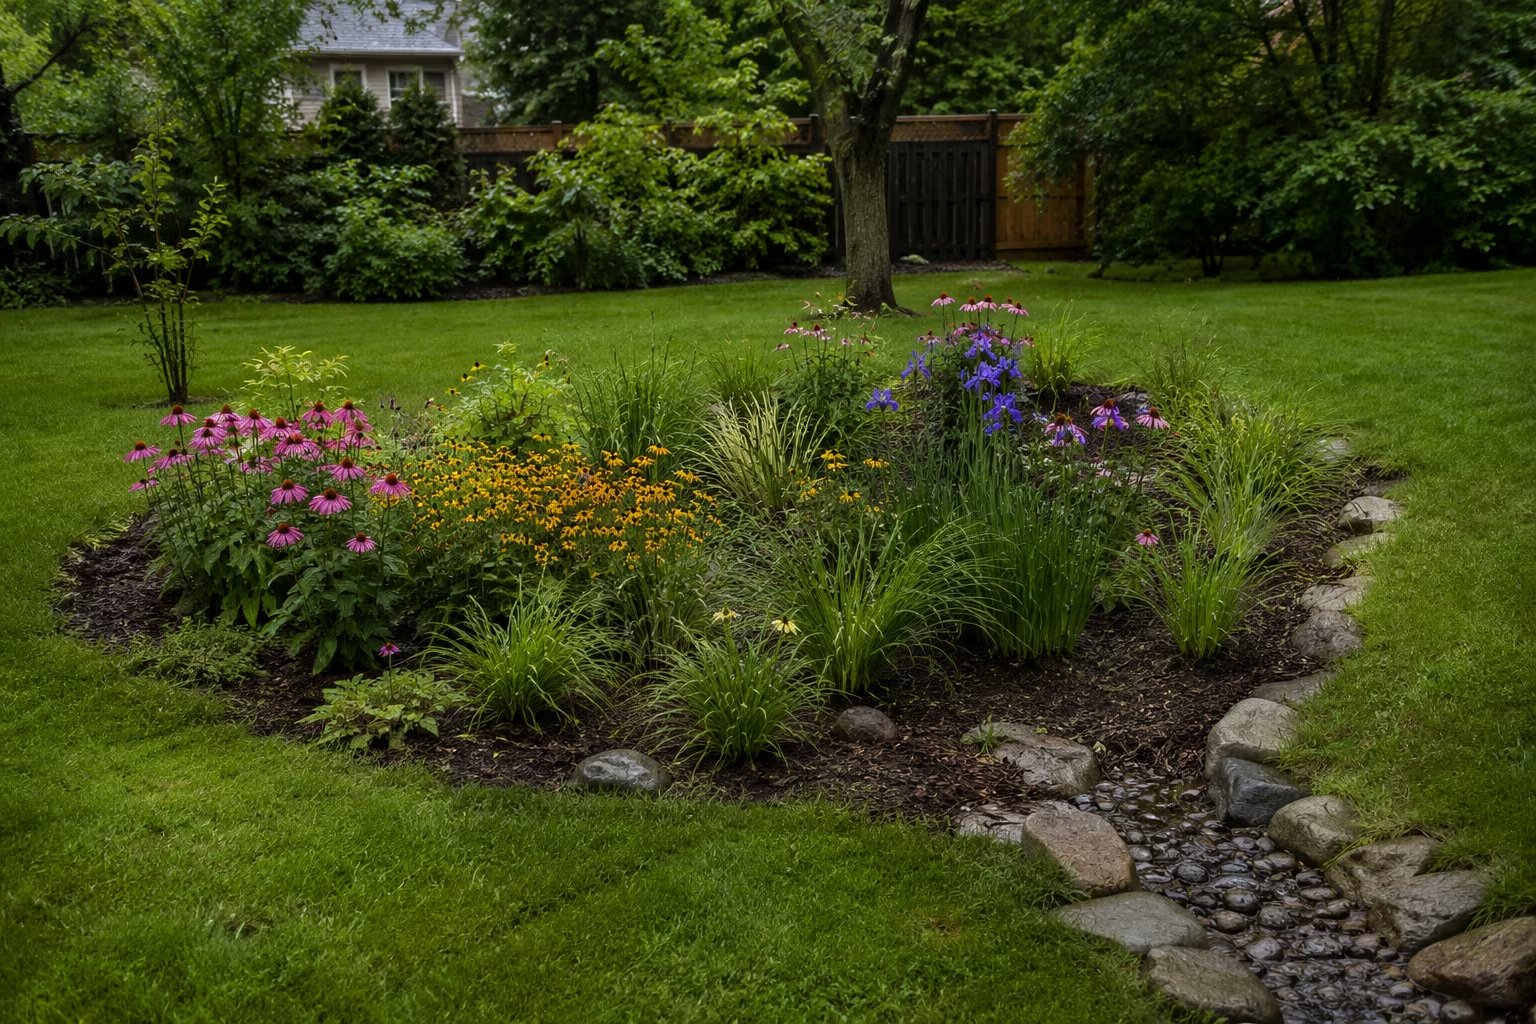
A rain garden is a shallow depression in the landscape designed to capture rainwater runoff from roofs, driveways, or yard, hold it briefly, and let it soak into the ground over the next day or two. The plants in the garden tolerate both the temporary flooding and the otherwise normal soil moisture between storms.

The benefits are real: less runoff entering storm drains (which reduces downstream pollution and erosion), groundwater recharge, habitat for pollinators and birds, and a visible garden feature where there was previously just lawn.

The catch is that the garden has to drain. A rain garden that holds standing water for more than 24-48 hours after a storm is a mosquito breeding ground and a place where plants drown. The drainage requirement is what makes clay soil challenging.

The percolation test before digging

The percolation test determines whether a location can drain water fast enough to function as a rain garden. The test takes a day but saves a weekend of digging in the wrong spot.

Dig a test hole at the proposed rain garden location. The hole should be 12 inches deep and 4-12 inches wide.

Fill the hole with water, let it drain completely once (this saturates the surrounding soil and gives a realistic test condition), then refill the hole and start a timer.

Measure how far the water level drops in 15 minutes. Calculate the rate in inches per hour. The acceptable rate for a rain garden is at least 0.5 inches per hour; ideally 1 inch per hour or more.

Below 0.5 inches per hour, the location is too impermeable for a standard rain garden. Either pick a different location, dig deeper to reach a more permeable layer, or accept that the garden will need extensive soil replacement to function.

In clay soil, percolation rates of 0.1-0.3 inches per hour are common in the top 6-12 inches. Deeper soil may drain better, depending on the specific site geology.

Sizing the garden to the runoff

A working rain garden is sized to the area of impermeable surface that drains into it. A common rule: the garden's surface area should be about 20-30% of the drainage area for clay-amended soils, or 5-10% for naturally well-drained soils.

For a small example: a 400 square foot section of roof drains into the rain garden via a downspout. In clay soil, the rain garden should be roughly 80-120 square feet (20-30% of 400). In well-drained soil, only 20-40 square feet would be needed for the same input.

Larger drainage areas need larger rain gardens, and at some scale the better answer is two or three small rain gardens rather than one big one. Multiple smaller gardens distribute the water input across more soil surface and drain faster.

The dig and amendment

Building a Rain Garden That Actually Drains in Clay Soil - The dig and amendment section detail

For clay soil, the excavation needs to go deeper than the finished garden depth. The clay you remove gets replaced with amended soil that drains faster.

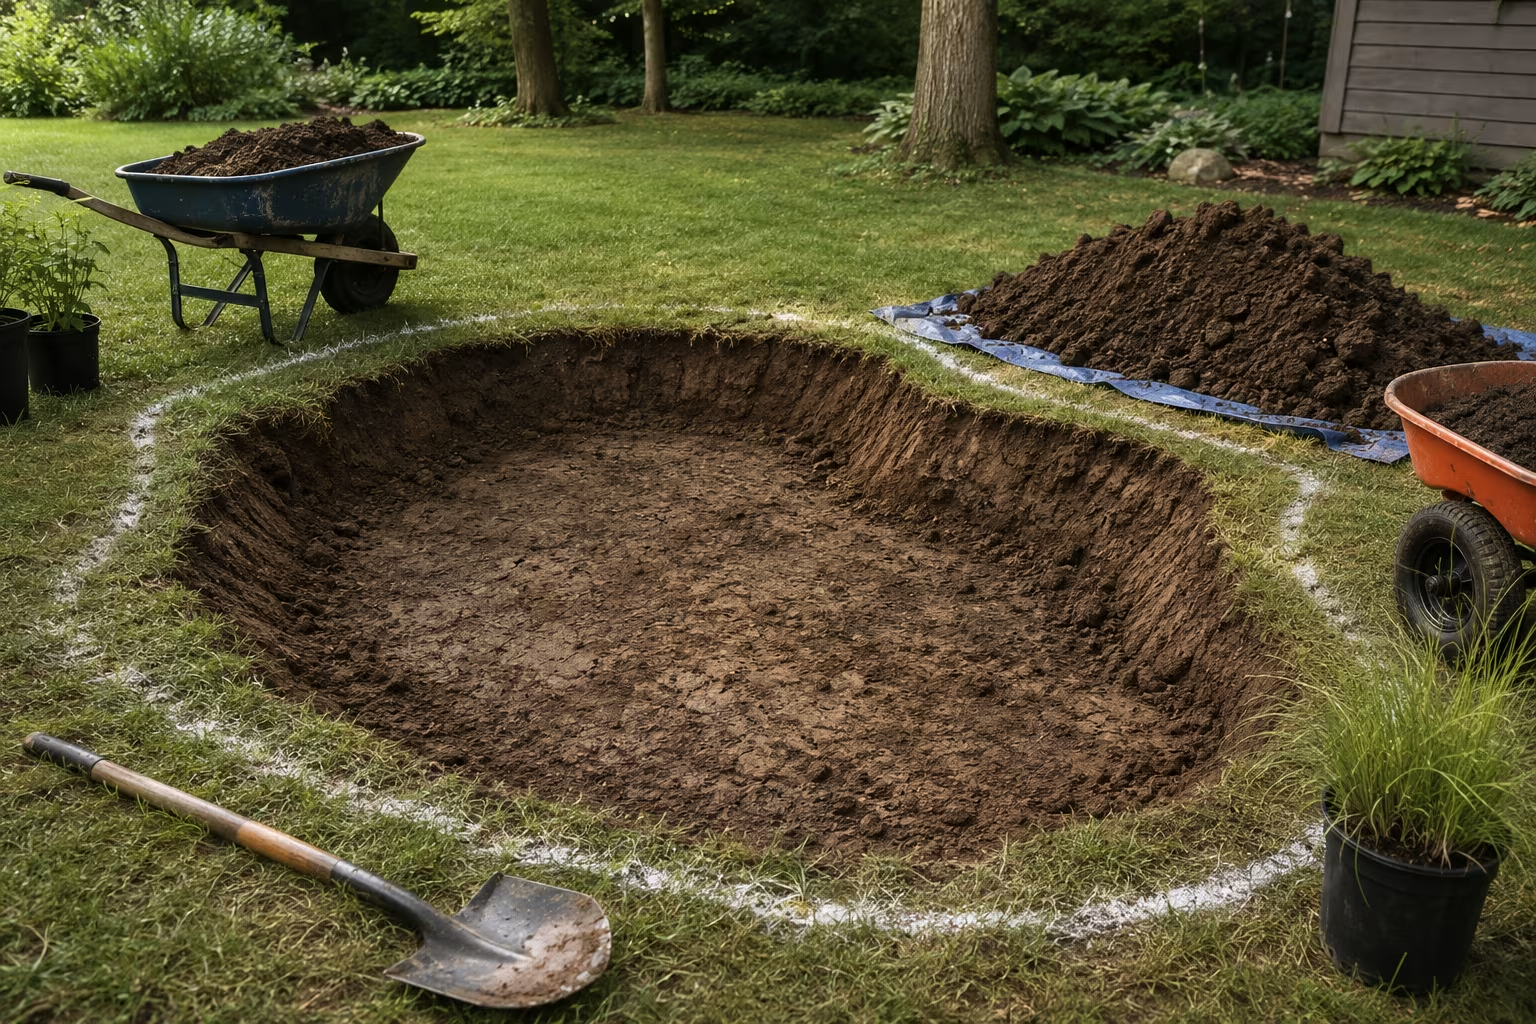
Mark the garden's outline on the ground. A natural shape with smooth curves looks better than rectangular and follows the natural drainage easier.

Excavate the garden to 12-18 inches deep across the marked area. The deepest point is in the middle; the edges slope up to ground level. Save the topsoil from the first few inches if it is reasonable; discard the deeper clay or use it to build berms elsewhere in the yard.

Mix the replacement soil. A standard rain garden mix is roughly 50-60% coarse builder's sand (not play sand or fine masonry sand — coarse sand has larger particles that maintain drainage), 20-30% topsoil, and 20-30% compost. Mix thoroughly before placing back in the excavation.

Refill the excavation with the mixed soil. The finished surface should be 6 inches below the surrounding ground level at the deepest point, sloping up to ground level at the edges.

Compact the soil lightly with a rake or by walking across it. Heavy compaction destroys the drainage you just built; light compaction prevents settling and washouts.

Berms and overflow

A rain garden in clay needs an overflow path because heavy storms will exceed the garden's capacity. Without an overflow, the garden floods and water runs across the lawn or into structures.

Build a berm on the downhill side of the garden using removed clay. The berm is 4-6 inches higher than the garden's surrounding ground level and holds water in the depression during normal storms.

Cut an overflow notch in the berm at one point, sized to release excess water during heavy storms. The notch should direct overflow toward a safe area — a lawn, another rain garden, an existing drainage path — not toward foundations, walkways, or driveways.

For long thin gardens, multiple berms with overflow notches create a series of step-down pools rather than one big pool. This terraced approach handles steep terrain better.

Plants for a clay-amended rain garden

The plants in a rain garden need to tolerate two extremes: short-term flooding (during and shortly after storms) and otherwise normal-to-dry conditions (between storms, especially in summer drought).

Native plants from local floodplain and meadow environments are usually the best choices. They evolved with periodic flooding and tolerate the regional climate without constant care.

For most temperate-climate North American sites, candidate plants include:

Wet zone (center of the garden): Cardinal flower (Lobelia cardinalis), blue flag iris (Iris versicolor), Joe Pye weed (Eutrochium), swamp milkweed (Asclepias incarnata).

Transition zone (mid-slope): Black-eyed Susan (Rudbeckia), purple coneflower (Echinacea), little bluestem grass (Schizachyrium scoparium), butterfly weed (Asclepias tuberosa).

Dry zone (edges): Native asters, goldenrod, prairie dropseed grass, sedges (Carex species).

Avoid plants that need consistently moist soil (most "moisture-loving" houseplants), plants that need consistently dry soil (true xeric plants), and plants that grow into structural roots (most trees, large shrubs). The rain garden's variable conditions kill plants outside this tolerance range.

Plant in clusters of three to five of the same species rather than one of each. The clusters look more natural and the plants support each other through difficult periods.

Mulch and the surface layer

A 2-3 inch layer of shredded hardwood mulch covers the planted garden. The mulch:

Holds soil in place during heavy rain (prevents erosion).

Suppresses weeds (which compete with the desired plants).

Slows evaporation from the soil surface (helps the plants through dry periods).

Slowly decomposes and adds organic matter (improves soil over time).

Use shredded hardwood, not bark chips or dyed mulch. Hardwood holds together under water flow better than chips, which float and wash away. Avoid dyed mulches because the dye may leach into the soil.

Replenish the mulch every 1-2 years as it decomposes. The garden never goes without a mulch layer if it is being maintained properly.

Year-one and year-two care

Newly planted rain gardens need more care than established ones. The plants are not yet rooted deeply and need water during dry spells.

Water deeply once or twice a week during the first growing season if there has been no rain. Watering at the soil surface (drip irrigation, soaker hose, hand watering) rather than overhead saves water and reduces evaporation.

Remove weeds as they appear. The first year sees the most weed competition because the desired plants have not yet filled in. Pull weeds by hand; chemical herbicides can damage the rain garden's plants.

By the second year, the planted species should be establishing dense growth. Less watering and less weeding are needed.

By the third year, the rain garden should be functioning independently with only occasional weed removal and the periodic mulch refresh.

Common rain garden mistakes

Building a Rain Garden That Actually Drains in Clay Soil - Common rain garden mistakes section detail

Choosing the wrong location. A rain garden too close to a foundation (less than 10 feet) can cause moisture problems in the structure. Too far from the water source means the runoff dissipates before reaching the garden. Pick a location 15-30 feet from buildings.

Going too deep. A rain garden more than 6-8 inches deep at the bottom encourages standing water and mosquitoes. Shallower with broader area is better than deeper with narrower area.

Skipping the amendment. Native clay alone will not drain at rain garden rates. The soil mix matters as much as the depth.

Planting non-natives. Exotic plants that look attractive in catalogs often fail in the rain garden's variable conditions. Stick to natives or proven adaptable species.

Neglecting overflow. Heavy storms will exceed the garden's capacity. Without an overflow path, the excess water finds its own path — usually a destructive one.

Maintenance through the seasons

A rain garden in its first year needs different care than an established one.

Year one: weekly inspection in growing season. Water deeply during dry spells. Pull weeds promptly. Refresh mulch as it thins.

Year two: monthly inspection. Less watering needed as plants establish. Spot-treat weeds. Note any plants struggling and replace with alternates suited to that specific zone in the garden.

Year three and beyond: seasonal inspection. Mulch refresh every 18-24 months. Divide plants that have grown beyond their space (most native perennials benefit from division every 3-5 years). Remove plants that have died and replace with suited alternates.

The garden becomes lower-maintenance over years as the plant community establishes. The early investment pays back in long-term ease.

Rain garden in winter and dormant season

In cold climates, the rain garden goes dormant in winter. The plants die back; the surface becomes a flat depression.

This is normal and expected. The plants are storing energy in their roots and will return in spring.

Avoid walking through the garden in winter — the wet, soft soil compacts easily under foot pressure, and compaction undoes the drainage you built.

Snow accumulation in the depression is normal and often helpful; the slow melt feeds the soil with moisture in early spring without overwhelming the drainage capacity.

In spring, do a clean-up pass — remove last season's dead foliage, refresh mulch where needed, and check the berms and overflow path for any winter damage.

Building multiple rain gardens for larger sites

For properties with significant impermeable surface (large roof, big driveway, paved patios), one rain garden may not be enough. Multiple smaller rain gardens distribute the runoff and handle larger total volumes.

The right approach is to plan the runoff path from each downspout or paved area separately, then design a rain garden at the natural collection point of each. A 1000-square-foot roof draining to four downspouts becomes four rain gardens, each sized to its portion of the runoff.

Connecting rain gardens with shallow swales (open vegetated channels) lets excess water from one garden flow to the next. The cascade approach handles very large storms without any single garden being overwhelmed.

Working with a landscape architect or contractor

For properties with significant runoff problems, complex sloping, or aesthetic considerations beyond a simple home rain garden, consulting a landscape architect or a contractor experienced with rain gardens can transform the result.

The professional brings knowledge of local soils, native plant communities, and code requirements that a homeowner researches one site at a time. The cost is real but the result is durable.

For a typical small home rain garden (one downspout, a modest backyard), the DIY approach here handles the project well. For larger or more complex sites, the professional consultation is the better investment.

Written by

Laura Hayes

Laura Hayes is a maker and DIY writer with over a decade of hands-on experience in woodworking, home decor, and small-batch crafts. At Hobby Rig she turns weekend projects into clear, step-by-step guides with honest budgets and real tool lists — including the mistakes she made so you don't have to.

View all posts →