Replacing a Cracked Bathroom Tile Without Re-grouting

The short answer
A single cracked tile can be replaced without disturbing any surrounding tile or re-grouting the whole wall — the technique requires patience and hand tools, not power tools. Score the four grout joints around the cracked tile with a utility knife, remove the grout with a grout saw, break the cracked tile out from the inside with a cold chisel held at a shallow angle, scrape the bed of old adhesive, set the new tile in fresh thinset, let cure, then grout only the four edges around the new tile.
Done carefully, the patched tile is indistinguishable from the rest of the wall except up close, and the surrounding grout lines stay intact. Done quickly with a power tool, you crack adjacent tiles and the small repair becomes a large one.
Before you start
Confirm you have an exact replacement tile. Match the surface (matte vs glossy), the size (down to 1/16 inch), and the colour as closely as possible. Tile lots vary slightly even within the same SKU; a stored leftover from the original install is the best source. If none exists, take a piece of the cracked tile to a tile store and find the closest match.
Confirm the grout colour. White and off-white grouts age differently — new white grout next to twenty-year-old white grout reads cleanly different. Test a small amount of new grout on a hidden area first if the contrast matters.
Tools needed: a sharp utility knife, a grout saw (the small handheld kind, not a power tool), a cold chisel (3/4 inch or 1 inch width), a small ball-peen hammer or club hammer, safety glasses, a putty knife or scraping tool, a small tub of thinset adhesive or pre-mixed tile mastic, matching grout, a small grout float or rubber-tipped spreader.
Scoring the grout joints
Score the four grout joints around the cracked tile by running the utility knife along each joint multiple times, slowly deepening the cut. This separates the cracked tile's perimeter from the surrounding grout and prevents the grout removal step from pulling at neighboring tiles.
Press lightly at first. Each pass goes a little deeper. After 4-6 passes you should have a clean V-cut along the joint roughly 1/16 inch deep on each side.
This step seems excessive but it is the difference between a clean repair and a multi-tile project. The scored joints give the grout saw a defined path to follow.
Removing the grout
Use the grout saw (a small carbide-tipped blade in a plastic handle) to grind out the grout in each joint until the back of the joint is reached. Work slowly, with the blade aligned to the joint angle. The blade will catch and pull if you angle it into adjacent tile.
Remove all the grout from each of the four joints. Vacuum the dust regularly so you can see what you are doing. The goal is a clean rectangular outline around the cracked tile with the perimeter of all four neighboring tiles fully exposed.
Inspect for any grout left behind, especially in corners. Residual grout will catch and pull during the tile removal step.
Breaking the cracked tile out
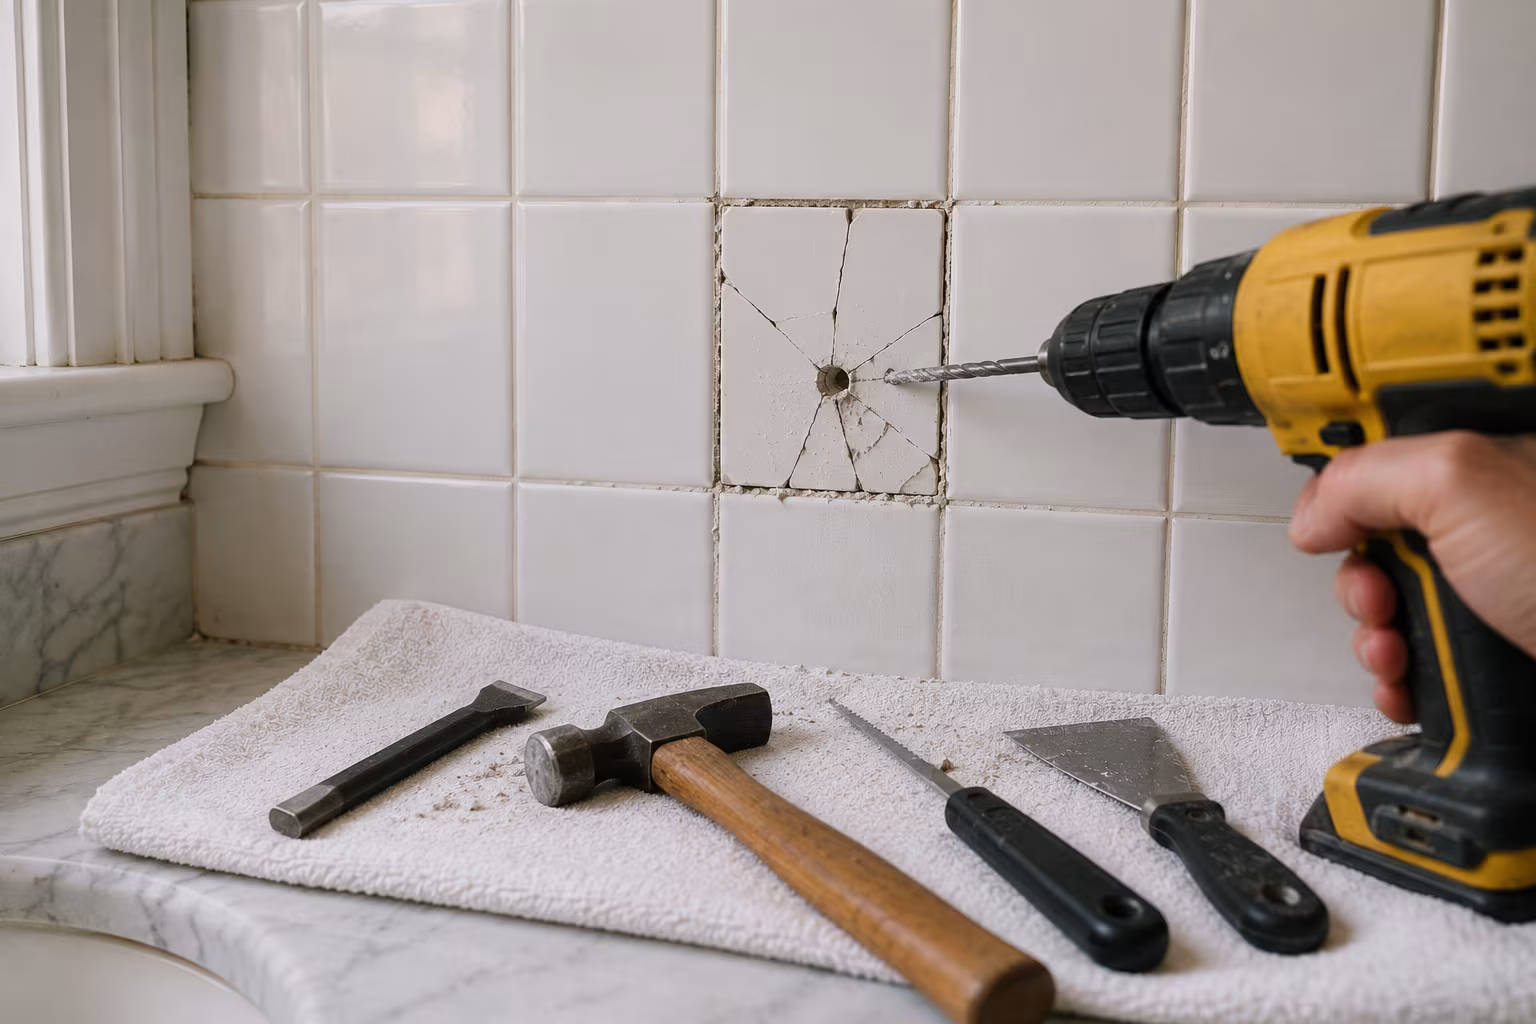
The safest removal technique is to drill a hole in the cracked tile first to give the chisel an entry point. Use a carbide-tipped drill bit (sized for the chisel width) and drill through the centre of the tile, slowly, without hammer-drilling. The hole creates a relief point so the chisel can start without compressing the surrounding tile.
Place the cold chisel into the drilled hole at a roughly 30-degree angle pointing inward (toward the centre of the cracked tile, away from neighbours). Tap with the hammer. The tile cracks outward in pieces.
Work each piece outward from the centre. The angle keeps the chisel force directed into the broken tile, not into adjacent tiles or the wall behind. Pieces come out as wedges; pull them with a putty knife.
The slow careful chisel approach is critical. A power tool (oscillating multi-tool, rotary tool) saves time on the removal but routinely chips adjacent tiles. Professionals who replace single tiles avoid power tools for exactly this reason.
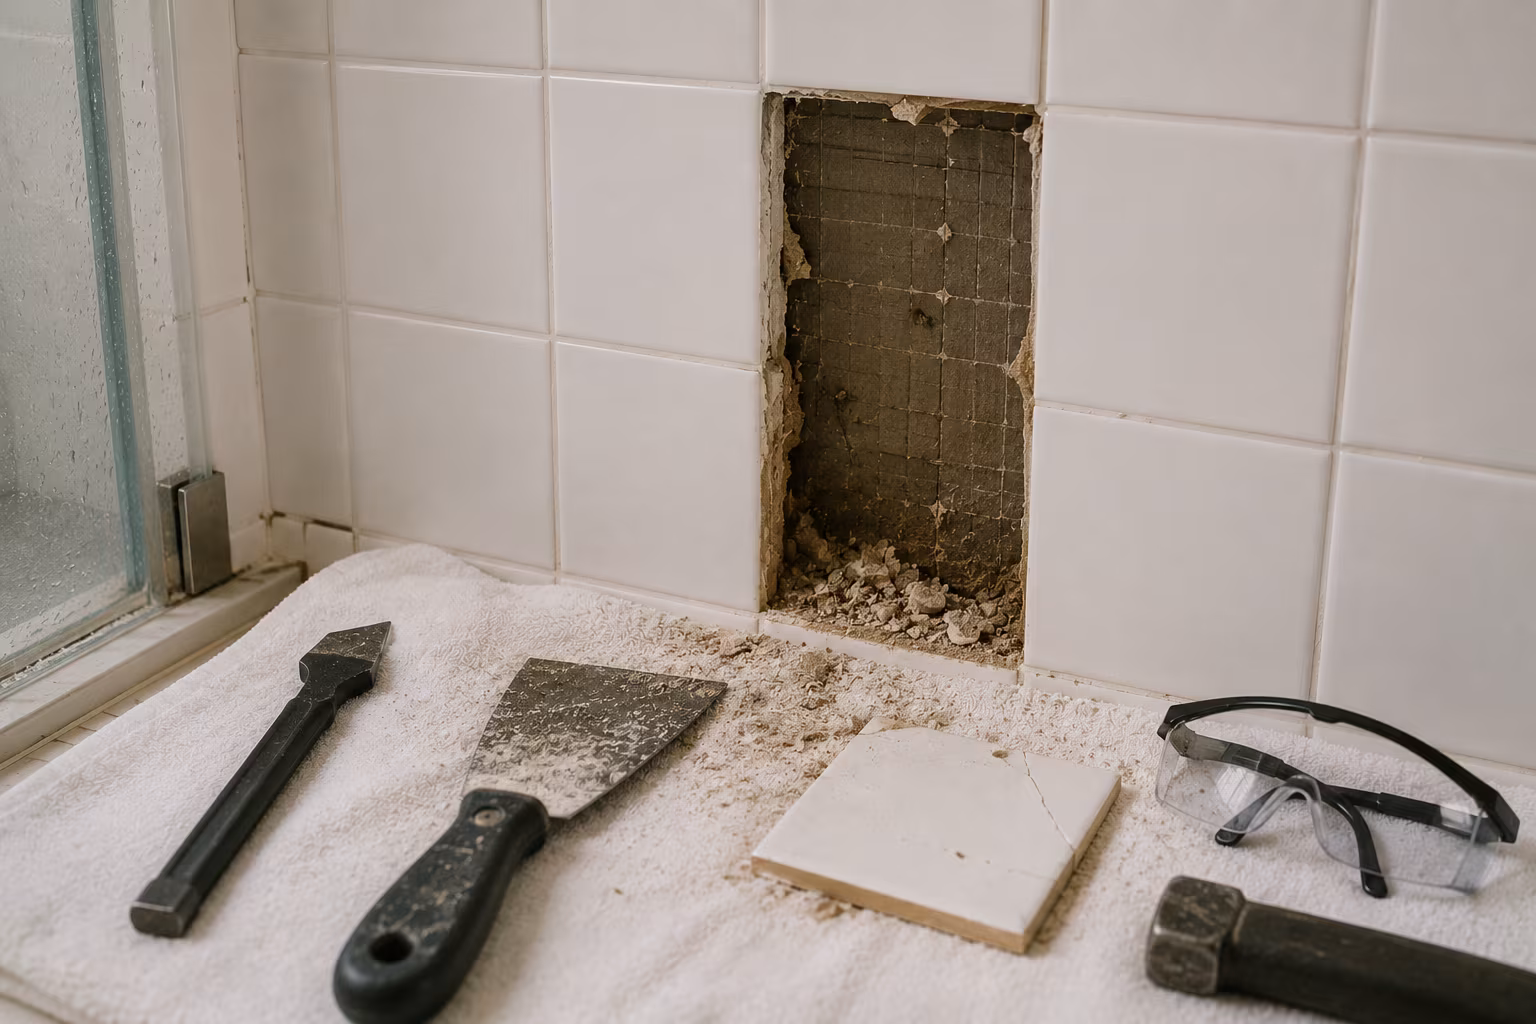
Cleaning the bed
Once the tile is fully removed, the underlying surface (cement board, mortar bed, or another drywall in older installs) will have old thinset or mastic remaining. Scrape this away with a putty knife or a 1-inch chisel held flat against the surface.
The bed must be flat and clean for the new tile to sit at the same depth as its neighbours. Any high spots in the old adhesive will make the new tile sit proud; any chunks left in corners will tilt it.
Wipe the cleaned bed with a damp sponge to remove dust. Let dry before applying new adhesive.
Setting the new tile
For wall installations: pre-mixed tile mastic is appropriate. For floor or wet-area installations: thinset mortar mixed from powder and water is the right choice. The product label states the application area.
Apply adhesive to the back of the new tile (not the wall) using a small notched trowel. Cover the back fully but lightly; too much adhesive squeezes out into the grout joints and is a problem.
Press the tile firmly into the bed. Check that it sits flush with neighbours — use a finger across the joints to feel for height differences. A high tile catches the eye and the fingernail. Push it slightly deeper if needed; pull it slightly out if it sits low (very rare).
Wedge the tile in place if needed using small plastic shims in the grout joints. The shims hold the tile centred and at the right joint width during cure. They come out when the adhesive sets.
Let the adhesive cure per the manufacturer's stated time — usually 24 hours before grouting. Do not rush this step.
Grouting the four edges
After the adhesive is fully cured, mix only enough grout for the four joints. Match the existing grout colour as closely as possible (test on scrap if uncertain).
Apply grout with a small float or a rubber-tipped spreader, pushing it into the four joints around the new tile. Hold the spreader at a shallow angle and work the grout into the joint until the joint is fully filled.
Wipe excess grout off the tile face with a damp sponge, rinsing the sponge frequently. The wipe step is repeated 2-3 times as the grout begins to set; each pass removes the next layer of grout haze.
After the grout cures (24-72 hours depending on product), a final polish with a clean dry cloth removes the last grout haze and reveals the matched joints.
When the colour does not match perfectly
Two common mismatches: the replacement tile is slightly different in colour or finish from its neighbours, or the new grout reads different from the aged grout.
For a tile colour mismatch: live with it. The discrepancy that bothers you in the bathroom that day will fade with months of normal lighting. If it still bothers you after thirty days, the right fix is to source a better-matched tile from a tile recycler or to replace several nearby tiles to spread the colour shift across a region rather than concentrating it on one square.
For grout colour mismatch: a grout colourant (sold as grout stain or grout refresh) can tint the surrounding grout to match the new, or vice versa. Use carefully — the product also tints the tile if it gets on the face.
When to call a professional
Hand-replacing one or two tiles is a manageable DIY project for someone comfortable with patient hand-tool work. Skills transfer across tile sizes and types.
Hand-replacing more than 3-4 tiles in one project becomes tedious and the discipline starts to slip. Professionals own tile removal experience and the right hand tools and can do the job in less time than the same person could DIY.
For tile in a wet wall (shower walls, bath surrounds, kitchen splashes near sinks), the waterproofing layer behind the tile may also be compromised if the tile cracked due to water damage. In wet installations, a single cracked tile sometimes signals a larger issue and a pro should assess before the repair starts.
When the cracked tile is in a wet shower wall
Shower walls add a complication: the waterproofing layer behind the tile may also be compromised if the tile cracked from water damage or impact.
If the cracked tile is in a shower or any consistently wet location, check the substrate behind. Standard drywall behind tile in a wet wall is a code violation in newer installs (the right material is cement board or a waterproof membrane); older installs sometimes have drywall that has absorbed water and become soft.
When the substrate is soft or crumbling: the tile repair is a small part of a larger problem. The waterproof layer needs replacement, which requires removing several adjacent tiles to access. A professional handles this work; DIY at this scale risks ongoing moisture damage inside the wall.
When the substrate is sound: the tile repair proceeds normally. Use a thinset rated for wet applications (not pre-mixed mastic) and grout designed for wet areas.
Storing extra tiles when you buy them
The single most useful precaution against future tile mismatches is to keep extra tiles from the original install. Building professionals routinely recommend buying 10% more than the calculated need; the extra goes into a labeled box in storage.
If you are buying tiles for a new install or major remodel, ask the contractor to leave you the boxes of extras. Store in a dry place, away from temperature extremes, with the lot number visible on the label.
Years later when a tile cracks, the extras match perfectly because they came from the same manufacturing lot. The discontinued-tile problem disappears entirely.
For tiles you inherit (homes where the previous owner did not keep extras), check the back of removed tiles for the manufacturer name and SKU before discarding. Sometimes the manufacturer still produces that line; sometimes the SKU lets you search for online inventory in a tile recycler or remnant warehouse.
Sealing the new grout
After the new grout has cured fully (typically 72 hours for cement-based grout, 24 hours for epoxy grout), apply a grout sealer to the four new joints.
Grout sealer (a clear penetrating liquid sold at tile and hardware stores) makes the grout less porous, more resistant to staining, and easier to clean. Apply with a small brush or applicator bottle, working only on the new grout lines. Wipe excess off the tile face within a few minutes to prevent residue.
Sealer needs to be re-applied annually for high-traffic or wet areas. The newly grouted patch may need re-sealing more frequently if it sees water exposure.
Tools that pay back for repeat tile work
A grout removal tool (carbide-tipped, with a comfortable handle) is the single most useful tool for tile repairs. The price is moderate; the speed and control it gives over manual grout scoring transforms a slow miserable job into a manageable one.
A small angled grout float ($8-15) gives better control on small patches than a large rectangular float. Worth owning if tile work is in your future.
The overall lesson on single-tile repair is that hand tools and patience beat power tools for protecting neighbors. The repair itself is a 30-minute job spread across two days for the cure cycles. The risk of damaging adjacent tiles with rushed work is far higher than the value of finishing in one session.
A final note on patience
The single-tile repair is one of those projects where rushing wastes more time than it saves. A 15-minute chisel session that damages two adjacent tiles becomes a full afternoon of replacing three tiles instead of one. The reverse — a slow patient hour that produces one clean tile replacement — is the right time investment. The repair is humble work that respects the surrounding tile rather than fights it.
Adjacent tiles that did get nicked during the repair are themselves candidates for the same technique; small chips are usually visible only up close and can be left as character or filled with colour-matched epoxy.
Related Posts

Patching Drywall Anchor Holes Without Sand-Through Halos
Fix anchor holes so the patch disappears under paint instead of showing as a sanded halo six mont...
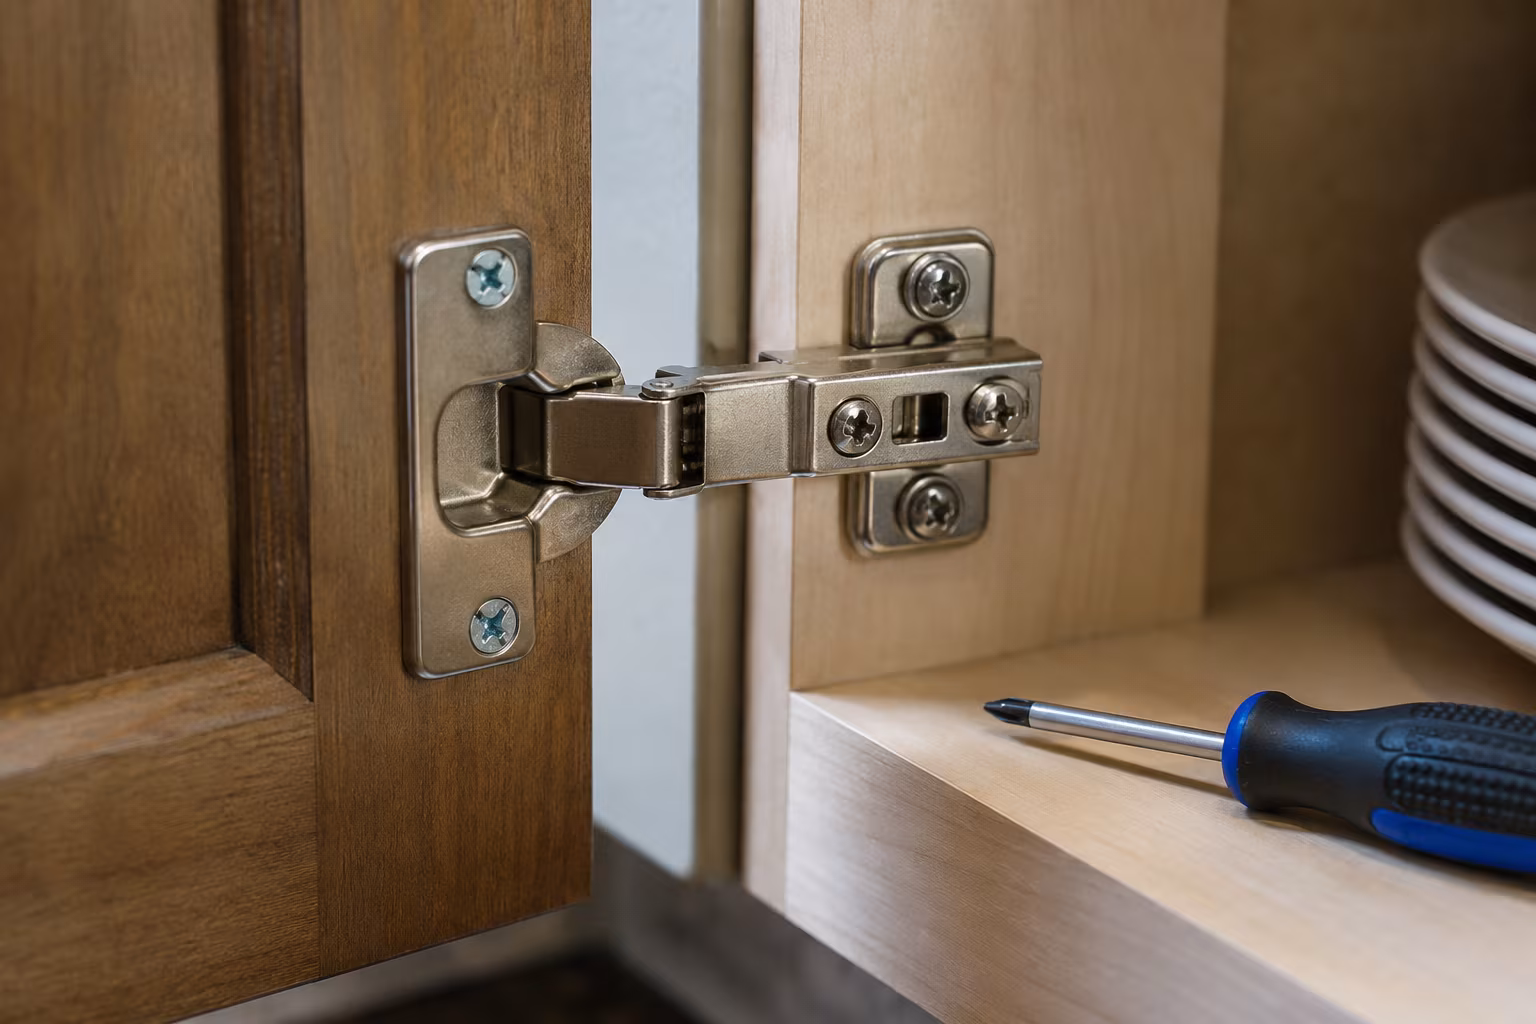
Cabinet Hinge Adjustment: Side, Depth, and Height Fix
Three screws, three directions, one diagnosis. Stop fighting misaligned cabinet doors — learn whi...
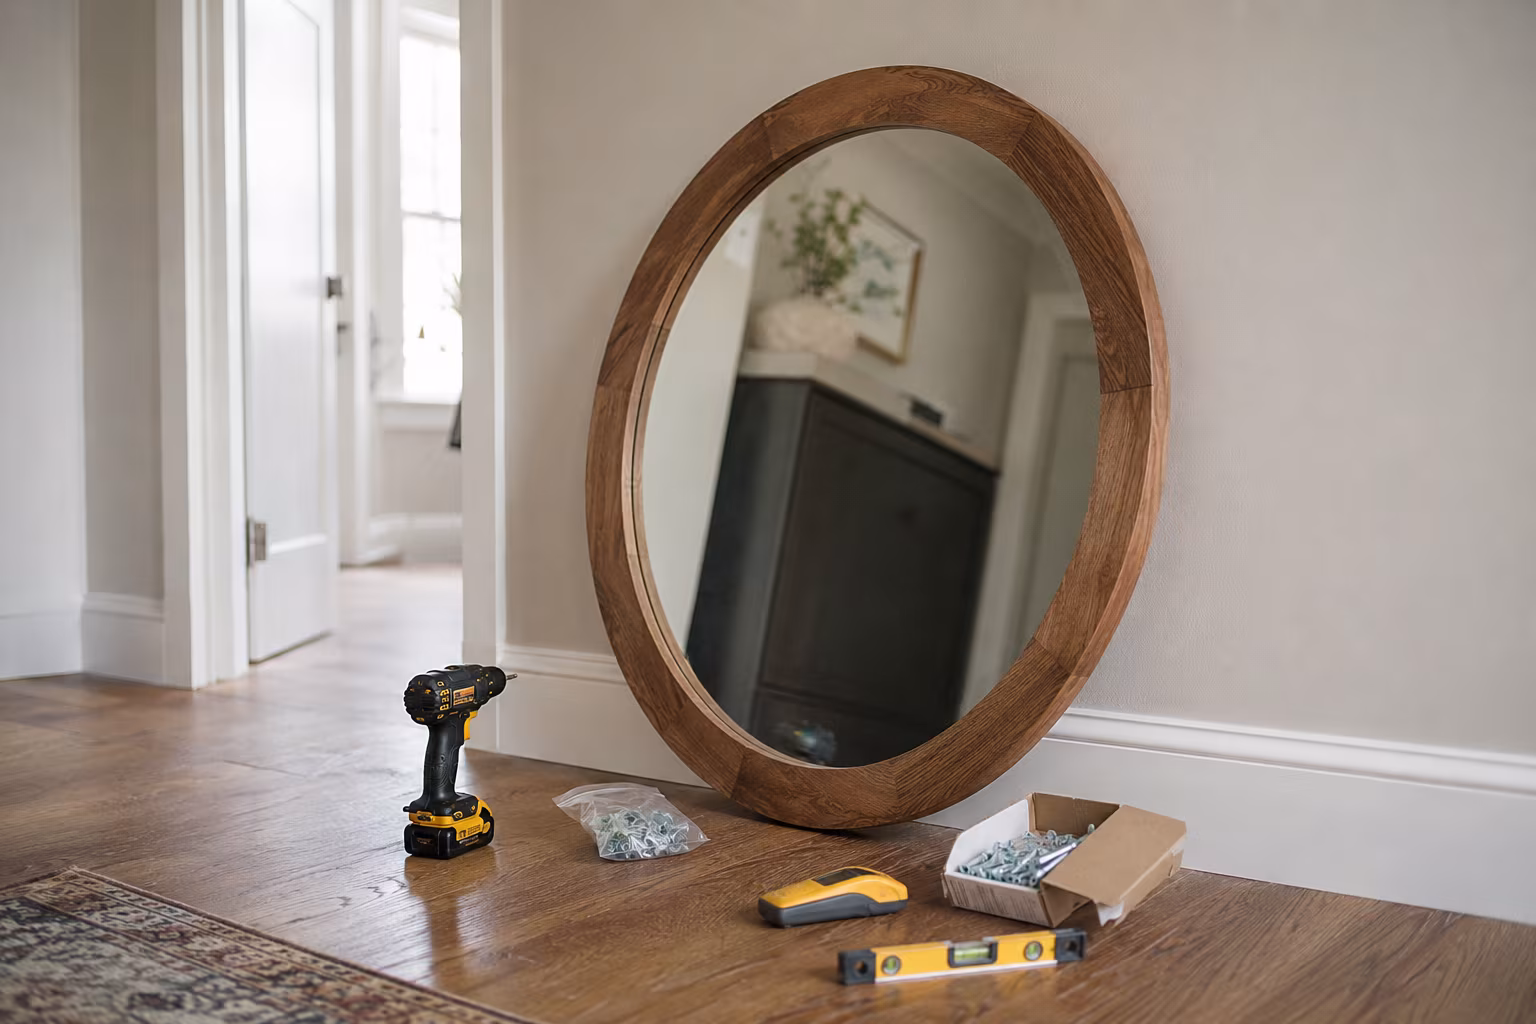
How to Hang a Heavy Mirror on Drywall Without Studs
No stud where you want the mirror? The anchor choices, weight math, and install routine that hold...
The Best Way to Weatherproof and Stain an Old Wooden Deck
Is your old wooden deck looking a little worse for wear? We'll show you the easiest, most effecti...