
Caulk Types Compared: Silicone vs Latex vs Hybrid
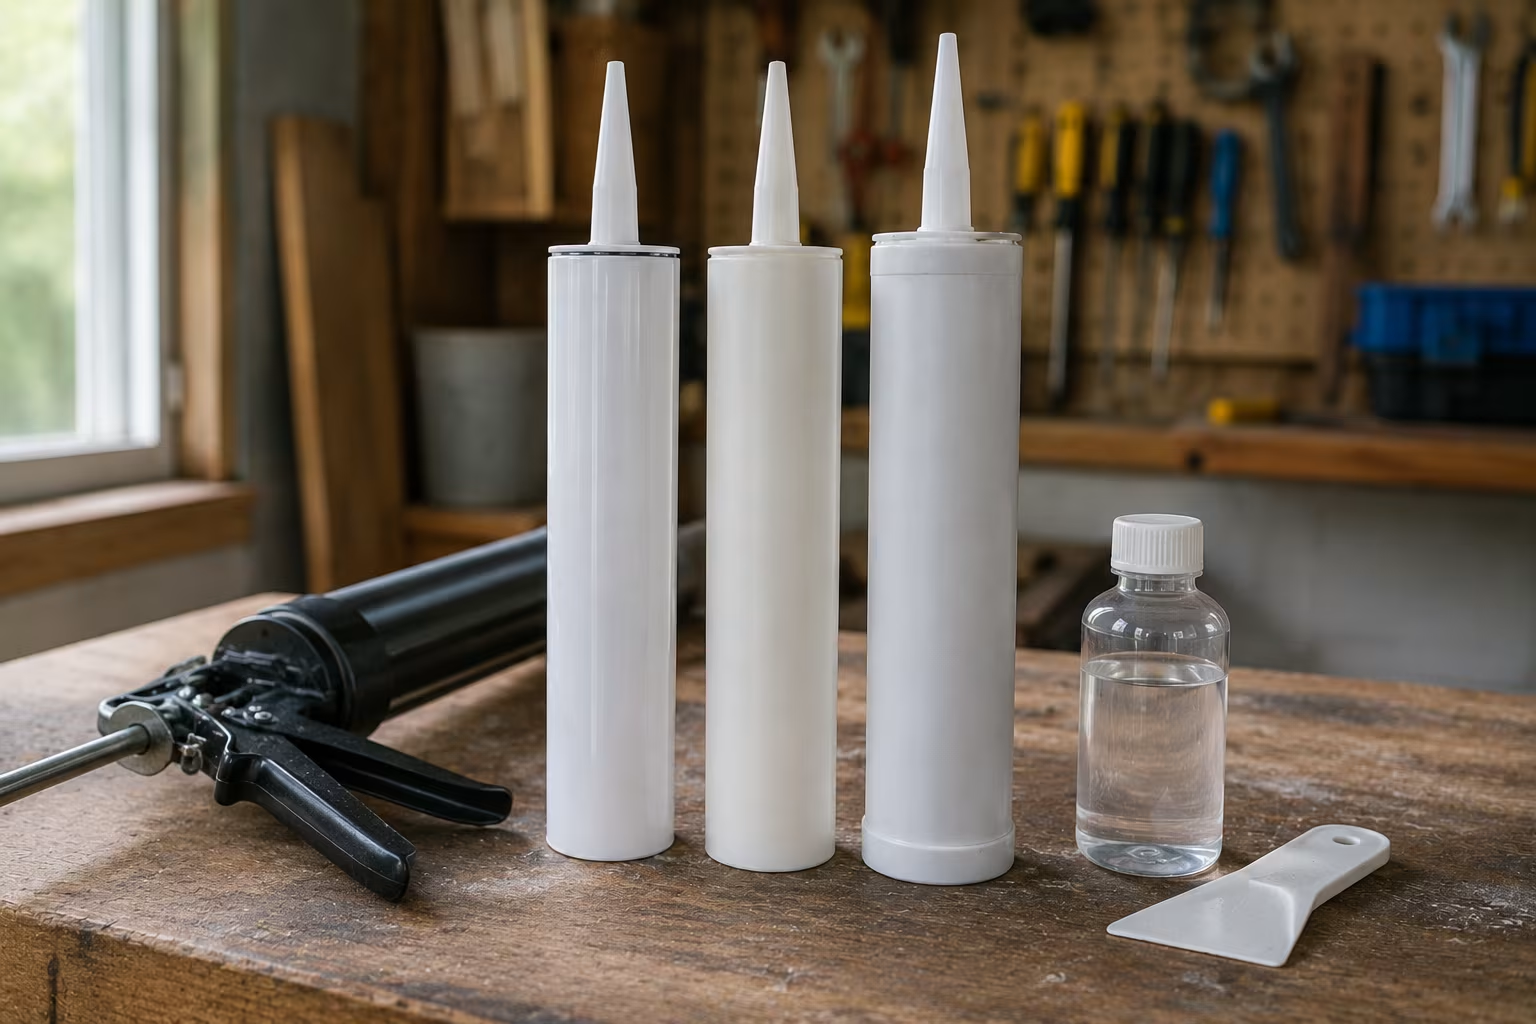
The short answer
Three main caulk types cover the vast majority of home applications: 100% silicone for joints exposed to water (bathtubs, sinks, showers), acrylic latex for paintable interior trim and gaps, and hybrid MS polymer for everything that wants the strengths of both — flexible, paintable, water-resistant, durable.
For specific applications, the choice is usually clear. Bathtub-to-tile joint: silicone, no other option works long-term. Painted trim against painted wall: acrylic latex; nothing else paints cleanly. Outdoor wood joint that will see weather: MS polymer or polyurethane.
The wrong caulk in the wrong place wastes both the caulk and the labor. Silicone on paintable trim never accepts paint and you have to remove it. Acrylic latex in a tub joint cracks within months and lets water through. Match the caulk to the application; the right tube is rarely the cheapest one.
100% silicone
The dominant choice for water exposure and joints that move.
Strengths completely waterproof, very flexible (handles joint movement), strong adhesion to most surfaces, doesn't shrink as it cures.
Weaknesses cannot be painted (paint beads on it and never adheres), cleanup of fresh silicone is difficult, slow cure time (24+ hours), can develop mildew on exposed surfaces.
Where to use bathtub-to-wall joint, around shower bases, sink-to-counter joints, around glass shower enclosures, exterior windows where flexibility matters, anywhere submerged in water.
Where not to use anywhere it needs to be painted, anywhere on porous surfaces that need to breathe.
Brand recommendations GE Silicone 2+, DAP All-Purpose 100% Silicone, Loctite Polyseamseal (silicone formulations). Anti-mildew formulations for kitchen and bath applications.
Acrylic latex caulk
The right choice for interior trim, paint-compatible joints, and dry environments.
Strengths paintable, cleans up with water, fast cure (skin in 30 minutes), affordable, easy to apply with smooth tooling, good adhesion to wood, drywall, and most painted surfaces.
Weaknesses not waterproof (works in dry environments only), less flexible than silicone, can crack with joint movement, shrinks slightly as it cures.
Where to use baseboards meeting walls, crown molding meeting ceilings, gaps between trim and wall, around interior windows and door frames in dry conditions, anywhere you need to paint over the seal.
Where not to use wet environments (bathrooms, exterior windows), joints that move significantly with temperature or load, outdoors except in very protected locations.
Brand recommendations DAP Alex Plus, Loctite Polyseamseal, GE Acrylic Caulk. The "plus" or "premium" formulations have small amounts of silicone for slightly better performance.
Hybrid (MS polymer)
Modified silicone polymer (MS polymer) is the newer category that combines benefits of silicone and acrylic.
Strengths paintable, waterproof, flexible, strong adhesion to many surfaces including some that silicone struggles with (concrete, masonry), faster cure than pure silicone.
Weaknesses more expensive than either silicone or acrylic, cleanup harder than acrylic.
Where to use bridging the gap between pure silicone applications and pure latex applications — moderately wet environments, joints with some movement that also need to be painted, exterior applications where weather resistance matters.
Brand recommendations Loctite Power Grab, DAP Dynaflex 230, OSI Quad MAX. Many manufacturers have entered this category in recent years.
For someone unfamiliar with hybrid caulk, it's the right answer for many "I'm not sure which caulk" moments. Slightly more expensive but more forgiving of application context.
Specialty caulks

Beyond the main three, several specialty caulks earn place in specific applications.
Polyurethane caulk very strong adhesion to concrete, brick, and masonry. Stays flexible at low temperatures. Difficult to clean up. Used for exterior masonry and concrete applications.
Butyl rubber caulk waterproof, stays flexible at extreme temperatures, used for gutters, flashing, and roof applications. Sticky and messy to apply.
Fire-rated caulk special formulations for sealing around penetrations through fire-rated walls (HVAC, electrical, plumbing). Required by code in some applications.
Concrete crack filler specifically formulated for concrete movement and adhesion. Self-leveling versions exist for horizontal cracks.
Most homeowners don't need these specialty caulks; the three main types cover residential work.
Application technique
The caulk is half the equation; application is the other half.
Clean the joint thoroughly. Remove old caulk completely, dust, oils. Caulk adhesion fails on contaminated surfaces.
Tape both sides of the joint with painter's tape if you want a clean line. The tape comes off immediately after smoothing.
Cut the caulk tube tip at a 45-degree angle. The size of the opening should match the bead width you want — small for fine joints, larger for wider gaps.
Apply with smooth steady pressure. Don't pull the gun back too fast or you'll get a thin uneven bead. Don't push too slow or you'll get a thick lumpy bead.
Tool the bead immediately. Use a wet finger, a damp cloth wrapped over a finger, or a dedicated caulk smoothing tool. Smoothing presses caulk into the joint and creates a clean fillet.
Remove painter's tape immediately while caulk is still wet. Pull at a 45-degree angle away from the wet caulk.
Common mistakes
Using the wrong type for the application. Silicone on trim that needs paint; acrylic in a tub joint.
Insufficient cleaning. Old caulk residue, dust, or oils prevent adhesion. The new bead lifts off within weeks.
Skipping primer or seal coat on porous surfaces. Some caulks work fine on raw wood or concrete; others need a primer first. Read the package.
Applying in wrong conditions. Most caulks have temperature ranges (typically above 40°F / 4°C). Cold caulk won't cure properly.
Tooling too aggressively. Wet-finger smoothing can pull caulk away from joints if you press too hard. Light touch only.
Not waiting for cure before water exposure. Most silicones need 24 hours before submersion; some longer. Premature water destroys the bond.
Lifespan and replacement
Caulk is not permanent. Different types have different lifespans.
100% silicone in dry conditions: 15-20+ years.
100% silicone in wet conditions: 5-10 years before yellowing and adhesion failure.
Acrylic latex on indoor trim: 10-15 years.
Hybrid MS polymer 10-15 years in most applications.
Outdoor caulk 3-7 years depending on exposure.
When caulk shows visible cracks, lifted edges, or color change, replacement time has come. Surface fixes (squeezing fresh caulk over old) rarely hold; full replacement is the right answer.
Specialty Caulks and Niche Applications
Beyond standard silicone and acrylic latex caulks, specialty formulations address specific use cases:
Polyurethane caulk (Sikaflex 221, BASF MasterSeal NP1): tough, paintable, exceptionally durable. Used in concrete joints, automotive applications, and exterior gaps facing UV exposure. Tensile strength roughly 250-400 psi compared to 50-150 psi for silicone. Costs 8-18 USD per 10.3-ounce tube (as of 2026 — confirm current pricing). Cure time 24-48 hours; tooling possible in first 30 minutes.
Hybrid polymer (MS Polymer) caulks: combines silicone flexibility with polyurethane strength. Brands like Bostik MaxSeal, Soudal Soudaflex, Loctite PL Premium Polymer. Paintable, waterproof, UV-resistant. Highest performance category at 10-25 USD per tube. Ideal for high-stress applications and exterior gap-filling that won't be visible.
Fire-rated caulk (3M Fire Barrier CP-25WB+, Hilti CFS-S SIL): specifically certified to maintain fire-resistance ratings in penetrations through fire-rated walls. Required by building codes for any pipe, conduit, or duct penetration through walls separating units, garages from living spaces, or floor levels. Costs 20-45 USD per tube but legally mandatory in some applications.
Mold and mildew resistant caulk: variants of silicone with added fungicides for high-humidity environments. GE Silicone II Bath, DAP Kwik Seal Plus Premium with Microban. Effective for 3-7 years before refresh needed. Costs 6-12 USD per tube.
High-temperature caulk (Permatex Ultra Copper, Rutland RTV High Heat): designed for woodstove gaskets, exhaust pipe sealing, and other extreme-heat applications. Rated to 500-600°F. 8-20 USD per tube.
Tools and Application Technique

Quality caulking depends as much on technique as material choice. Essential tools:
Caulk gun dripless ratchet design (Newborn 250, Albion B12) outperforms cheap plug-in versions. 25-65 USD investment lasts decades. Smooth-rod versions allow drip-free release pressure on the trigger.
Caulk smoothing tool silicone tip (Cramer Caulk Tool, Allway Smooth) or fingertip wrapped in damp cloth. 5-15 USD.
Painter's tape for clean parallel lines along caulked edges. 4-8 USD per roll.
Razor scraper or putty knife for removing old caulk before reapplication. 8-15 USD.
Solvent (mineral spirits, alcohol, dedicated caulk remover): for cleaning surface before new caulk application. 5-12 USD per bottle.
Application technique cut the tube tip at 45-degree angle to match desired bead width (1/8" cut for narrow joints, 1/4" cut for standard gaps, 3/8" or larger for wide gaps). Pierce the inner seal with a long wire or rod (caulk gun usually includes one). Place gun at 45-degree angle to surface, apply consistent pressure while pulling along joint, smooth immediately with tool before skin forms.
Common mistakes cutting too small a tip (slow application, often skipped corners), applying too thick a bead (waste, sloppy appearance), not smoothing while wet (gritty surface), forgetting painter's tape on visible installations (caulk smear on surrounding surfaces), reusing old tube after weeks of air exposure (cured plug at tip).
Caulk Selection Decision Tree
For each application, ask three questions: Will it be painted? (Acrylic latex or hybrid polymer if yes; silicone is paint-resistant.) Will it be wet frequently? (Silicone or polyurethane.) Does appearance matter? (Hybrid polymer or paintable silicone for the best of both.) Combining the answers determines the best caulk.
Bathroom shower corners 100% silicone with mold inhibitor — flexible, waterproof, mold-resistant, but unpaintable. Color match white silicone is the standard.
Window and door interior trim paintable acrylic latex caulk — easy to apply, takes paint perfectly, adequate for indoor moisture levels. Replace every 5-8 years.
Exterior siding gaps hybrid polymer (MS Polymer) — UV-resistant, paintable, flexible for thermal cycling, lasts 15-25 years.
Concrete expansion joints polyurethane self-leveling caulk — fills horizontal joints automatically, withstands foot traffic and vehicle weight.
Aquarium glass repair aquarium-safe silicone only — many silicones contain fungicides toxic to fish; specialty aquarium silicone (Aqueon Silicone, ASI Aquarium Sealant) at 8-15 USD per tube is the only safe choice.
Removal and Surface Preparation
Old caulk must be completely removed before reapplication. Caulk residue prevents proper adhesion of new material, causing premature failure. Removal techniques vary by caulk type:
Silicone caulk use a razor scraper or utility knife to score along both edges, then peel out in long strips. Specialized silicone removers (DAP Caulk-Be-Gone, 3M Caulk Remover, McKanica Silicone Caulk Remover Gel) chemically soften silicone over 2-4 hours, simplifying removal. 8-15 USD per bottle.
Acrylic latex caulk peels out more easily than silicone after scoring with razor. Often comes off in long flexible strips. Residue cleans with water and detergent.
Polyurethane caulk hardest to remove. Mechanical scraping with razor scraper is usually required. Some polyurethane removers exist (3M Auto Adhesive Remover) but results vary. Plan extra time for removal in polyurethane joints.
After removal, surfaces must be clean and dry. Wipe with mineral spirits or alcohol to remove all oils, debris, and residue. Allow to dry completely before applying new caulk; trapped moisture prevents adhesion in waterproof formulations.
Joint width matters too. New caulk applied over very narrow joints (under 1/16 inch) may not bond properly because there's insufficient material thickness. Joints wider than 1/2 inch require backer rod (closed-cell foam round, 2-8 USD per foot) installed before caulking to provide proper depth and prevent caulk sag.
Curing Time and Performance Window
Each caulk type has distinct curing characteristics that affect when the joint is fully functional:
100% silicone skin formation 5-15 minutes; tooled within 5 minutes for best results. Tack-free 1-2 hours. Water exposure tolerable after 4-12 hours. Full cure (maximum strength) at 7-14 days.
Acrylic latex skin 15-30 minutes; tooled immediately. Water exposure after 24 hours. Paintable after 2-4 hours. Full cure 48-72 hours.
Polyurethane skin 30-60 minutes; tooling possible for first 30 minutes. Tack-free 24 hours. Full cure 5-7 days.
MS Polymer skin 15-30 minutes; tooling 15-25 minutes. Tack-free 4-8 hours. Paint after 24 hours. Full cure 3-7 days.
Working in cold (below 50°F) or extremely humid conditions extends all cure times significantly. Some caulks shouldn't be applied below 40°F at all; check manufacturer specifications.
Caulking is a foundational home maintenance skill that prevents water damage, energy loss, and pest entry. Knowing which caulk to use where, how to apply it cleanly, and when to refresh it saves thousands in long-term repair costs. The right tube and patient technique on a Saturday morning protects the home for many years.
Related Posts

Cordless Battery Platform Lock-In: How to Pick a Brand
Every cordless brand wants you locked in. The lock-in is real and one-direction. The brand...


Drill Bit Sets: Twist, Brad-Point, and Forstner Real-Use Map
Most home shops own three drill bits they actually use and twenty they bought once and forgot....
Beginner Cricut Blade Set: What You Actually Use Daily
The Cricut starter blade list is longer than most beginners need. The two or three blades that...
Painter's Tape for Crisp Lines on Textured Wall Surfaces
Standard blue tape bleeds on textured walls. The specialty tapes, caulk-edge-seal step, and...
Comments
No comments yet. Be the first to share your thoughts!